23
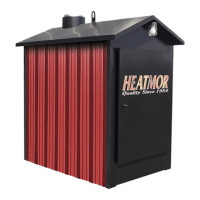
Lighting the HEATMOR™ for the First Time
When lighting the HEATMOR™ furnace for the rst time, all installations must be complete and the furnace
must be full of water. It is recommended to open bladder valve, reinstall the pop-off ball, and then build re to
bring the water up to temperature.
The lighting process is fairly simple. Please use the following steps simply as a guideline or contact your local
dealer for further instruction. Read the entire manual before lighting, so you have a complete working
knowledge of the furnace. Ask for a demonstration from your local dealer. It is very important to fully
educate all persons who will be lighting and fueling the HEATMOR™ furnace.
PLEASE READ THROUGH ALL “LIGHTING YOUR HEATMOR™” STEPS BEFORE LIGHTING
YOUR FURNACE.
1) Remove the weighted pop off ball from the relief vent pipe, on top of the HEATMOR™ furnace.
2) Close the green valve, supplying the bladder, located at the front of the stove.
3) Ensure that the furnace is full of water by running ve gallons of water onto the roof of the
HEATMOR™.
4) Ensure that there is 115-volt electrical power supplying the HEATMOR™ furnace.
5) Place some small pieces of wood (ve pounds) with paper into the rebox.
6) Place a few larger pieces of wood (20 pounds) on top of the smaller pieces.
7) Light the re.
8) Leave the re box door partially open to allow the re to start burning. The rebox door should only
need to be open about two inches. At this point the smoke should go up the chimney and not out
the rebox door.
9) Once the re is burning rather briskly, close the re box door and turn off the light switch which in
turn will make the combustion air blower(s) operate.
10) Operate the blowers for approximately 10 minutes.
11) Turn off the blowers.
Wait a few seconds to allow the combustion to decrease.
12) Open the rebox door and add a substantial amount of wood to the rebox.
13) Turn on the blowers.
14) Securely close the rebox door and outer door.
NOTE: Before the furnace is red up, the furnace is lled with water. While the furnace is lling with water, the
bladder is shut off to prevent excess water into the bladder, preventing over ll. When the furnace is freshly
lled the water temperature is approximately 50 degrees Fahrenheit. When the furnace is full of water you will
notice water coming out onto the roof from the relief vent pipe. At this point the water should be turned off and
the bladder valve opened. After the furnace is red up, the water temperature will start to increase. While the
water temperature rises, the water will expand as it heats up, causing the excess water to go into the bladder.
It will go into the bladder because it is the place of least restriction. This is another reason why we do not ll
the bladder initially, too much water in the bladder at cooler temperatures could cause the bladder to overll at
higher temperatures caused by the expansion of the water during temperature rise.