31 / 42
PL
SK
DE
EN
CS
HU
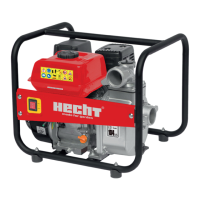
SPARK PLUG
For best results, replace the spark plug every 100 hours of use. Use only the recommended spark
plug which is the correct heat range for normal engine operating temperatures. To find actual
types of recommended spark plugs please contact an authorized service center.
CAUTION! A
If the engine has been running, the muffler and the spark plug will be very hot. Be
carefull not to touch this parts.
Note: I
Incorrect spark plugs can cause engine damage.
For good performance, the spark plug must be properly gapped and free of deposits.
1. Disconnect the cap (fig. 12) from the spark plug, and remove any dirt from the spark plug area.
2. Use the proper size spark plug wrench to remove the spark plug.
3. Inspect the spark plug. Replace it if damaged, badly fouled, if the sealing washer is in poor
condition, or if the electrode is worn.
4. Measure the electrode gap with a suitable gauge. The correct gap is listed in the Specifications
(fig. 13). If adjustment is needed, correct the gap by carefully bending the side electrode.
5. Install the spark plug carefully, by hand, to avoid cross-threading.
6. After the spark plug is seated, tighten with the proper size spark plug wrench to compress
the washer.
7. When installing a new spark plug, tighten by 1/2 turn after the spark plug seats to compress
the washer.
8. When reinstalling the original spark plug, tighten by 1/8 - 1/4 turn after the spark plug seats
to compress the washer.
Note: I
A loose spark plug can become very hot and can damage the engine. Over tightening
the spark plug can damage the threads in the cylinder head.
9. Attach the spark plug cap to the spark plug.
FUEL STRAINER CLEANING
C Gasoline is extremely flammable and is explosive under certain conditions. Do not
smoke or allow flames or sparks in the area open fire.
1. Remove the fuel strainer from the fuel tank
(fig. 18).
2. Clean the fuel strainer (remove dirt which has accumulated on the mesh, and check that
the mesh is not broken anywhere).
3. Reinstall the fuel strainer and fuel line.
Note: I
Replace filter if frayed, torn, damaged or unable to be cleaned.
DRAINING THE FUEL TANK AND CARBURETOR
• Stop engine, allow it to cool completely and keep heat, sparks, and flame away.
• Refuel only outdoors.
• Wipe up spills immediately.
1. Place an approved gasoline container below the carburetor, and use a funnel to avoid spilling fuel.
2. Remove the drain bolt (fig. 17), then move the fuel valve lever to the ON position.
3. After all the fuel has drained into the container, reinstall the drain bolt and washer. Tighten
the drain bolt securely.