24 / 46
BASIC PROTECTIVE ELEMENTS
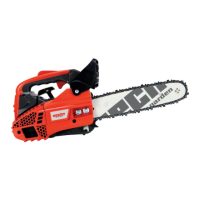
BRAKE
When mounting the bar and chain, you will be able to see the chain brake (the caliper inside
the clutch cover (fig 2) . This brake is used to stop the chain immediately in case of chainsaw
kickback/kick (described in the KICKBACK chapter). This is an important safety feature on
the chainsaw. The brake is switched on/locked if the front hand guard is pushed forward by
leaning on your left hand while holding the saw when there is a kickback due to inertia. To
intentionally lock the saw brake (for example, when transporting or starting), push the front
hand guard forward (fig. 3) (b). To unlock/turn off the brake quickly, pull the front hand guard
towards the front handle (fig. 3 b) (a).
Note: I
Try to lock and unlock the brake without the engine running several times before
the first use.
CHAIN TRAP
It is a safety element the function of which is to capture a slid-down or broken chain that is in
motion.
BUMPER SPIKES
Another safety feature is rigid bumper spikes located on the front of the chainsaw next to
the bar. They are used to firmly lean the chainsaw when cutting so that the saw cannot jump
out of the cut when the chain is caught on a hidden solid material.
ACCIDENTAL START PROTECTION
Two controls must be pressed at the same time when the engine is running to start the chain.
First, the gas lever lock and then the gas lever.
CHAIN AND BAR ASSEMBLY
• Pull the front hand guard to the front handle to check the chain brake is off/unlocked.
(fig. 3) (a).
• Release the side nuts and remove the clutch cover.
• If there is a transport spacer under the cover, remove it.
• Install the bumper spikes on the engine unit (if it is not already factory fitted).
• Attach the bar to screws by the oval opening and move it as far back as possible
(towards the chainsaw).
• Attach the chain to the sprocket so that the chain edges point forward at the top of the bar.
(fig. 4)
• Put the chain on the groove in the bar. Start with the top.
• Insert the tensioning pin into the lower circular opening by sliding the bar with chain forward.
• Position the chain so that the guide links fit into the chain/chain drum.
• If the pin is too far in front and the bar cannot be put in (fig. 2) (the chain is short), it will
be necessary to loosen the tensioning screw.
• Install the clutch cover. When installing, be careful that the brake caliper is properly seated
on the drum. Do not use force!
• Do not tighten the nuts with a spanner, only by hand.
HECHT_925_R_MANUAL_2022_EN.indd 24HECHT_925_R_MANUAL_2022_EN.indd 24 28.03.2023 11:58:0328.03.2023 11:58:03