23
7
8
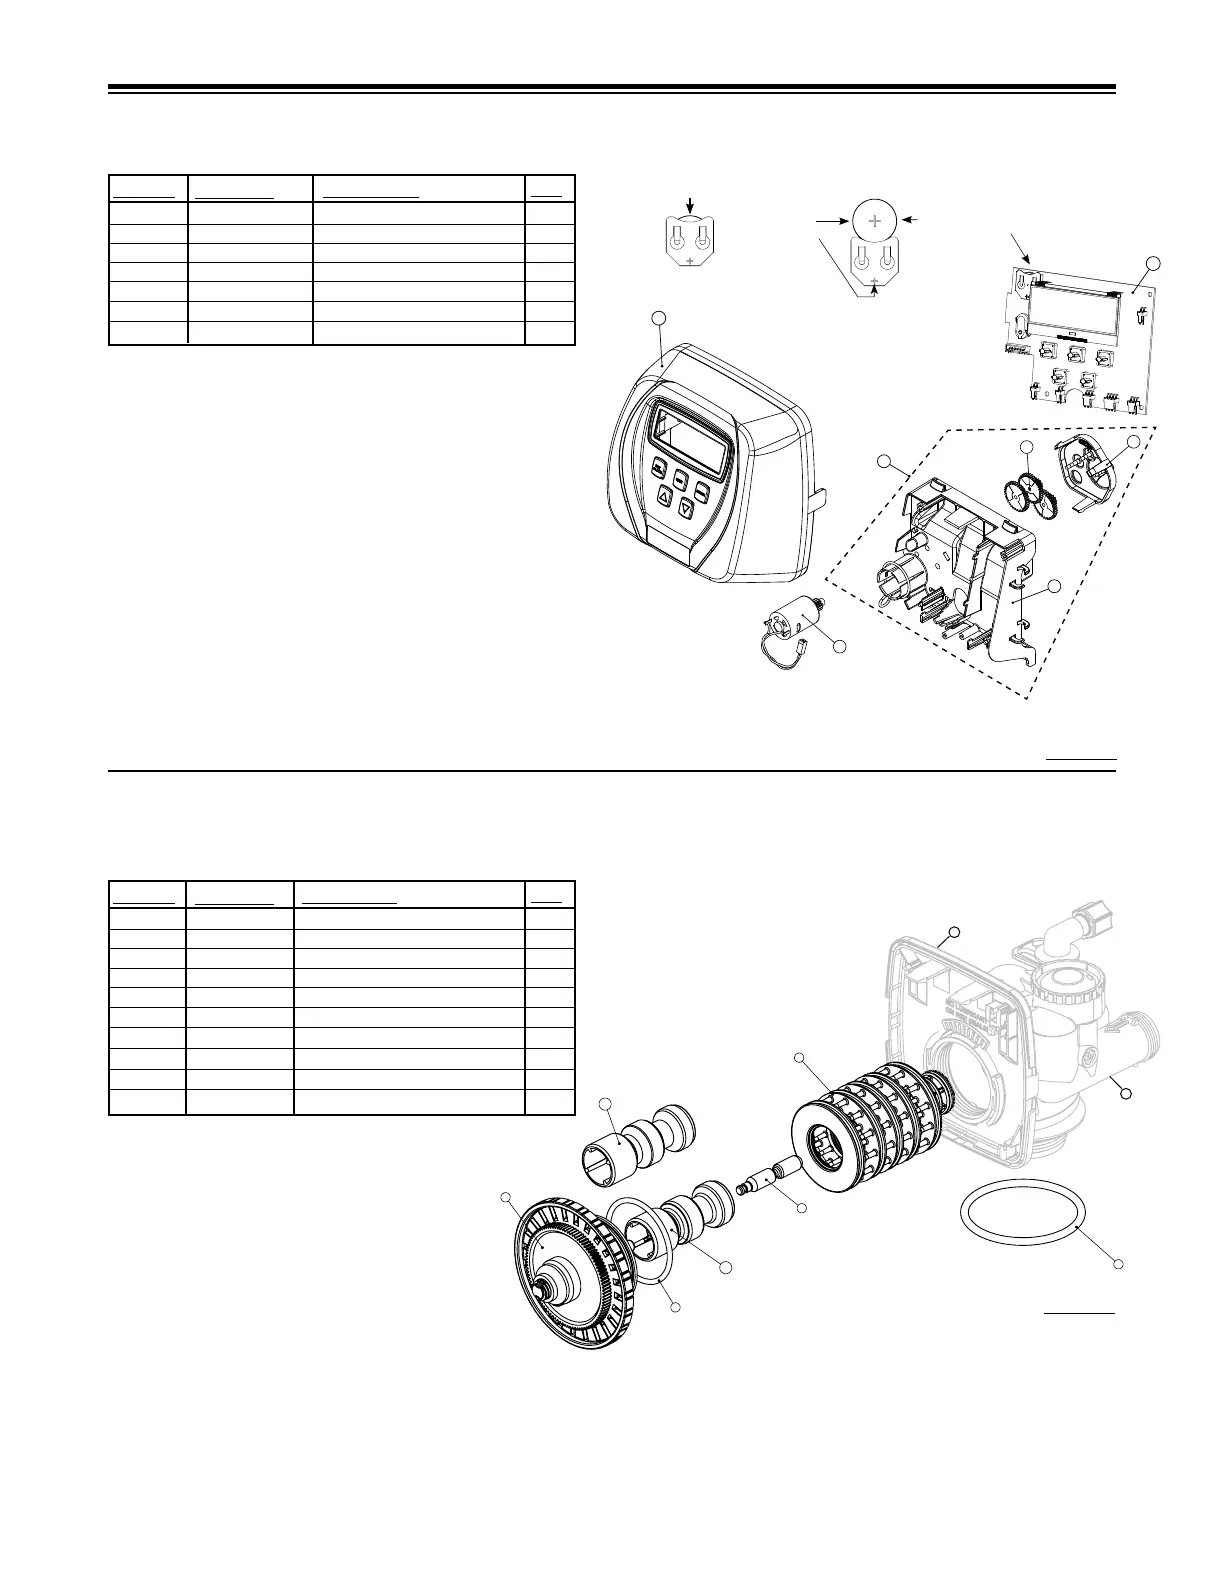
FRONT COVER AND DRIVE ASSEMBLY
DRIVE CAP ASSEMBLY, DOWNFLOW PISTON, REGENERANT PISTON
AND SPACER STACK ASSEMBLY
1 112590 Front Cover Assy w/Label 1
2 102096 Motor 1
3 101262 Drive Bracket & Spring Clip 1
4 101234 PC Board-CC 1
5 101746 Drive Gear 12x36 3
6 101459 Drive Gear Cover 1
Not Shown 102653 Transformer 110V-12V 1
QTY.
ITEM NO.
ORDER NO.
DESCRIPTION
1 102548 Spacer Stack Assy 1
2 101613 Drive Cap Assy. 1
3 102167 O-Ring 228 1
4a 102292* Piston Downow Assy. 1**
4b 102297* Piston Upow Assy. 1
5 102296 Regenerant Piston 1
6 102192 O-ring 337-tank 1
7 102860 Valve Body 1
8 102299 Back Plate 1
9 102892 Service Wrench - Not Shown 1
QTY.
ITEM NO.
ORDER NO.
DESCRIPTION
*102292 is labeled with DN and 102297 is labeled with UP.
Note: The regenerant piston is not used in backwash only applications.
**Standard Option.
After completing any valve maintenance involving the drive assembly or the
drive cap assembly and pistons, press and hold NEXT and REGEN buttons
for 3 seconds or unplug power source jack from the printed circuit board (black
wire) and plug back in. This resets the electronics and establishes the service
piston position. The display should ash all wording, then ash the software
version (ex: 154) and then reset the valve to the service position.
Do not use vaseline, oils, other hydrocarbon lubricants or spray silicone anywhere. A silicon lubricant may be used on black o-rings but is not necessary. Avoid any
type of lubricants, including silicone, on red or clear lip seals.
After completing any valve maintenance involving the drive assembly or the drive cap assembly and pistons, press and hold NEXT and REGEN buttons for 3 seconds
or unplug power source jack from the printed circuit board (black wire) and plug back in. This resets the electronics and establishes the service piston position. The
display should ash all wording, then ash the software version (ex: 154) and then reset the valve to the service position.
Figure 14
Figure 15
1
Battery replacement is
3 volt lithium coin cell
type 2032.
Correct
Battery
Orientation
Battery Fully Seated
When replacing the battery, align
positives and push down to fully seat.
4
2
5
6
3
7
 Loading...