ENDE
Operating Instructions • Bench Mount Kit AT2000 CPK • 03/2020 • 106-29020
Installation and initial operation
10
5.6 Connecting the tool
1 Connect the tool to the power supply unit.
f Observe the operating instructions for the
Autotool2000CPK.
2 Connect the foot switch to the power supply unit.
3 Check the cabling.
f Make sure that the cables are routed without kinks.
f Make sure that the tool, the power supply unit,
and the cable tie reel are still easily accessible
after connecting.
; The tool is connected.
5.7 Installing the waste bin
The waste bin is not included in the scope of delivery
and must be individually produced and installed by
the operator.
The following points must be observed for producing and
installing the waste bin:
f Make sure that the waste bin is positioned
underneath the opening in the base plate.
f Make sure that the waste bin is big enough.
f Make sure that the waste bin is easily accessible
for emptying.
; The waste bin is installed.
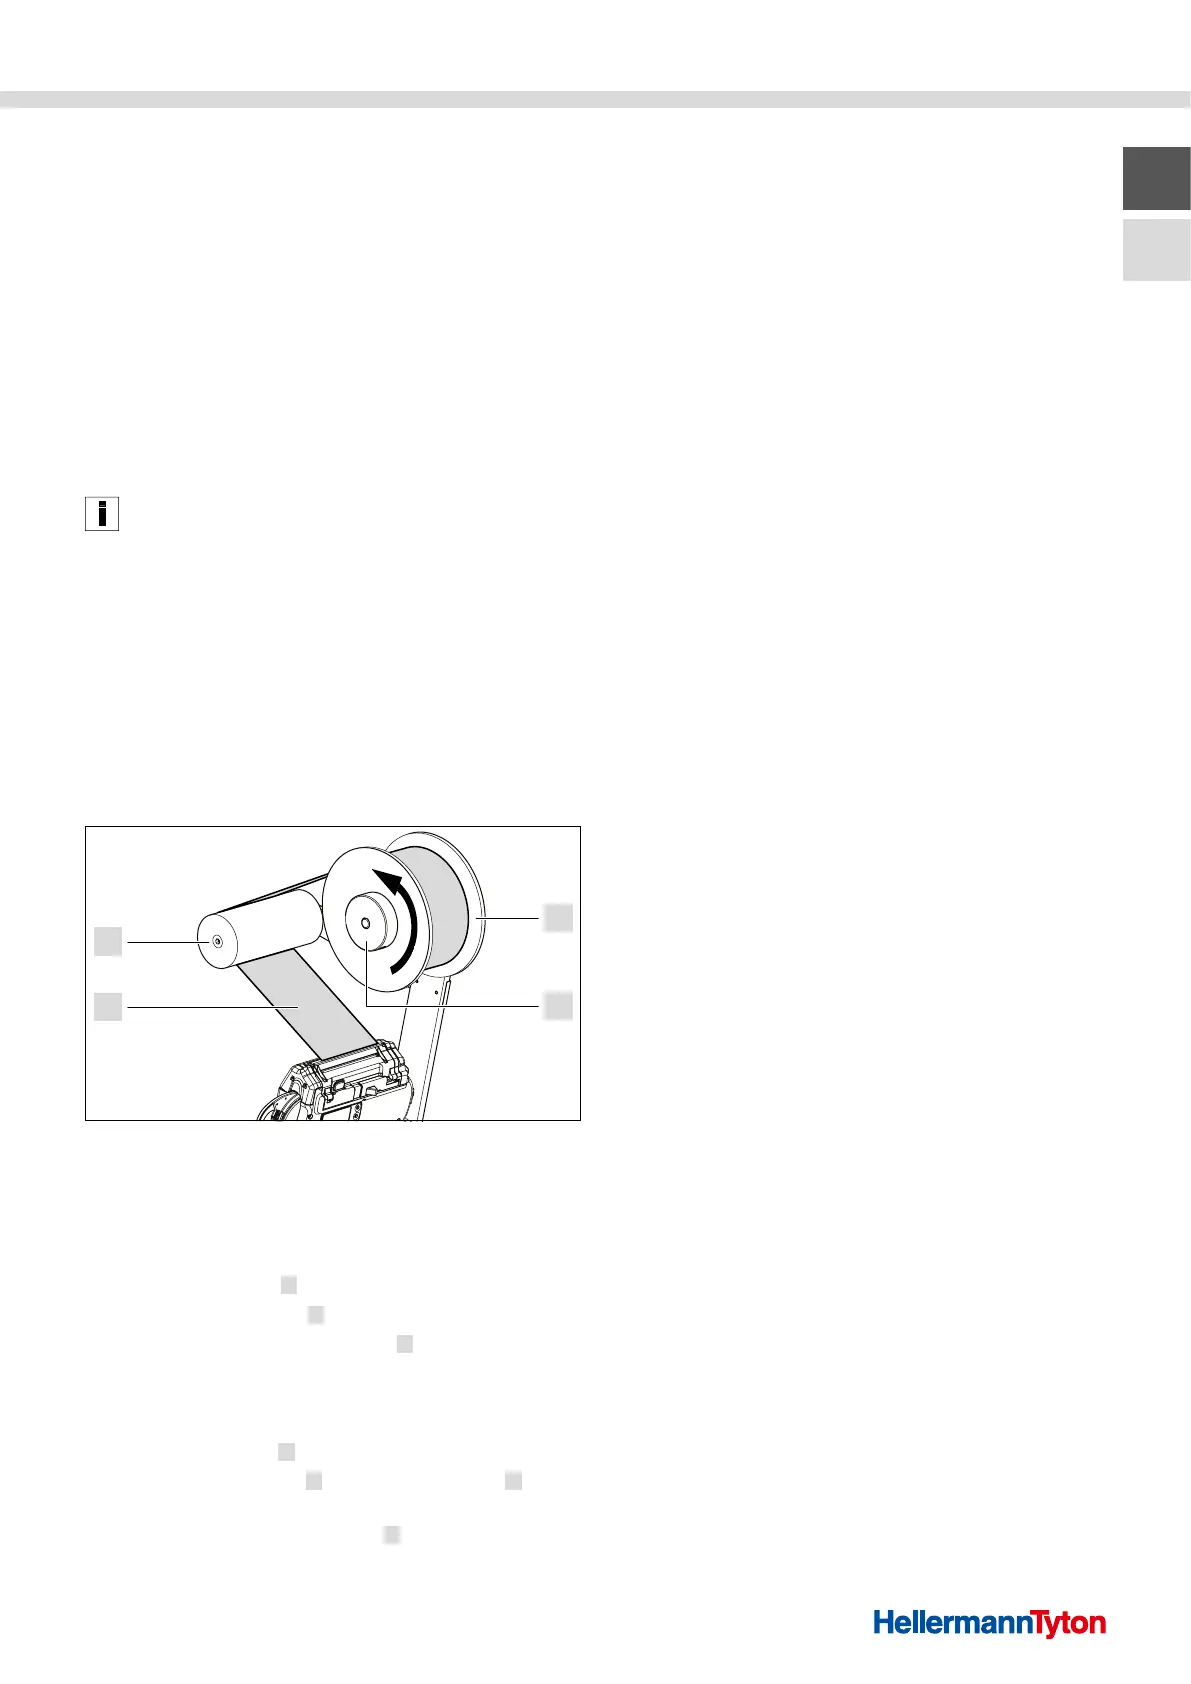
5.8 Inserting the cable tie reel
4
3
1
2
Inserting the cable tie reel
1 Cable tie reel
2 Clamp ring
3 Band chain
4 Guide roller
1 Pull the clamp ring 2 off the reel retainer.
2 Push the cable tie reel
1 onto the reel retainer.
f Make sure that the cable tie reel
1 can be
unwound counterclockwise.
f Turn the cable tie reel until it engages in
the reel brake.
3 Put the clamp ring
2 on the reel retainer.
4 Guide the band chain
3 over the guide roller 4
to the tool.
f Make sure that the band chain
3 is not twisted.
; The cable tie reel is inserted.
5.9 Commissioning before every use
Commissioning before every use is important for safety
and comprises a check before and after operation.
f Check the bench mount for defects.
f Have any defects found repaired by maintenance
personnel if necessary.
f Only operate the bench mount when all defects have
been repaired and safety is ensured.
5.9.1 Check before operation
Before every operation, perform the following steps:
f Check the cabling for firm seating.
f Check the unwinding direction of the cable tie reel.
f Check that the foot switch works properly.
5.9.2 Check after operation
After every operation, perform the following steps:
f Clean the bench mount, the tool, and the
surrounding workplace.
f Empty the waste bin.
f Record and report any observed defects.