ENDE
Operating Instructions • Bench Mount Kit AT2000 CPK • 03/2020 • 106-29020
Installation and initial operation
8
5.1 Required installation tools
f Perform the necessary installation work with the
following installation tools:
• Open-end spanner (size 13)
• Allen key (size 4)
5.2 Installing the bench mount kit
The base plate of the bench mount has additional holes
that enable two different installation options.
Normal installation A :
The waste is disposed of through the opening in the base
plate. The base surface must also have a suitable opening.
Optional installation B :
The waste is disposed of in front of the base plate. An
opening in the base surface is therefore not necessary.
B
A
5 4 4566
7 8
1
2
3
10
11
9
8
7
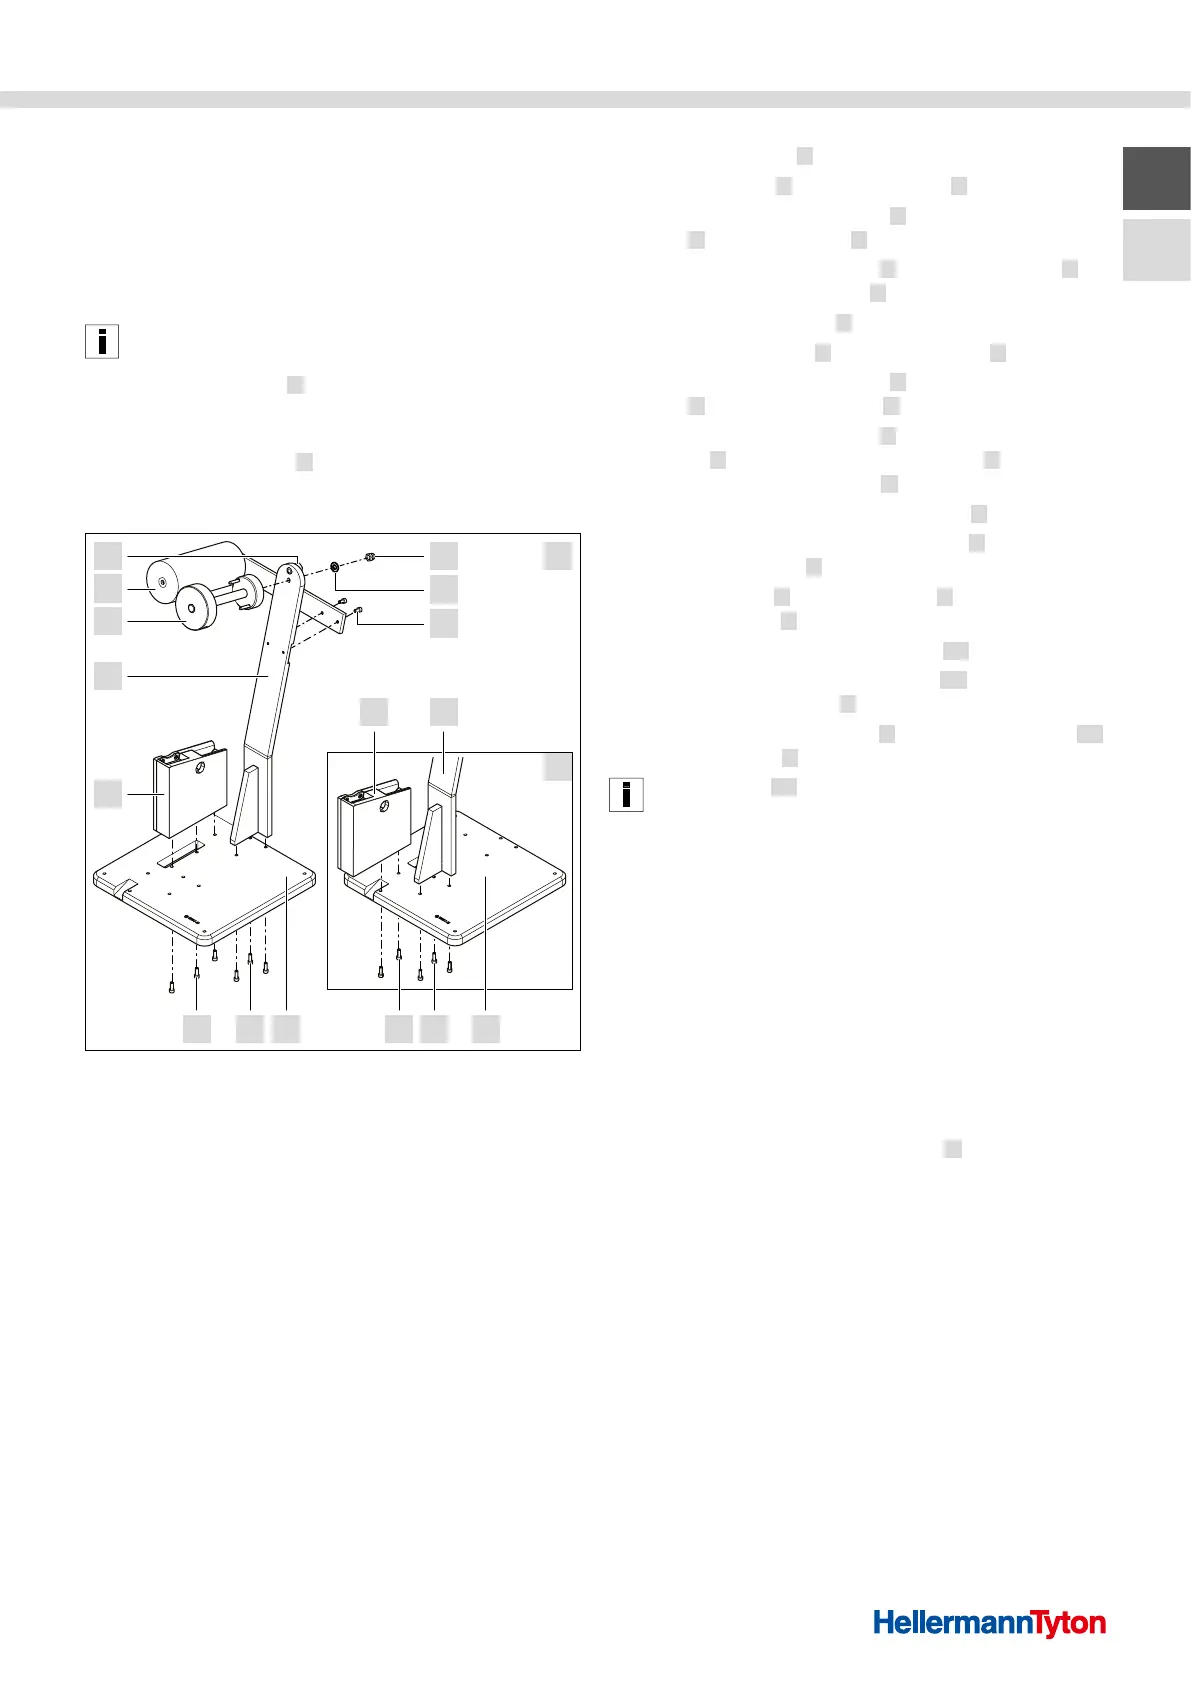
Installing the AT2000CPKbenchmountkit
1 Cap nut
2 Washer
3 Fixing screws (guide roller with bracket)
4 Base plate
5 Fixing screws (column)
6 Fixing screws (tool bracket)
7 Tool mount
8 Column
9 Reel retainer incl. clamp ring
10 Guide roller with bracket
11 Reel brake
A Normal installation (waste disposal through the opening in the base plate)
B Optional installation (waste disposal in front of the base plate)
1 Install the column 8 .
f Put the column
8 on the base plate 4 .
f Insert the three fixing screws
5 through the base
plate 4 into the column 8 and tighten by hand.
f For the optional installation
B , move the column 8 to
the front of the base plate 4 and screw it on.
2 Install the tool bracket
7 .
f Put the tool bracket
7 on the base plate 4 .
f Insert the three fixing screws
6 through the base
plate 4 into the tool mount 7 and tighten by hand.
f For the optional installation
B , move the tool
bracket 7 to the front of the base plate 4 and screw
it on with two fixing screws 6 .
3 Install the reel retainer incl. clamp ring
9 .
f Insert the reel retainer incl. clamp ring
9 through the
hole in the column 8 .
f Put the washer
2 and the cap nut 1 on the thread of
the reel retainer 9 and tighten by hand.
4 Install the guide roller with bracket
10 .
f Insert the guide roller with bracket
10 into the
opening in the column 8 .
f Insert the two fixing screws
3 through the bracket 10
into the column 8 and tighten by hand.
The reel brake 11 is adjusted at the factory.
It is not necessary to readjust the reel brake.
; The AT2000CPKbenchmountkit is installed.
5.3 Suitable workplace
To ensure flawless operation of the bench mount, the
workplace must be prepared and arranged as follows:
f The workplace must have sufficient lighting.
f The workplace must have a stable base surface
(e.g. a work table, a workbench or a work surface).
f The base surface must have enough space for the
bench mount and the required work with the bench
mount.
f The base surface must have a suitable opening for
waste disposal (only for installation
A ).