ENDE
Operating Instructions • Bench Mount Kit AT2000 CPK • 03/2020 • 106-29020
Operation
11
6 Operation
The AT2000CPKbenchmountkit can only be operated
with the Autotool2000CPK tool.
6.1 Switching the tool on and off
f Observe the operating instructions for the
Autotool2000CPK.
à Operating instructions for Autotool2000 CPK
6.2 Inserting the band chain in the tool
f Observe the operating instructions for the
Autotool2000CPK.
à Operating instructions for Autotool2000 CPK
6.3 Operating the tool with the foot switch
f Observe the operating instructions for the
Autotool2000CPK.
à Operating instructions for Autotool2000 CPK
6.4 Emptying the waste bin
f Empty the waste bin regularly and dispose of the
wastes properly.
; The waste bin is emptied.
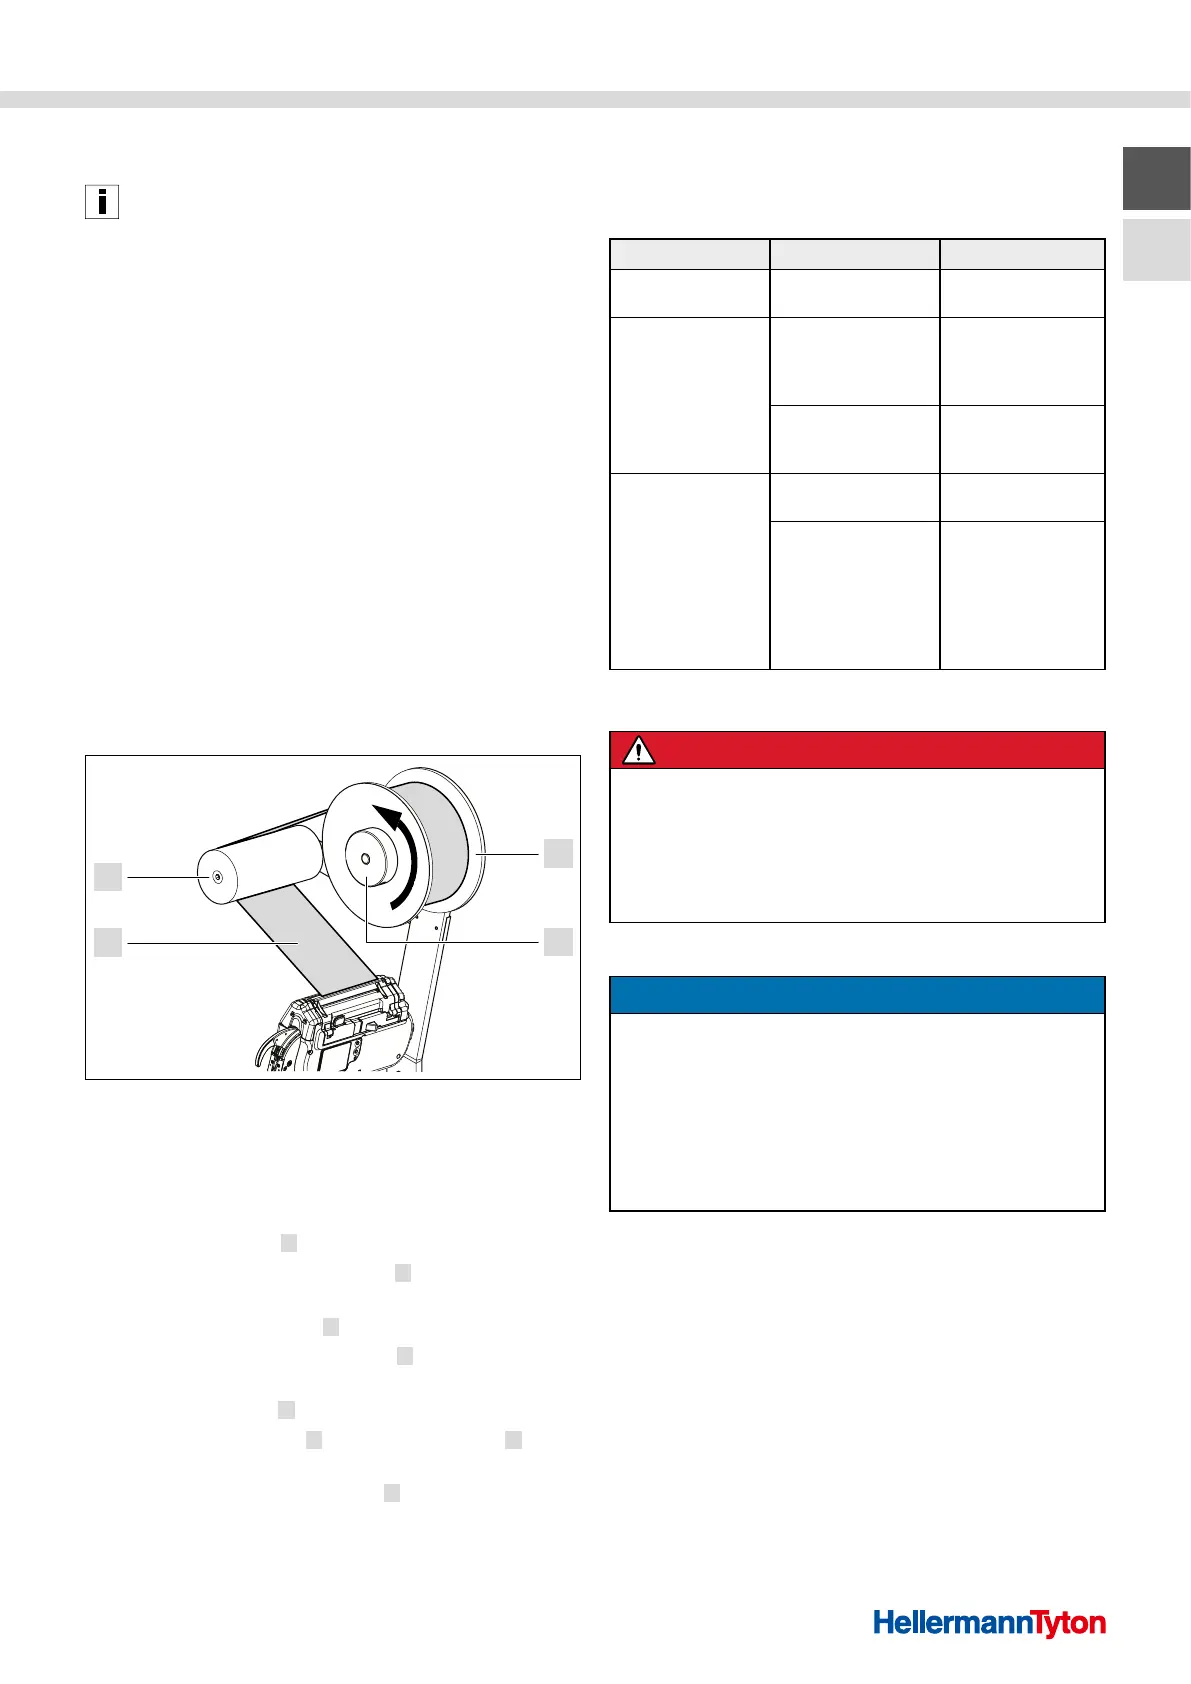
6.5 Replacing empty cable tie reels
4
3
1
2
Replacing empty cable tie reels
1 Cable tie reel
2 Clamp ring
3 Band chain
4 Guide roller
1 Pull the clamp ring 2 off the reel retainer.
2 Remove the empty cable tie reel
1 from the reel
retainer and dispose of it properly.
3 Push a full cable tie reel
1 onto the reel retainer.
f Make sure that the cable tie reel
1 can be unwound
counterclockwise.
4 Put the clamp ring
2 on the reel retainer.
5 Guide the band chain
3 over the guide roller 4
to the tool.
f Make sure that the band chain
3 is not twisted.
; The cable tie reel is replaced.
7 Troubleshooting
The following overview helps find possible faults and their
causes and perform measures to rectify the faults.
Fault Cause Remedy
The tool does
not work.
The cable is
disconnected.
f Connect the cable
properly.
The cable tie reel will
not unwind.
The cable tie reel is
inserted in the wrong
winding direction
(clockwise).
f Insert the cable tie
reel with
counterclockwise
winding direction.
The reel brake is set
too strong.
f Reduce the
braking force of
the reel brake.
The material waste is
not being properly
disposed of.
The waste bin is full. f Empty the
waste bin.
The opening in the
base plate is blocked.
f Check the
opening in the
base plate from
below for possible
blockage.
f Remove the
material waste.
8 Servicing
DANGER
Danger of lethal electric shock!
There is a risk of lethal injury when touching live
components.
f Switch off the power supply unit before taking
out of operation
f Pull the power cable out of the socket.
8.1 Cleaning
NOTE
Possible material damage due to unsuitable
cleaning agents!
Incompatible and aggressive cleaning agents can damage
surfaces or components.
f Only use cleaning agents that are compatible with the
surfaces and materials of the bench mount, tool,
power supply unit, and cables.
f Cover sensitive components for protection.
1 Disconnect the power supply unit.
2 Clean dirt and foreign objects off of the bench mount.
3 Switch the power supply unit back on.
; The bench mount is cleaned.