Helmer Scientic i.Series
®
and Horizon Series
™
Freezer - Upright Operation Manual
360369/A 18
6.4 Set Temperature Units
Note
If temperature units are changed, the temperature setpoints, offsets and alarm settings must be recalibrated.
1. Press and hold the Up and Down Arrows simultaneously for 3 seconds to enter program mode.
2. The LED Display will show ˚C or ˚F to indicate Celsius or Fahrenheit.
3. Press and hold the SET button while pressing the Up or Down Arrow to select the desired temperature unit.
4. Release SET button. The new setting is saved.
5. Press and hold the Up and Down Arrows simultaneously for 3 seconds to exit program mode.
6.5 Temperature Calibration Offsets
Temperature calibration offsets indicate an acceptable margin of error between the actual temperature value and the desired
temperature value.
Monitor Offset
♦ Value is factory-set to match a calibrated reference thermometer.
♦ Refer to the service manual for instructions regarding changing the Monitor Offset.
Control Sensor Offset and Hysteresis
The control sensor affects the reading of the control probe temperature and therefore the actual temperature of the freezer.
This should not be adjusted from the original setting unless directed by Helmer Technical Service.
Hysteresis helps control the refrigeration based on the control probe temperature reading and the set point and should not
be changed from the default setting.
NOTICE
Control Sensor Offset and Hysteresis are factory-preset and should not be changed. Contact Helmer Technical Service for
instructions regarding changing these values.
6.6 Set Alarm Setpoints (Parameters)
1. Press and hold the Up and Down Arrows simultaneously for 3 seconds to enter program mode.
2. The LED Display will show ˚C or ˚F to indicate Celsius or Fahrenheit.
3. Press SEL until HIGH TEMP or LOW TEMP and MONITOR lamps ash.
4. Hold SET, then press Up or Down Arrow to change the setpoint.
5. Release SET button. The new setting is saved.
6. Press and hold Up and Down Arrows simultaneously for 3 seconds to exit program mode.
6.7 Active Alarms
The controller displays temperature and alarm information.
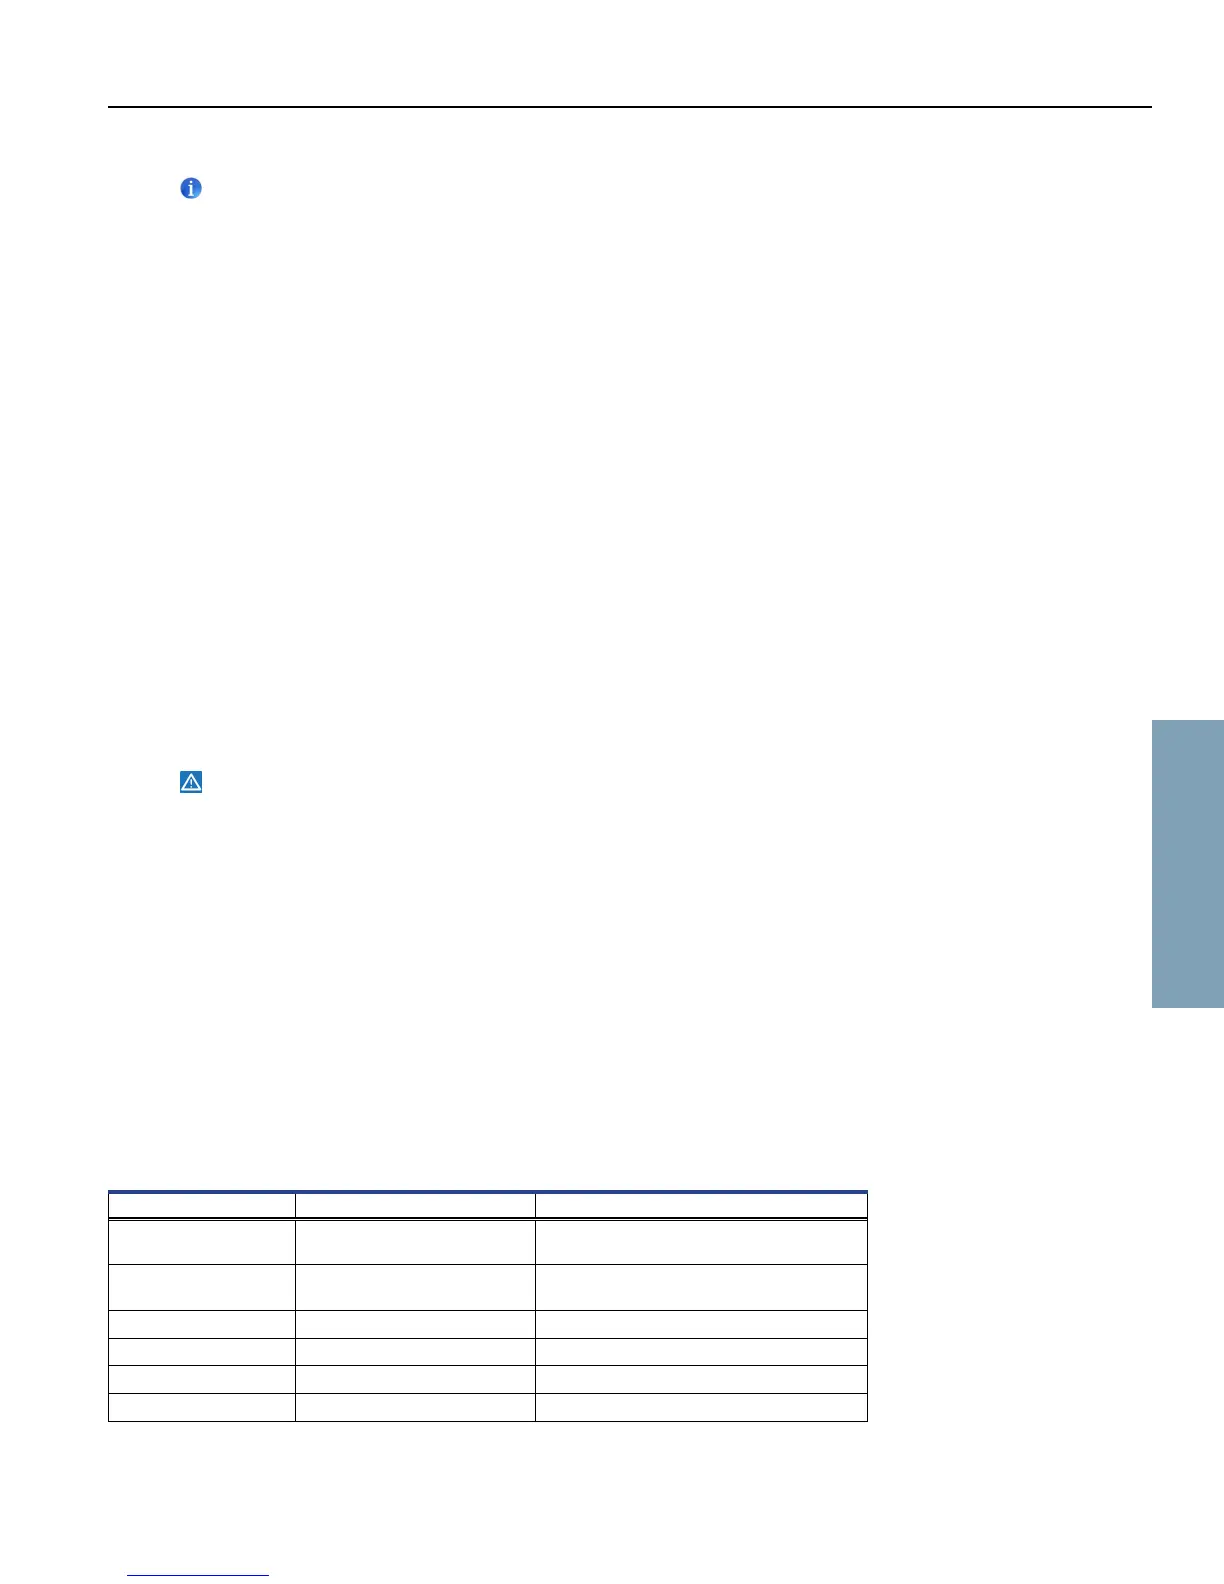
Table 4. Horizon Series Active Alarms
Alarm Visual Indicator Description
High Temperature HIGH TEMP lamp ashes Chamber temperature reading is above high
temperature alarm setpoint
Low Temperature LOW TEMP lamp ashes Chamber temperature reading is below low
temperature alarm setpoint
Power Failure ”PoFF” appears on display Power to unit has been disrupted
Probe Failure “Prob” appears on display Probe not functioning properly
Door Open < 3 min. DOOR ALARM lamp lights Door is open (less than three minutes)
Door Open > 3 min. DOOR ALARM lamp ashes Door has been open 3 minutes or longer*
*Audible alarm will sound after door is open for 3 minutes.
Horizon Series Operation