14/32 – User Manual
4.
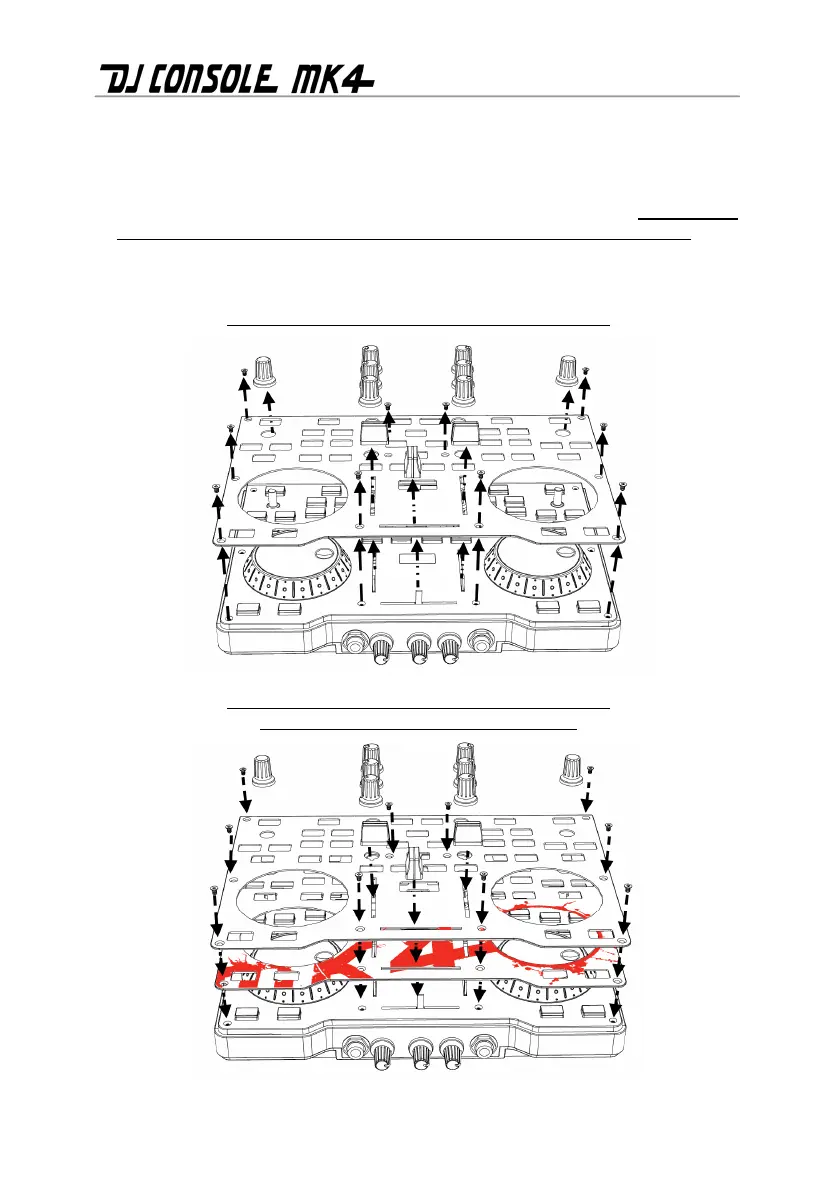
Place and adjust the flexible sub-skin with the red “Mk4” graphic on the DJ Console Mk4’s top
panel, until it is perfectly positioned.
5. Put the rigid transparent skin on top of the sub-skin on the DJ Console Mk4’s top panel.
6. Replace and re-tighten the 10 screws holding down the rigid transparent skin. Be careful not
to over-tighten the screws, to avoid the risk of cracking the rigid transparent skin!
7. Carefully replace the 11 caps on the DJ Console Mk4’s top panel (6 EQ knob caps, 2 pitch
knob caps, 3 fader caps).
Removing the caps, screws and rigid transparent skin:
Replacing the rigid transparent skin, screws and caps,
once the flexible sub-skin has been installed:
 Loading...