Maintenance
the
outboard
motor
falls
on
you.
• Never
get
under
the
lower
unit
while
it
is
tilted
, even when
the
tilt
support
lever
or
knob
is
locked. Severe
injury
could
occur
if
the
outboard
motor
accidental-
Iy
falls.
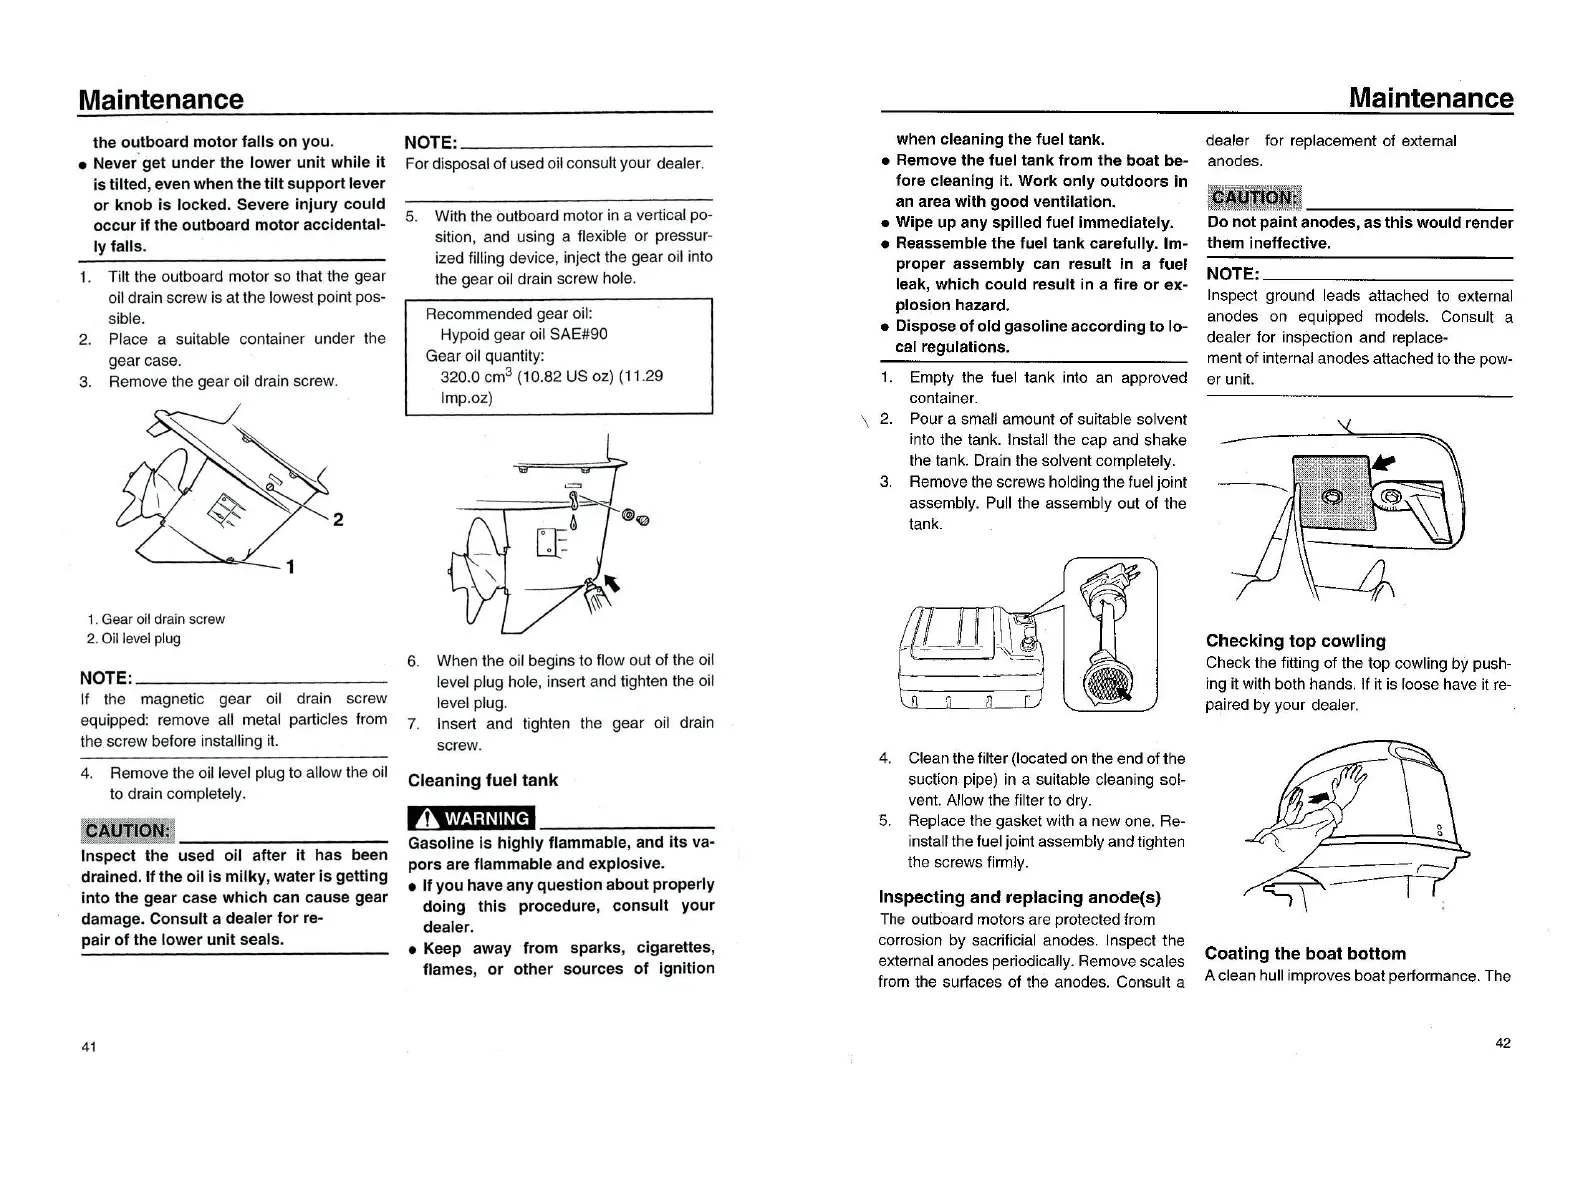
1.
Tilt the outboard motor so that the gear
oi
l drain screw
is
at the lowest point pos-
sible.
2.
Place a suitable container under the
gearcase
3. Remove the gear oil drain screw
NOTE
:
If
the magnetic gear oil drain screw
equipped: remove a
ll
metal particles from
th
e screw belore installing i
t.
4.
Remove the oil level plug to allow the oil
to drain completely
攘攘麟
警
Inspect
the used
oil
after
it
has
been
drained.lf
the
oil
is
milky
, water
is
gett
i
ng
into
the gear case
which
can cause gear
damage. Consult a dealer
for
re-
pair
of
the
lower
unit
seals.
41
NOTE:
For disposal
01
used oil consult your dealer
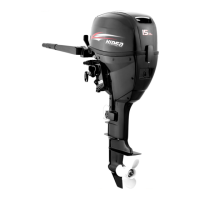
5.
With the outboard motor in a vertical po-
sition
, and using a flexible or
pressu
卜
ized lilling devi
ce
, inject the gear oil into
the gear oil drain screw hole
Recommended gear oil:
Hypoid gear oil SAE#90
Gear oil quantity:
320.0 cm
3
(10.82 US oz) (11.29
Imp.oz)
6.
When
the oil begins
to
flow out
01
the oil
level plug hole
,
inse
同
and
tighten the
oi
l
level
plug
7. Insert
and
tighten
the
gear o
il
drain
screw.
Cleaning
fuel
tank
,
1
‘,
""!':I~II~[
帽
Gasoline
is
highly
flammable, and
its
va-
pors
are flammable
and
explosive
.
•
If
you
have
any
question
about
properly
doing
this
procedure
,
consult
your
dealer.
• Keep
away
from
sparks
, cigarettes,
flames,
or
other
sources
of
ignition
when cleanÎng
the
fuel tank.
• Remove
the
fuel
tank
from
the
boat
be-
fore cleaning it.
Work
only
outdoors
in
an area
with
good
ventilation.
• Wipe up
any
spilled
fuel immedlately.
• Reassemble
the
fuel
tank
carefully.
1m
圄
proper
assembly
can result
in
a
fuel
leak,
which
could
result
in
a
fire
or
ex-
plosion
hazard.
• Oispose
of
old
gasoline
according
to
10-
cal regulations.
1.
Empty the luel tank into
an
approved
container
\
2.
Pour a small amount
01
suitable
solv
电
nt
into the tank. Install the cap and shake
the tank. Drain the solvent completely
3.
Remove the screws holding the luel joint
assembly. Pull the assembly out
01
the
tank
4.
Clean the lilter (Iocated
on
the end
01
the
suction pipe) in a suitable cleaning sol-
vent. Allow the filter to dry.
5.
Replace the gasket with a new one. Re-
install the luel joint assembly and tighten
the screws lirmly.
Inspecting
and
replacing
anode(s)
The
outboard motors are protected Irom
corrosion by sacrilicial anodes. Inspect the
external anodes periodically. Remove scales
Irom the surfaces
01
the anodes. Consult a
Maintenance
dealer for replacement
01
external
anodes.
00
not
paint
anodes, as
this
would
render
them ineffective.
NOTE:
Inspect ground leads attached to external
anodes on equipped models. Consult a
dealer
lor
inspection and replace.
ment
01
internal anodes attached to the pow.
er uni
t.
Checking
top
cowling
Check the litting
01
the top cowling by push-
ing it with both hands
,
1I
it is loose have it
re-
paired by your deale
r.
Coating
the
boat
bottom
A clean hull improves boat performance. The
42