User Manual of E Series Network Mini PTZ camera
© Hikvision
3. In the router, set the PPPoE user name, password and confirm the password.
For your privacy and to better protect your system against security risks, we strongly
recommend the use of strong passwords for all functions and network devices. The
password should be something of your own choosing (using a minimum of 8 characters,
including upper case letters, lower case letters, numbers and special characters) in order
to increase the security of your product.
Proper configuration of all passwords and other security settings is the responsibility of
the installer and/or end-user.
4. Set port mapping. E.g. 80, 8000 and 554 ports. The steps for port mapping vary depending on
different routers. Please call the router manufacturer for assistance with port mapping.
Refer to Appendix 2 for detailed information about port mapping.
5. Apply a domain name from a domain name provider.
6. Configure the DDNS settings in the setting interface of the router.
7. Visit the mini PTZ camera via the applied domain name.
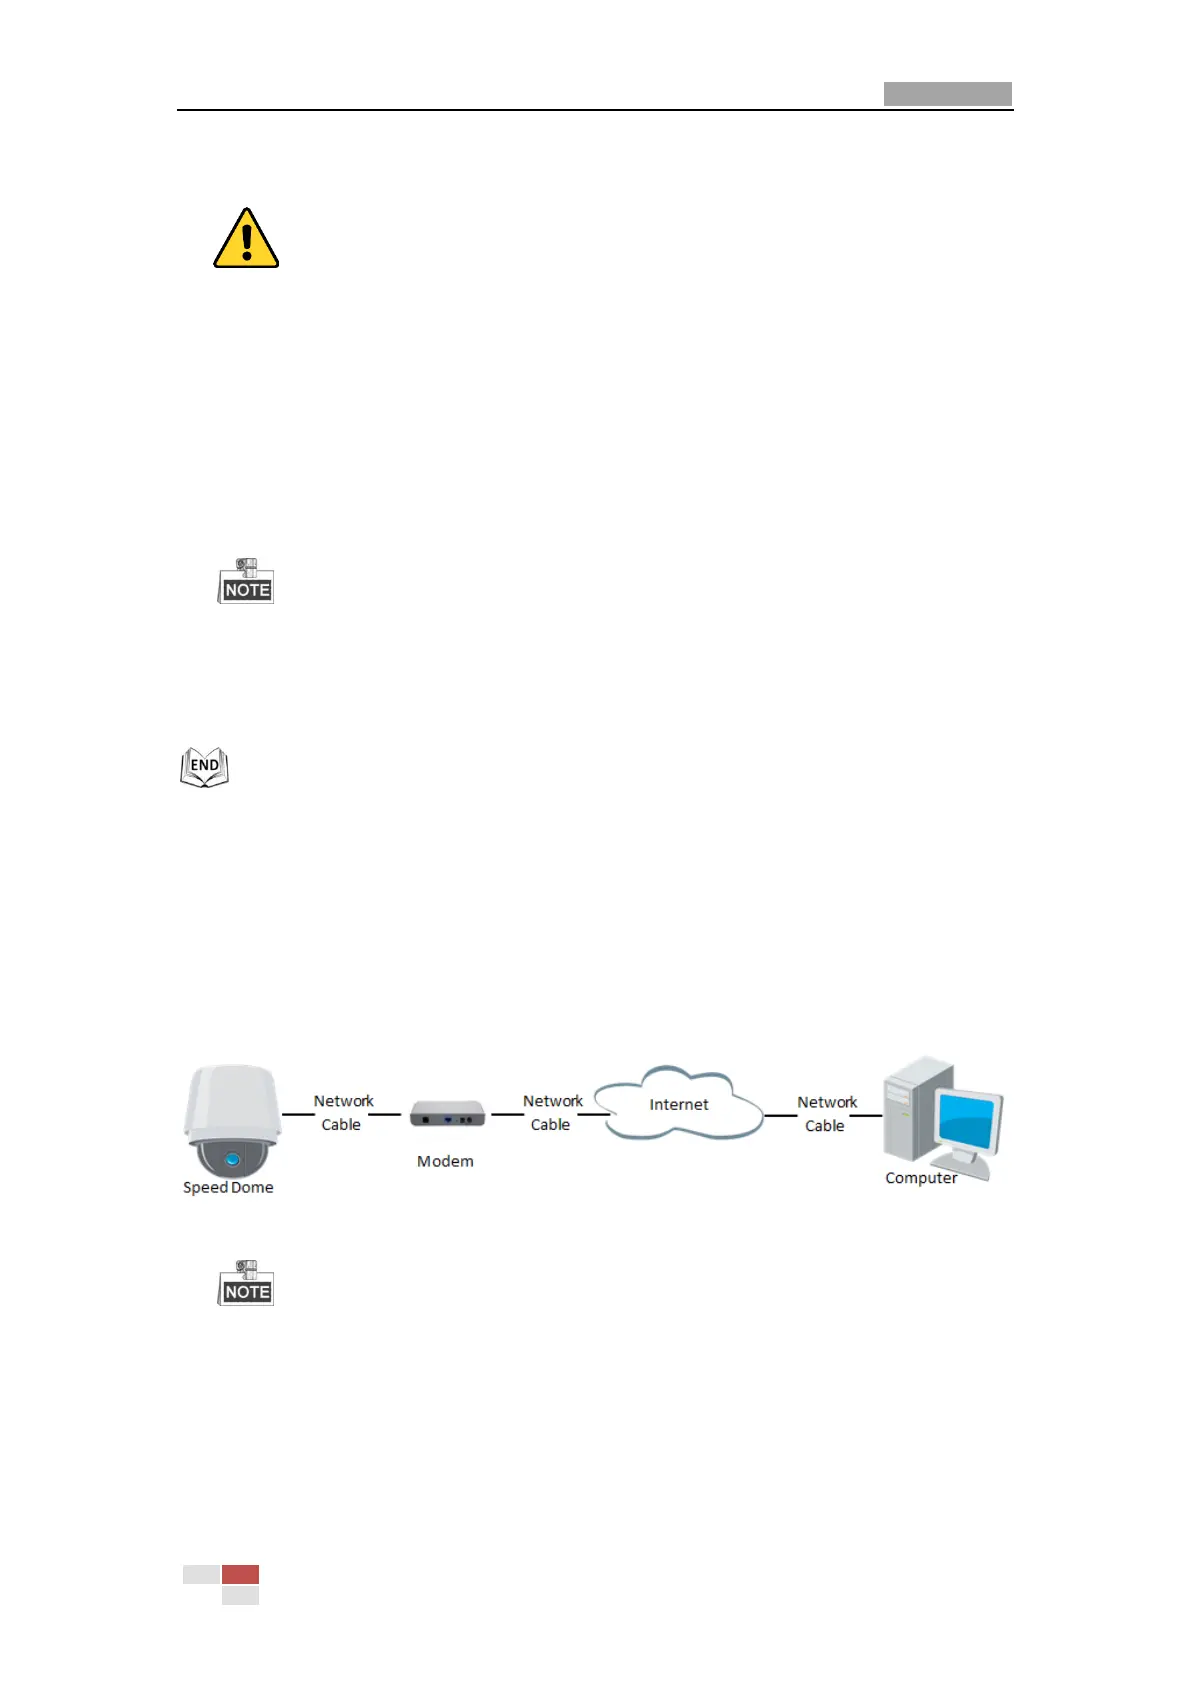
Connecting the network mini PTZ camera via a modem
Purpose:
This mini PTZ camera supports the PPPoE auto dial-up function. The mini PTZ camera gets a
public IP address by ADSL dial-up after the mini PTZ camera is connected to a modem. You need
to configure the PPPoE parameters of the network mini PTZ camera. Refer to Section 0
Configuring PPPoE Settings for detailed configuration.
Figure 2-12 Accessing the Mini PTZ camera with Dynamic IP
The obtained IP address is dynamically assigned via PPPoE, so the IP address always changes
after rebooting the mini PTZ camera. To solve the inconvenience of the dynamic IP, you need
to get a domain name from the DDNS provider (E.g. DynDns.com). Please follow below steps
for normal domain name resolution and private domain name resolution to solve the
problem.
Normal Domain Name Resolution
 Loading...