PoE Port
Used for other PD devices connecon via network
cables.
Gigabit RJ45 Port Used for devices connecon via network cables.
Gigabit SFP Fiber
Opcal Port
Used for other devices connecon via opcal ber
when plugged into with an opcal module.
Grounding Terminal
Used for connecng to the grounding cable to
protect the switch from lightning.
Power Supply
Use the aached power cord to connect the switch
to socket.
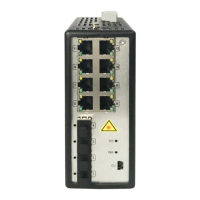
DIP Switch
Support 3 modes:
•
Extend: Port 3 and 4 of DS-3TXX06HP-E series and
port 7 and 8 of DS-3TXX10HP-E series support
network transmission of up to 300 metres.
•
Isolaon: Data transmission of each port is
isolated from each other to improve network
security.
•
PoE Watchdog: Auto-detect and restart cameras
that do not respond.
2 Installaon
Please select the appropriate installaon method according to
the actual needs.
Before You Start
•
Keep the room well-venlated.
•
Keep at least 10 cm distance around the device for heat
dissipaon.
2.1 Wall-Mounted Installaon
Before You Start
Use a screwdriver to remove the DIN rail-mounted unit.
Steps
1.
Fix the wall mount ears to the device with self-prepared M4
screws.
2.
Use self-prepared M4 screws to
x the device onto the wall.
Figure 2-1 Wall-Mounted Installaon
3
 Loading...