Network Video Recorder Quick Start Guide
27
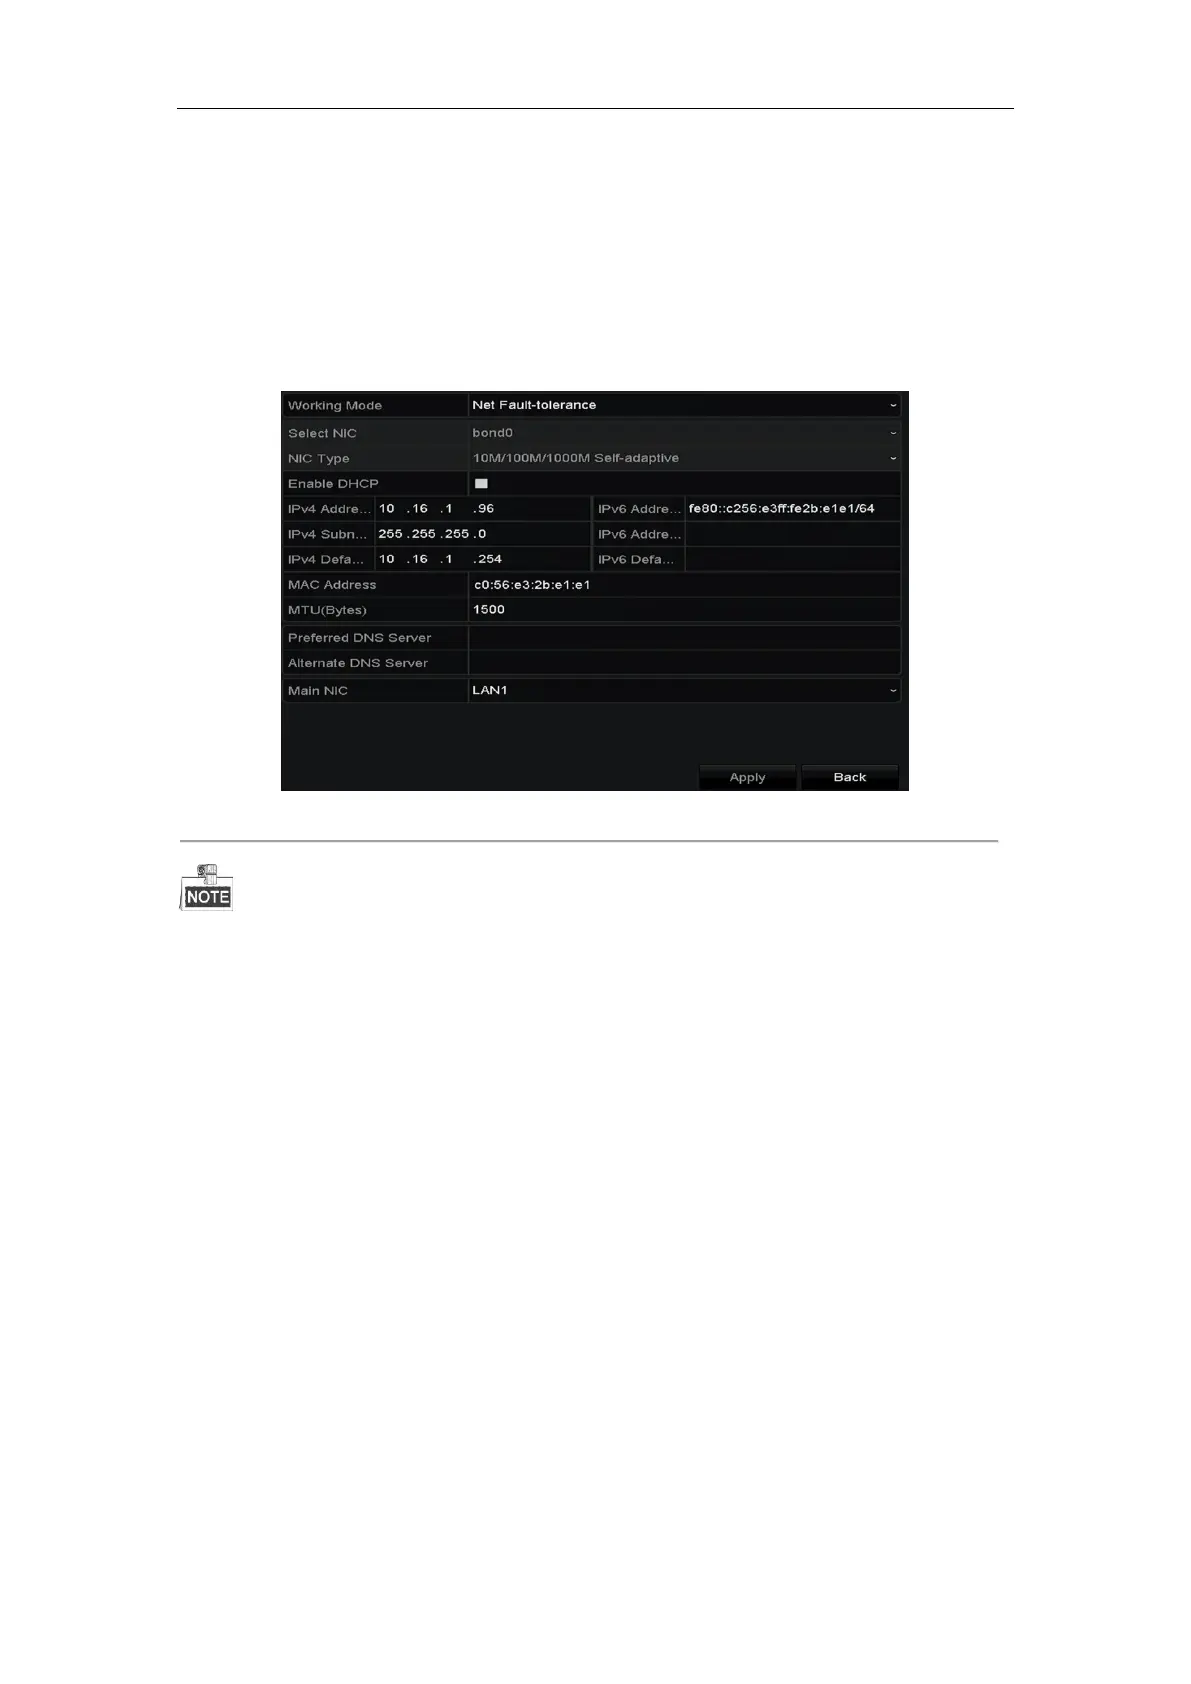
3.7 Network Settings
Purpose:
Network settings must be properly configured before you operate NVR over network.
Steps:
1. Enter the Network Settings interface.
Menu > Configuration > Network
Figure 3. 11 Network Settings
Two self-adaptive 10M/100M/1000M network interfaces for DS-9600NI-I8, DS-9600NI-I16,
DS-8600NI-K8, DS-7700NI-I4 and DS-7700NI-K4, and the multi-address and network fault tolerance
working modes are configurable.
One self-adaptive 10M/100M/1000M network interface for DS-7600NI-K2/I2(/P), DS-7700NI-I4/P and
DS-7700NI-K4/P.
One self-adaptive 10M/100M network interface for DS-7600NI-K1 (/P).
2. Select the General tab.
3. In the General Settings interface, you can configure the following settings: NIC Type, IPv4 Address, IPv4
Gateway, MTU and DNS Server.
If the DHCP server is available, you can check the checkbox of DHCP to automatically obtain an IP address
and other network settings from that server.
4. After having configured the general settings, click the Apply button to save the settings.
3.8 Adding IP Cameras
Purpose:
Before you can get live video or record the video files, you should add the network cameras to the connection list
of the device.
Before you start:
Ensure the network connection is valid and correct, and the IP camera to add has already been activated. Please
 Loading...