Hikvision USA, Inc. – Series DS-7300 User Manual
Operating Your DVR
There are numerous ways to navigate and operate your DVR. You may use the Front Panel Controls, the
included IR (Infra-Red) Remote, a Mouse and the Soft-Keyboard.
Using the Front Panel Controls
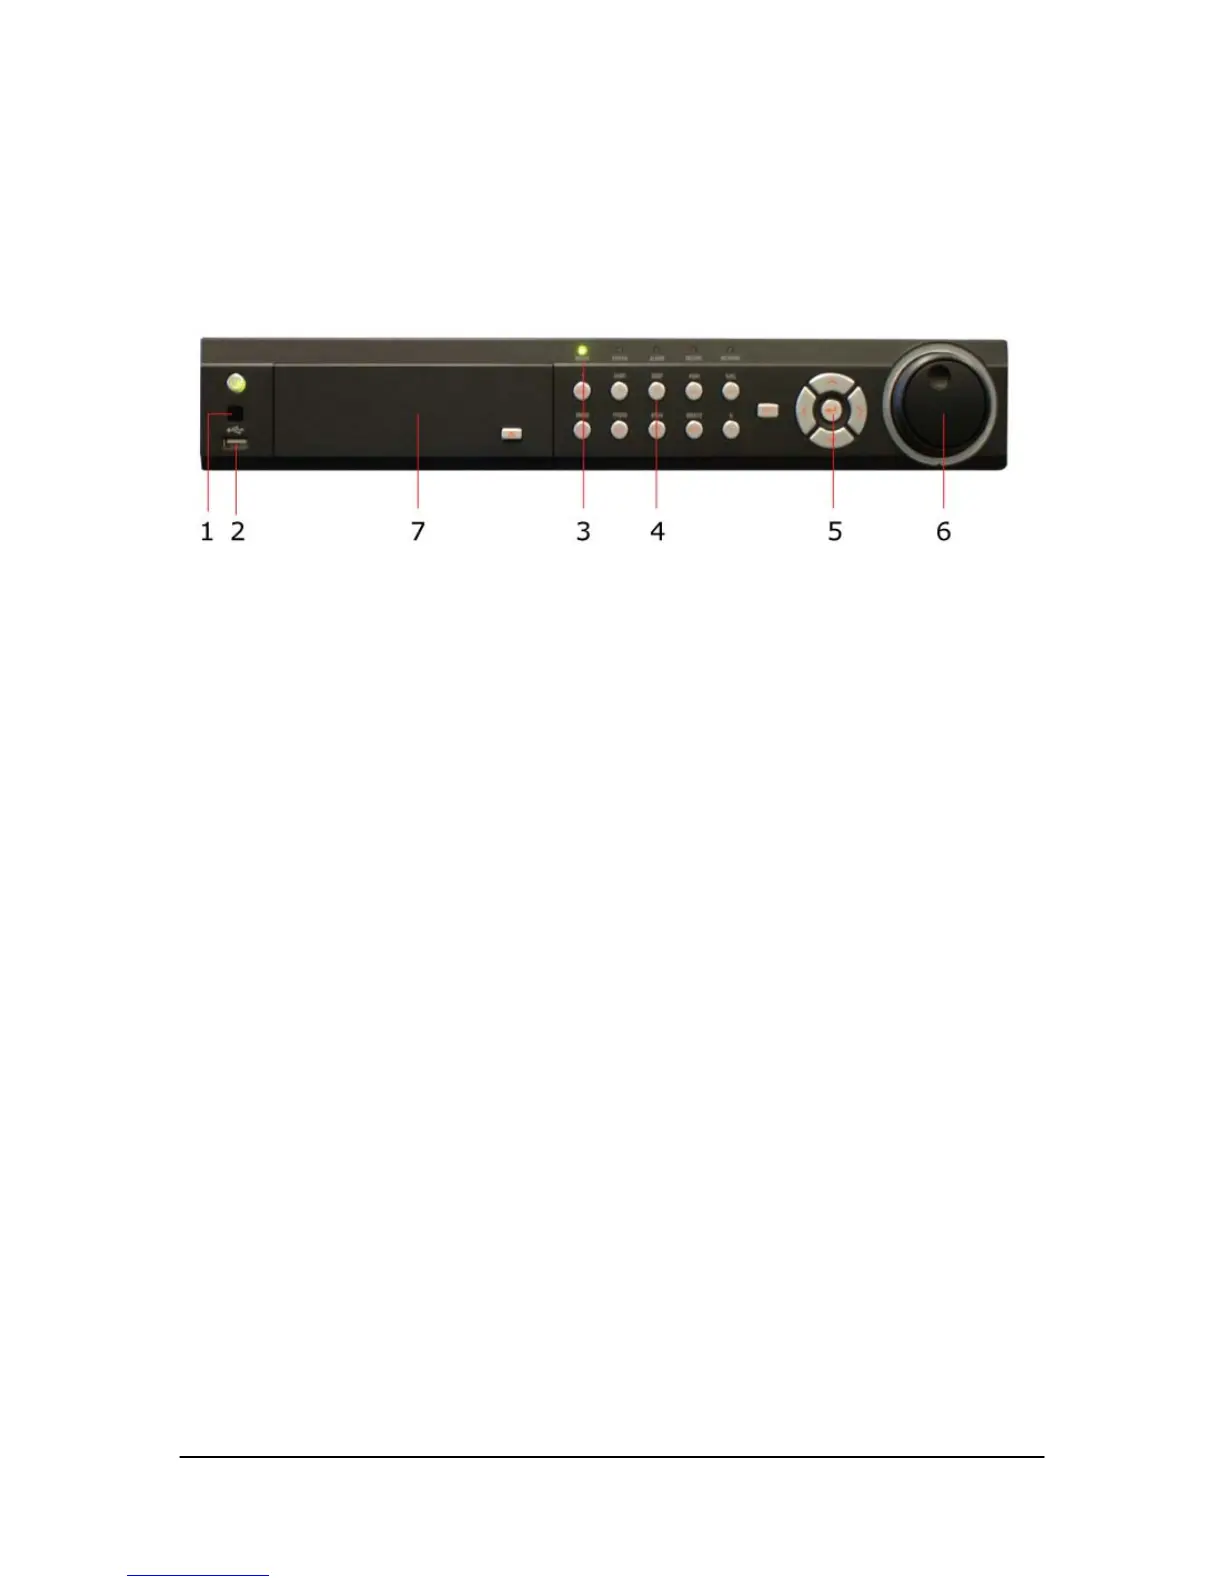
Your DVR comes with built-in front panel controls, as shown in Figure 3.
The controls on the front panel include:
1. IR Receiver: Receiver for IR remote.
2. USB Ports: Universal Serial Bus (USB) ports for additional devices such as USB mouse and USB Hard Disk
Drive (HDD).
3. Status Indicators: Status indicators for different features of the DVR.
• Ready: Ready indicator turns blue when DVR is functioning properly.
• Status: Status indicator turns blue when DVR is controlled by an IR remote. Indicator turns red when
controlled by a keyboard and purple when IR remote and keyboard is used at the same time.
• Alarm: Alarm indicator turns red when a sensor alarm is detected.
• RECORD: HDD indicator blinks red when data is being read from or written to HDD.
• NETWORK: Network indictor blinks blue when network connection is functioning properly.
4. Alphanumeric Buttons: Alphanumeric buttons used in various menus of the DVR. Some uses include:
• Switching to the corresponding channel in Preview or PTZ Control mode.
• Inputting numbers and characters in Edit mode.
• Switching between different channels in Playback mode.
Control Buttons:
•MENU / WIPER Button: Pressing the MENU / WIPER button will return the user to the Main menu (after
successful login). Pressing and holding the button for 5 seconds will turn off audible key beep. The MENU /
WIPER button will also bring up Sensitivity Interface settings. In PTZ Control mode, the MENU / WIPER button
wills tart the wiper (if applicable).
• F1/LIGHT Button: The F1/LIGHT button when used in a list field will select all items on the list. In PTZ
Control mode, it will turn on/off PTZ light.
• F2/AUX Button: The F2/AUX button is used to cycle through tab pages. It will also bring up the Channel &
OSD Position settings.
• ESC Button: The ESC button is used to escape to the previous menu and to arm/disarm the DVR in Preview
mode.
•EDIT / IRIS+ Button: The EDIT / IFIS+ button is used to edit text fields. When editing text fields, it will also
function as a Backspace button to delete the character in front of the cursor. On checkbox fields, pressing the
EDIT / IRIS+ button will tick the checkbox. In PTX control mode, the EDIT / IRIS+ button opens up the iris of the
camera. In playback mode, it can be used to generate video clips for backup.
• PLAY/AUTO Button: The PLAY/AUTO button is used to enter the Playback menu. It is also used to turn
audio on/off in the Playback menu and auto scan in the PTZ Control menu.
• REC/SHOT Button: The REC/SHOT button is used to enter the Manual Record interface. If used when
controlling a PTZ, pressing the REC/SHOT button and then a Numeric button will call a PTZ preset.
 Loading...