EasyManuals Logo

HIKVISION DS-7604NI-SE/P Quick Start Guide

HIKVISION DS-7604NI-SE/P
24 pages
To Next Page IconTo Next Page
To Previous Page IconTo Previous Page
Page #8 background imageLoading...
Page #8 background image
www.hikvision.com/en/us
Networking a NVR requires 3 steps:
1. Assign an IP address, Default Gateway, Subnet Mask, and a DNS server (Please note: DNS,
not DDNS) to the NVR
2. Forward the appropriate ports on the router (Port Forwarding).
3. Register DDNS (DDNS registration is required only if the public IP address is Dynamic).
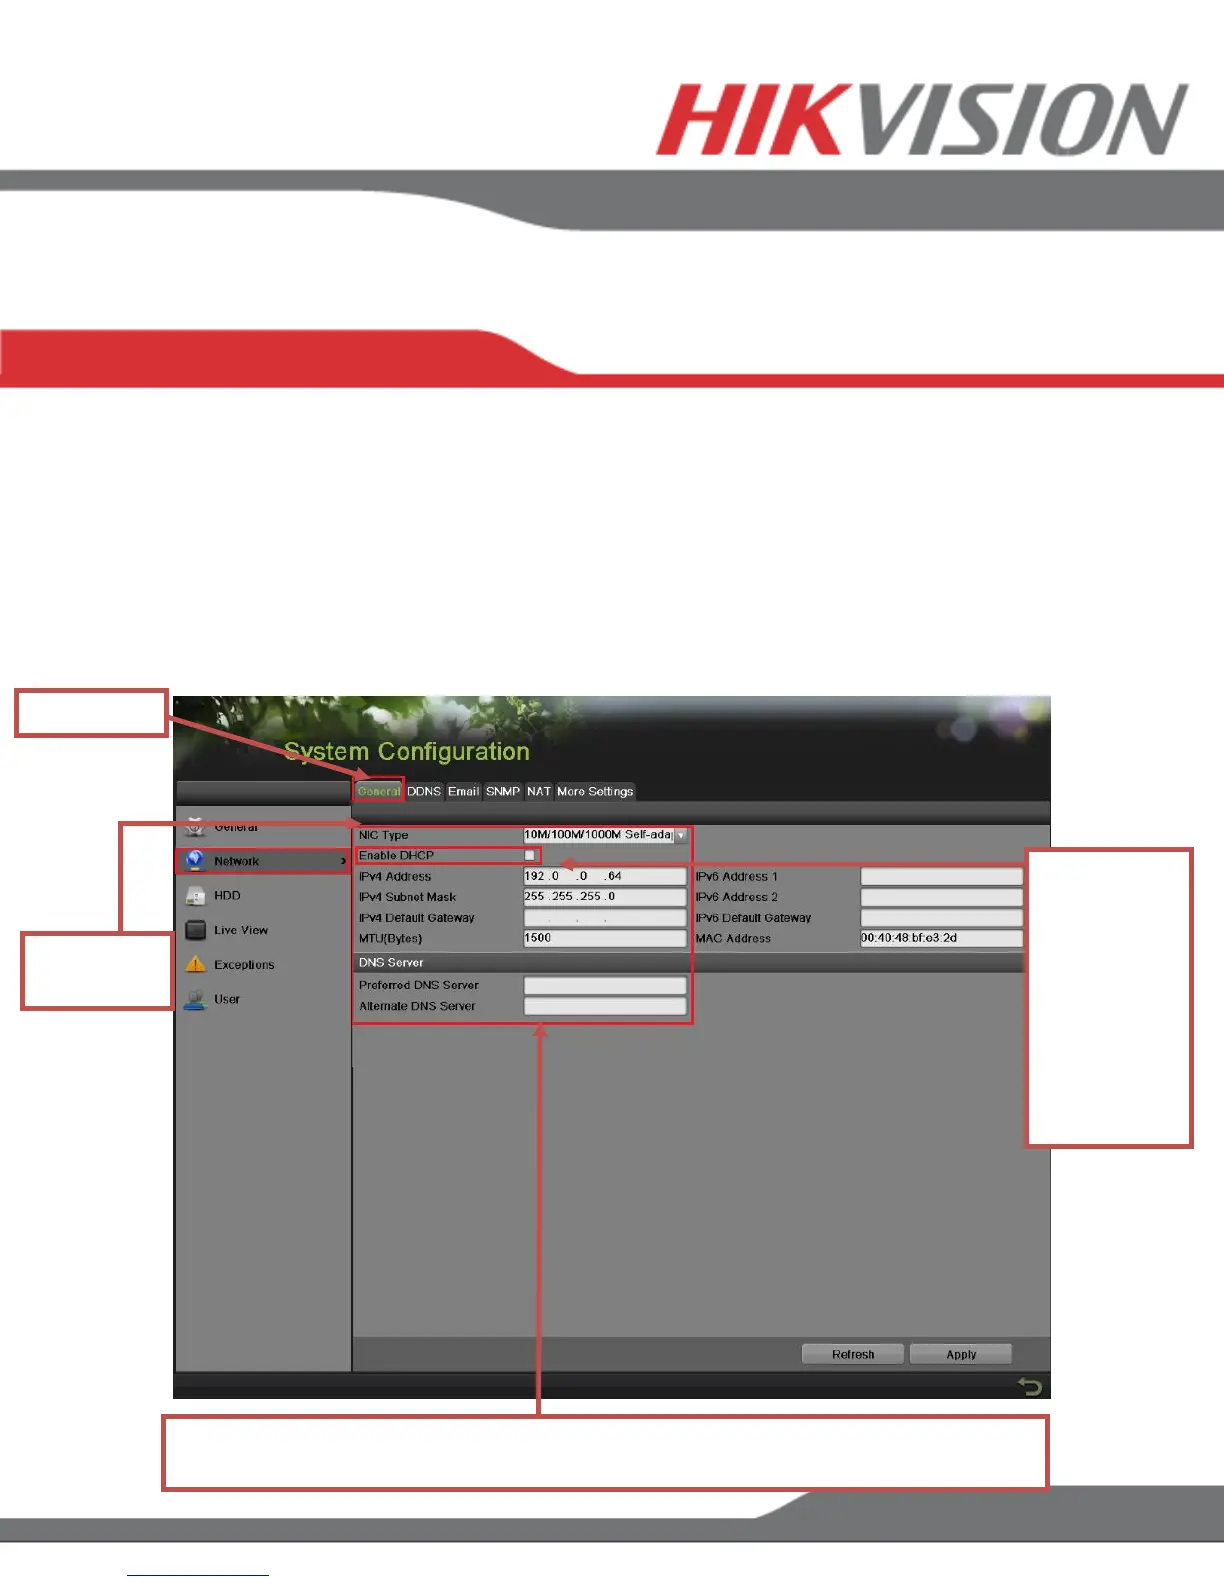
To assigning an IP ADDRESS, go to “MENU”>”SYSTEM CONFIGURATION”>”NETWORK”
5. SETTING UP THE NETWORK
SETTING UP NETWORK ACCESS
General
IP CONFIGURATION
Please note that the NVR have a default IP Address set to 192.0.0.64
Enable
DHCP
With DHCP
enabled, the
router will
assign an IP
address to
the NVR
Select NIC
Type

Other manuals for HIKVISION DS-7604NI-SE/P

Questions and Answers:

Question and Answer IconNeed help?

Do you have a question about the HIKVISION DS-7604NI-SE/P and is the answer not in the manual?

HIKVISION DS-7604NI-SE/P Specifications

General IconGeneral
Product colorBlack
Channels quantity4 channels
Playback resolutions supported5MP, 3MP, 1080p, UXGA, 720p, VGA, 4CIF, DCIF, 2CIF, CIF, QCIF
Audio input1
USB 2.0 ports quantity2
Ethernet LAN (RJ-45) ports5
Ethernet interface typeFast Ethernet, Gigabit Ethernet
HDD capacity1000 GB
HDD interfaceSerial ATA
Maximum HDD capacity4000 GB
Power consumption (typical)15 W
Operating temperature (T-T)-10 - 55 °C
Operating relative humidity (H-H)10 - 90 %
Weight and Dimensions IconWeight and Dimensions
Weight2000 g
Dimensions (WxDxH)445 x 290 x 45 mm

Related product manuals