Network Video Recorder Quick Start Guide
30
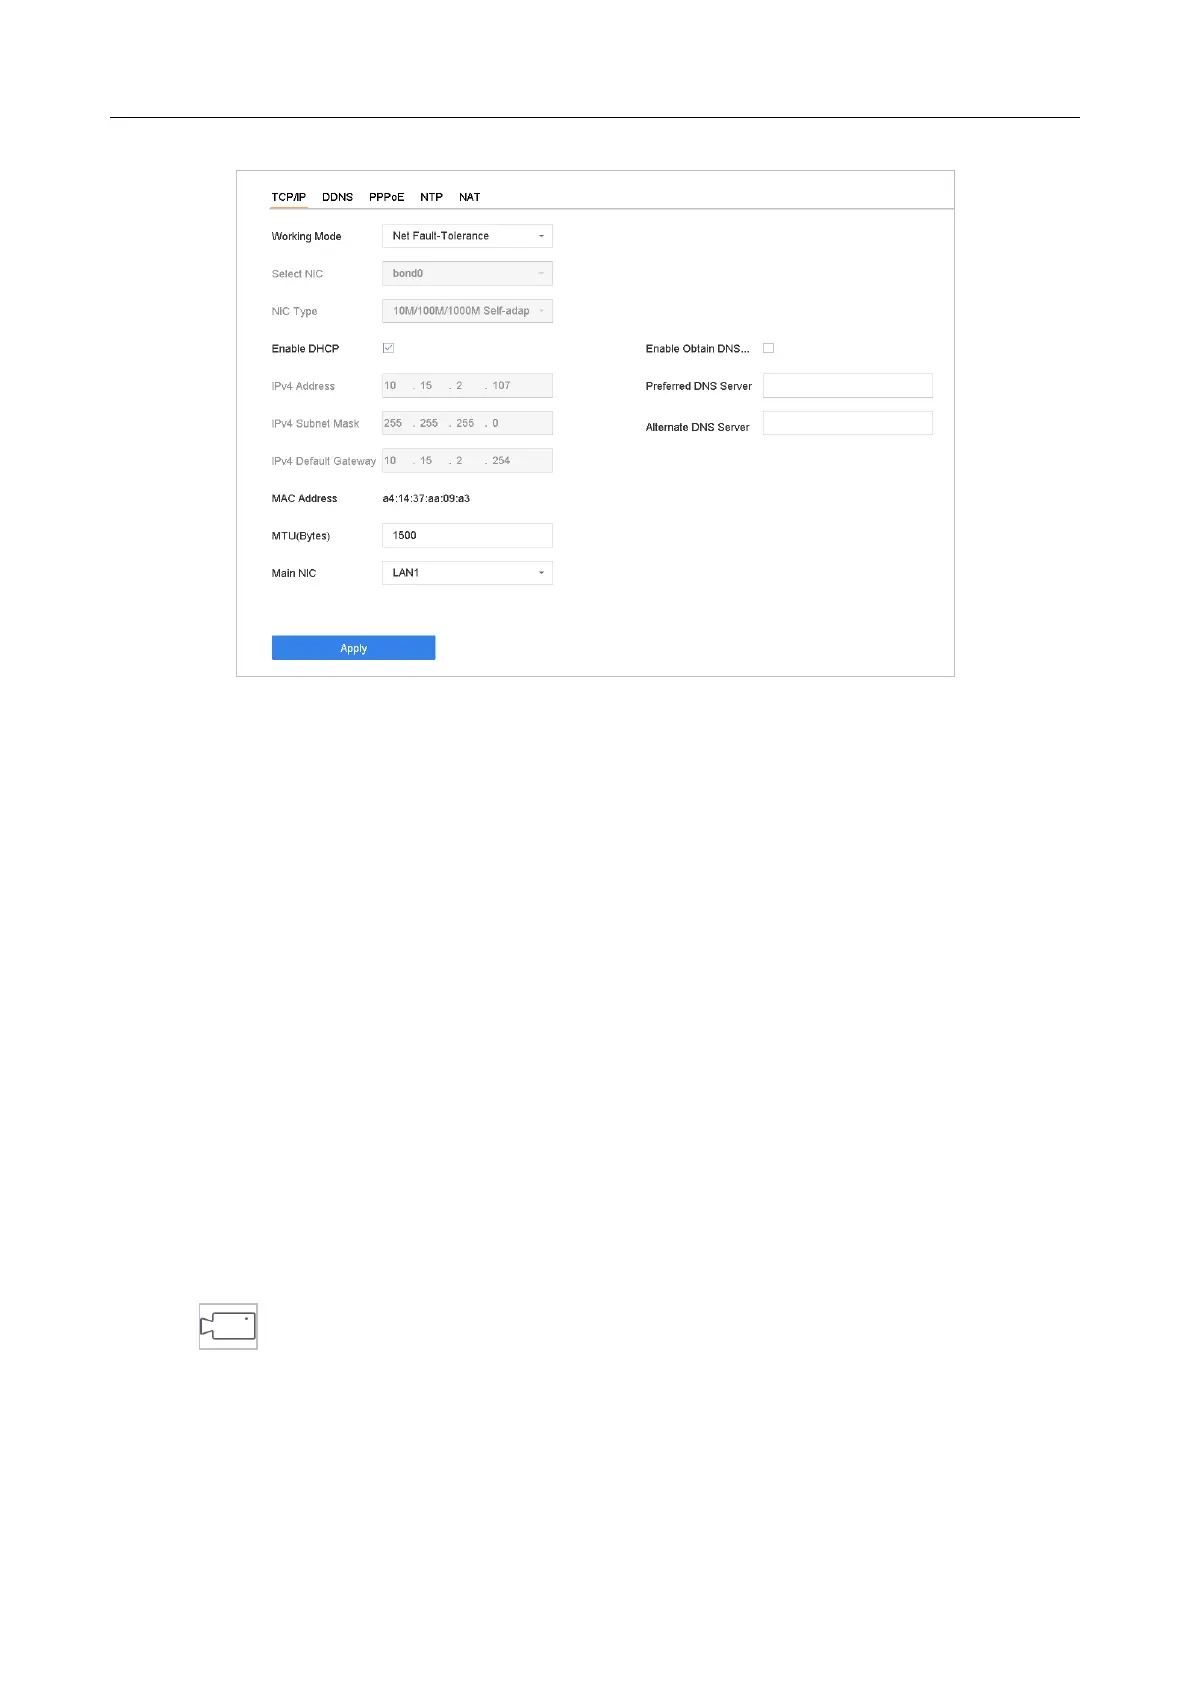
Figure 3-5 Network Settings
Step 2 Select the General tab.
Step 3 In the General Settings interface, you can configure the following settings: NIC Type, IPv4
Address, IPv4 Gateway, MTU and DNS Server.
Step 4 If the DHCP server is available, you can check the checkbox of DHCP to automatically obtain
an IP address and other network settings from that server.
Step 5 After having configured the general settings, click the Apply button to save the settings.
3.7 Add IP Cameras
Purpose:
Before you can get live video or record the video files, you should add the network cameras to the
connection list of the device.
Before you start:
Ensure the network connection is valid and correct, and the IP camera to add has already been
activated.
Step 1 Click on the main menu bar to enter the Camera Management.
Step 2 Click the Custom Add tab on the title bar to enter the Add IP Camera interface.
 Loading...