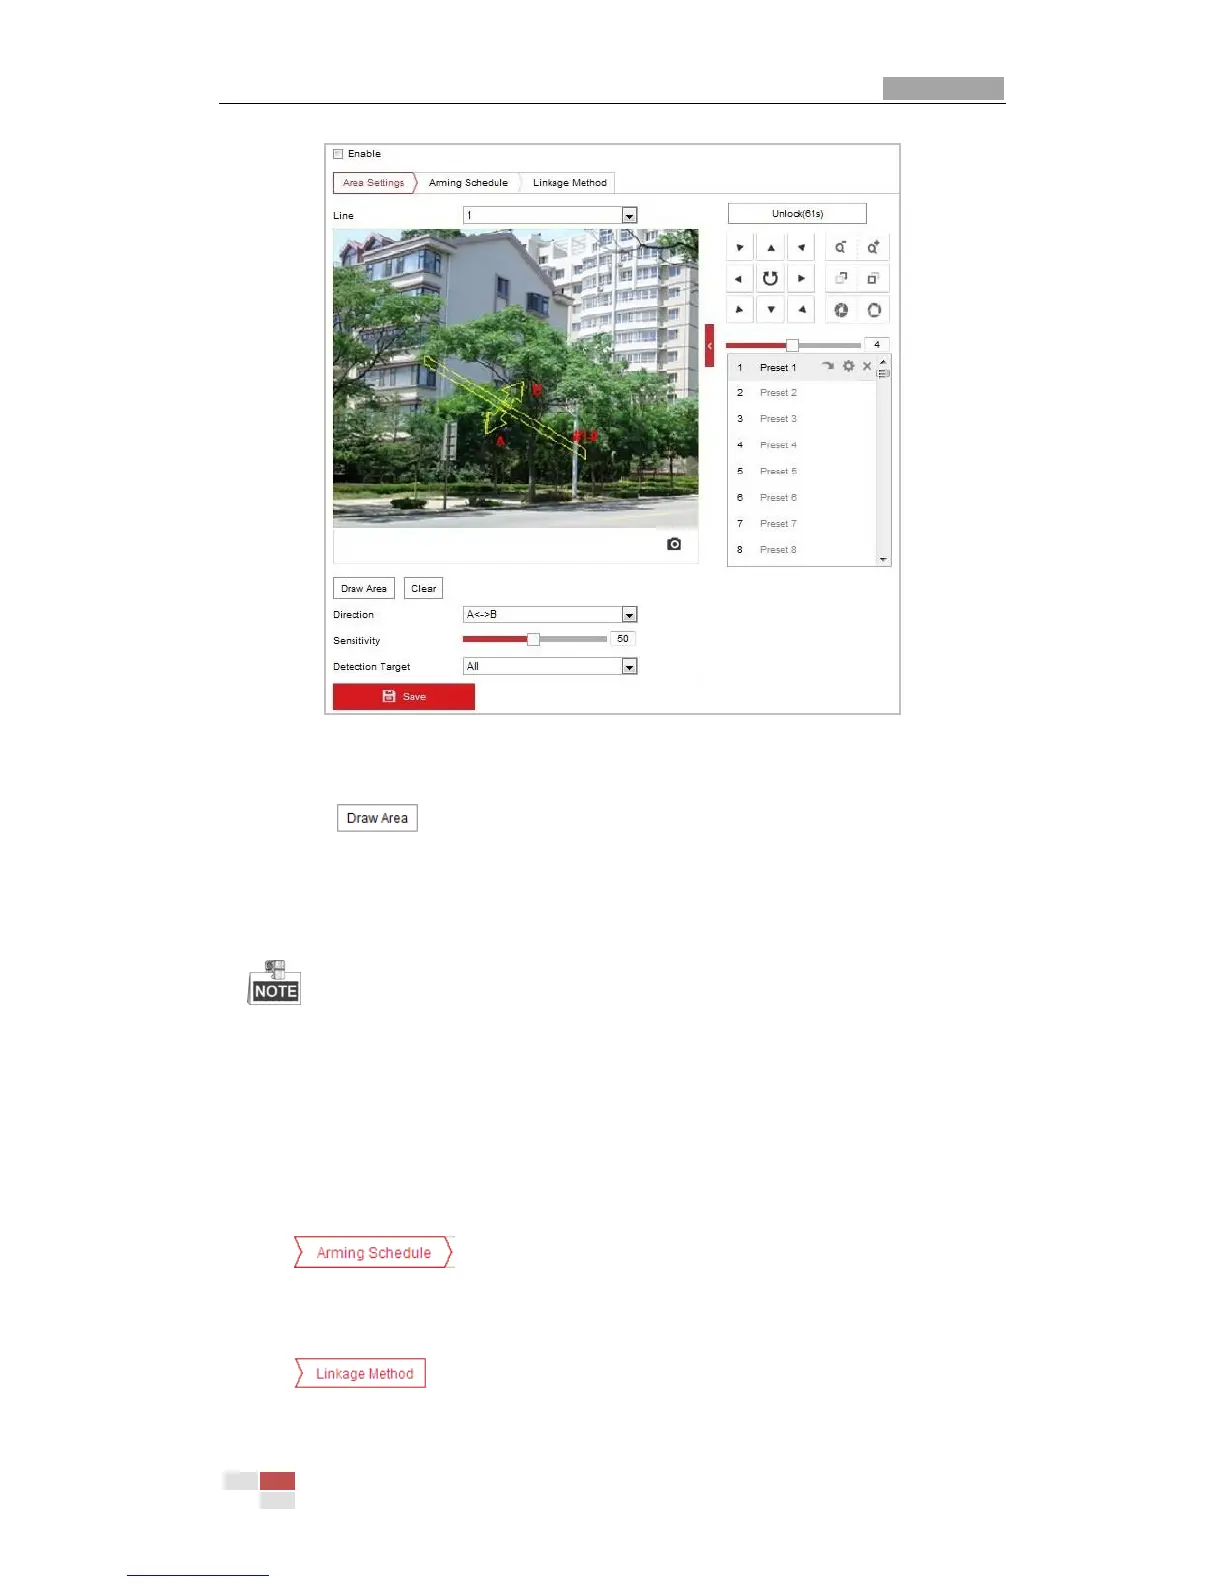
Figure 5-24 Configuring Line
5. Draw area.
1) Click to draw a line on the image.
2) Click the line to switch to the editing mode.
Click and drag an end to the desired place to adjust the length and angle of the line. And
click and drag the line to adjust the location.
Up to four lines are supported.
6. Configure the parameters for each defense region separately.
Direction: Select the detection direction in the dropdown list, there are A<->B, A->B and
B->A selectable.
Sensitivity: Range [1-100]. The value of the sensitivity defines the size of the object which
can trigger the alarm, when the sensitivity is high, a very small object can trigger the
alarm.
7. Click tab to enter the arming schedule setting interface. The time
schedule configuration is the same as the settings of the arming schedule for motion
detection. Refer to Step 2 in Section 5.2.1 Configuring Motion Detection.
8. Click tab to select the linkage method taken for the video loss alarm,
including Notify surveillance center, send email, upload to FTP, trigger channel, smart tracking
 Loading...