EN
FR
TOP
BACK
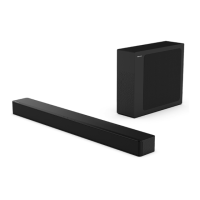
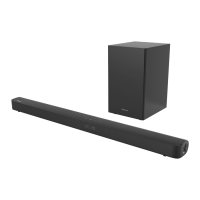
3. Identifying the Parts
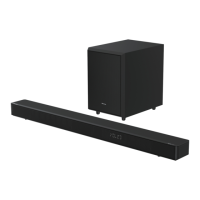
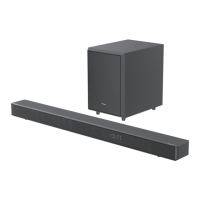
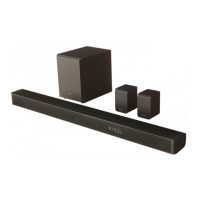
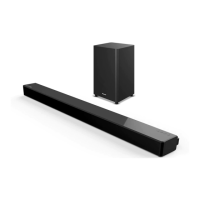
3.1 Soundbar
1 Remote Control Sensor
Receive signal from the remote control.
2 Display Window
Show the current status.
3
(ON/OFF) button
Switch the soundbar between ON and
Standby mode.
4 (SOURCE) button
Select the play function.
5
+/-(
VOL) buttons
Increase/decrease the volume level.
6 Wall bracket screws
7 AC~ Socket
Connect an AC power cord.
8 OPTICAL Socket
Connect to an optical audio output on the
TV.
9 AUX Socket
Connect to an external audio device.
10 USB Socket
Insert the USB device to play music.
11 HDMI (TV eARC/ARC) Socket
Connect to a TV via HDMI cable.
3.2 Wireless Subwoofer
1 Pairing Indicator
Light stops blinking once the subwoofer is
paired with the soundbar.
2 AC IN~ Socket
Connect an AC power cord.
3 PAIR button
Press activate the pairing function between
the soundbar and subwoofer.
7
11
10
12
3.3 Remote Control
1 Switch the soundbar between ON and
STANDBY mode.
2 SURR Adjust the surround ON/OFF.
3 VOL
+
/VOL
-
Increase/decrease the volume level.
4 BASS
+
/
-
Adjust bass level.
5
(MUTE) Mute or resume the sound.
6
button Select the play function.
7
Select the Bluetooth mode.
Press and hold to activate the pairing
function in Bluetooth mode or disconnect
the existing paired Bluetooth device.
8 EQ Select a preset sound eect.
9
/ Skip to previous/next track in
Bluetooth/USB mode.
10
Play/pause/resume playback in Bluetooth/
USB mode. Press and hold the button for 3s
to enter setup menu.
11 DIMMER
+
/
-
Adjust LED brightness.
12 TREBLE
+
/
-
Adjust treble level.
4. Preparations
4.1 Prepare the Remote Control
The provided Remote Control allows the soundbar
to be operated from a distance.
•
Even if the Remote Control is operated within
the effective range 19.7 feet (6m), remote
control operation may be impossible if there
are any obstacles between the soundbar and
the remote control.
•
If the Remote Control is operated near other
products which generate infrared rays, or
if other remote control devices using infra-
red rays are used near the soundbar, it may
operate incorrectly. Conversely, the other
products may operate incorrectly.
4.2 Replace the Remote Control Battery
1 Press and slide the back cover to open the
battery compartment of the remote control.
2 Insert two AAA size batteries. Make sure the (+)
and (–) ends of the batteries match the (+) and
(–) ends indicated in the battery compartment.
3 Close the battery compartment cover.
Precautions Concerning Batteries
• Be sure to insert the batteries with correct
positive “
Q
” and negative “
R
” polarities.
• Use batteries of the same type. Never use
dierent types of batteries together.
• Either rechargeable or non-rechargeable
batteries can be used. Refer to the
precautions on their labels.
• Be aware of your ngernails when removing
the battery cover and the battery.
• Do not drop the remote control.
• Do not allow anything to impact the remote
control.
• Do not spill water or any liquid on the remote
control.
• Do not place the remote control on a wet
object.
• Do not place the remote control under direct
sunlight or near sources of excessive heat.
• Remove the battery from the remote control
when not in use for a long period of time,
as corrosion or battery leakage may occur
and result in physical injury, and/or property
damage, and/or re.
• Do not use any batteries other than those
specied.
• Do not mix new batteries with old ones.
• Never recharge a battery unless it is
conrmed to be a rechargeable type.
TOP
BACK
3. Identifying the Parts
3.1 Soundbar
1 Remote Control Sensor
Receive signal from the remote control.
2 Display Window
Show the current status.
3
(ON/OFF) button
Switch the soundbar between ON and
Standby mode.
4 (SOURCE) button
Select the play function.
5
+/-(
VOL) buttons
Increase/decrease the volume level.
6 Wall bracket screws
7 AC~ Socket
Connect an AC power cord.
8 OPTICAL Socket
Connect to an optical audio output on the
TV.
9 AUX Socket
Connect to an external audio device.
10 USB Socket
Insert the USB device to play music.
11 HDMI (TV eARC/ARC) Socket
Connect to a TV via HDMI cable.
3.2 Wireless Subwoofer
1 Pairing Indicator
Light stops blinking once the subwoofer is
paired with the soundbar.
2 AC IN~ Socket
Connect an AC power cord.
3 PAIR button
Press activate the pairing function between
the soundbar and subwoofer.

 Loading...