--- 27 ---
Tool required
4 mm (0.157") hexagonal bar wrench
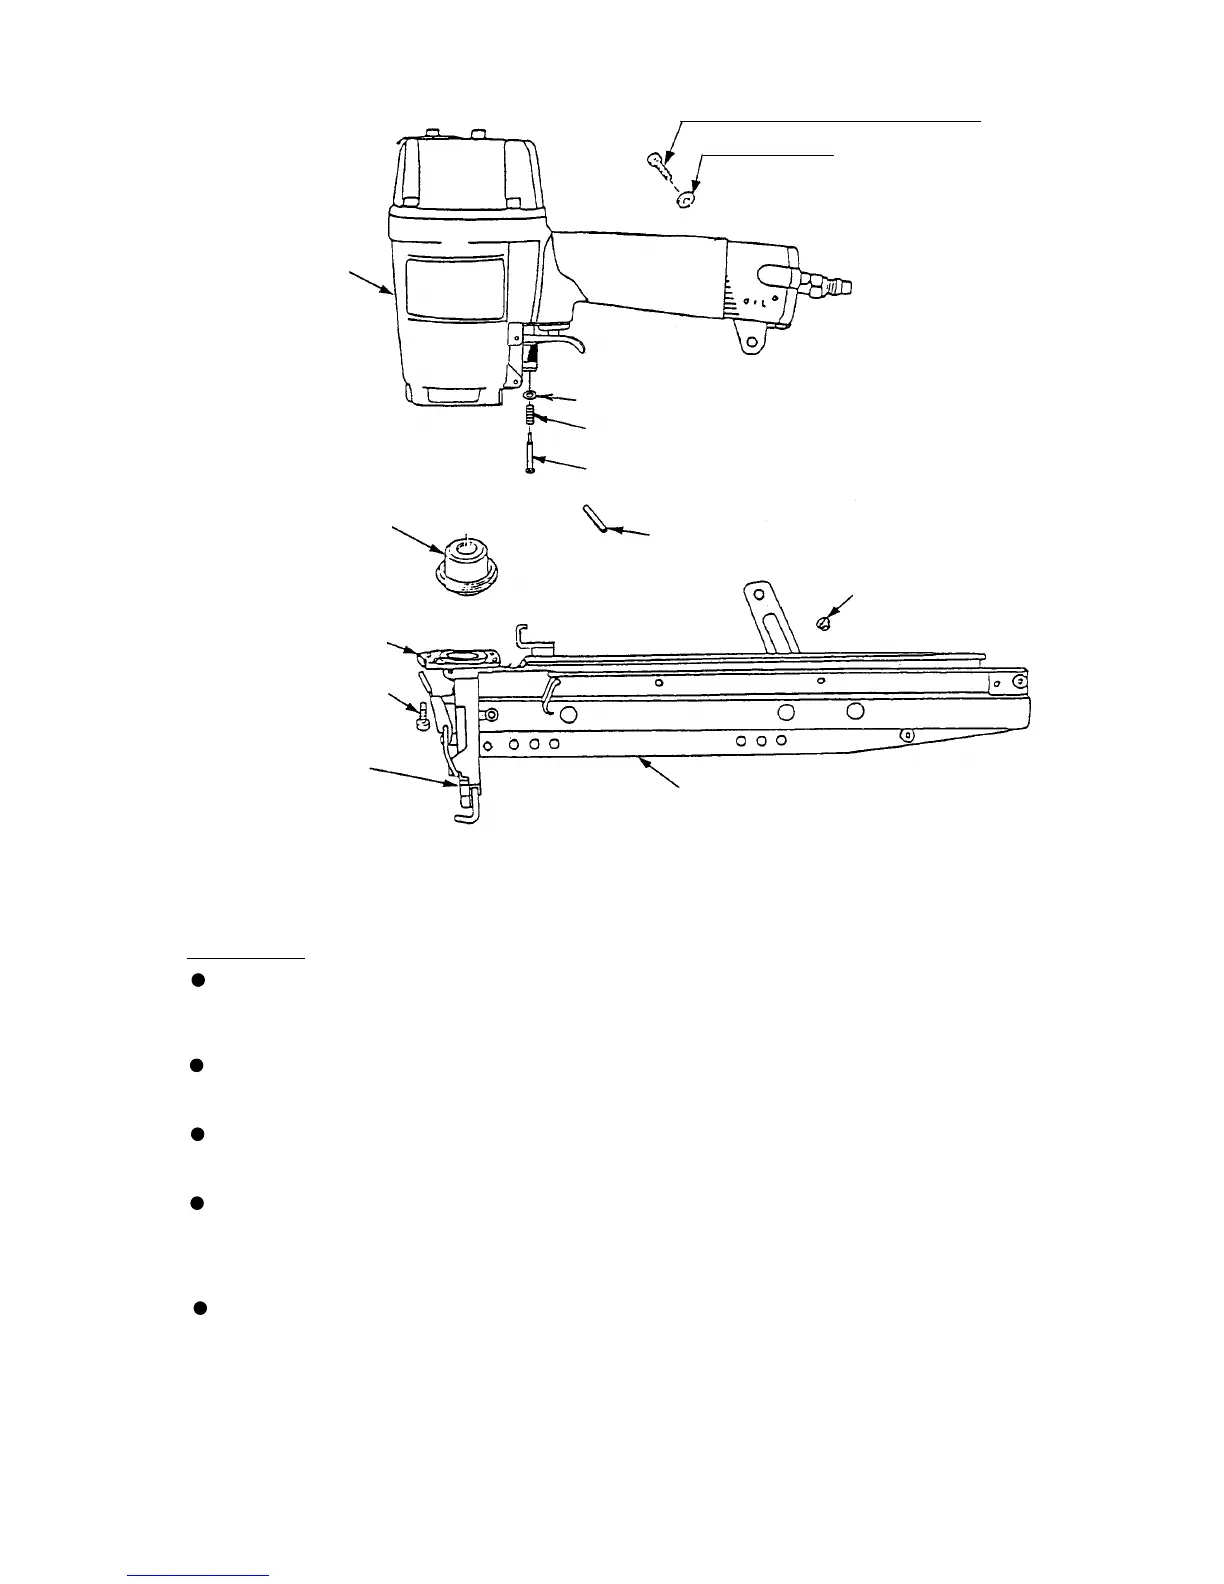
(a) Disassembly (Refer to Figs. 11, 12 and 13.)
As illustrated in Fig. 10, loosen the four Hex. Socket Hd. Bolts M5 x 20 [1], and remove the Exhaust Cover
[3]. The Piston [9] can then be taken out.
Perform the following operation first if the Piston [9] cannot be removed because the top surface of the
Piston [9] is flush with the top surface of the Cylinder [13].
Next, as illustrated in Fig. 11, screw the two previously removed Hex. Socket Hd. Bolts M5 x 20 [1] into the
provided holes on the Cylinder Plate [12]. Gripping these two bolts, simultaneously turn and pull upward to
remove the Cylinder Plate [12], the Cylinder [13] and the related parts.
If the Cylinder [13] is difficult to remove as described above, remove the Nose Ass'y [22] as described in
paragraph 10-2-(1), and push down on the cylinder to remove it from the lower portion of the main body.
(2) Piston [9], Cylinder [13] and the related parts
Washer M5 [50]
Nylon Nut M5 [60]
Body Ass'y [19]
Washer [32]
Hex. Socket Hd. Bolt M5 x 18 [31]
Roll Pin D3 x 30 [38]
Piston Bumper [21]
Plunger (B) [52]
Plunger (B) Spring [51]
Magazine Ass'y [63]
Guide Plate [25]
Nylock Hex. Socket
Hd. Bolt M5 x 16 [24]
Nose Ass'y [22]
Fig. 10