English
— 19 —
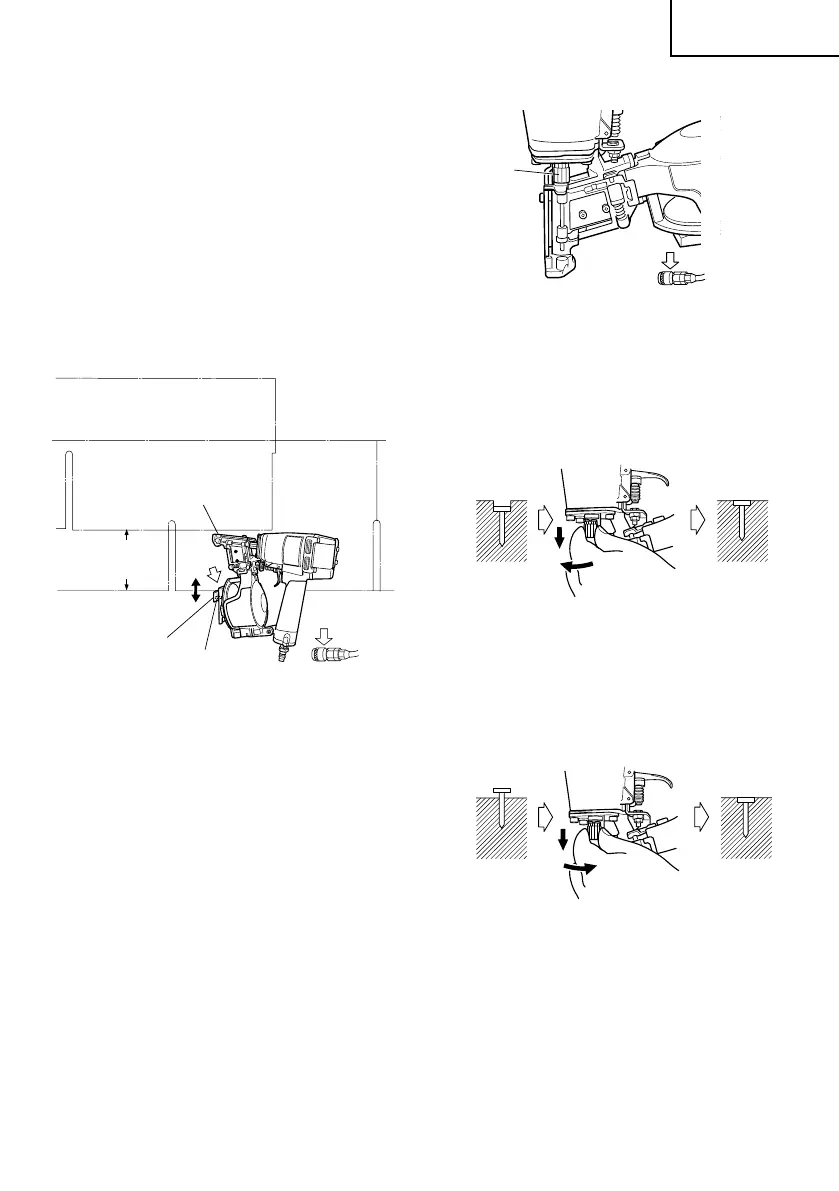
USING THE SHINGLE GUIDE
The shingle guide can be used to control
shingle spacing. Adjust the shingle guide in
the following order.
1 DISCONNECT AIR HOSE FROM NAILER
2 Loosen the hex. socket hd. bolt with the
accessory Allen wrench.
3 Place the shingle guide against the
bottom of the first row of shingles.
4 Adjust the distance between the outlet
and the shingle guide to the proper
shingle exposure by sliding the shingle
guide.
5 Tighten the hex. socket hd. bolt.
NOTE:
䢇 The proper shingle exposure will depend
on the type of shingle and the
manufacturer's specifications.
䢇 The shingle guide is not to be utilized as
an indicator of nail location.
ADJUSTING THE NAILING
DEPTH
To assure that each nail penetrates to the
same depth, be sure that:
1) the air pressure to the Nailer remains
constant (requlator is installed and
working properly), and
2) the Nailer is always held firmly against
the workpiece.
If nails are driven too deep or shallow into
the workpiece, adjust the nailing in the
following order.
1 DISCONNECT AIR HOSE FROM NAILER.
2 If nails are driven too deep, turn the
adjuster counterclockwise while pulling
it downward.
When the adjuster is released, it returns
upward. Furthermore, turn the adjuster
until it reaches a position where it gets
fixed with a clock.
If nails are driven too shallow, turn the
adjuster clockwise while pulling it
downward.
When the adjuster is released, it return
upward. Furthermore, turn the adjuster
until it reaches a position where it gets
fixed with a clock.
The adjuster can be fiexed each at 1/4
rotation.
The adjuster moves approximately
0.25 mm per 1/4 rotation.
3 Stop turning the adjuster when a suitable
position is reached for a nailing test.
4 Connect the air hose.
ALWAYS WEAR EYE PROTECTOR.
Perform a nailing test.
5 DISCONNECT AIR HOSE FROM NAILER.
6 Choose a suitable position for the
adjuster.
Second Row
First Row
Outlet
Proper Shingle
Exposure
Disconnect
air hose
Hex. Socket
Hd. Bolt
4
1
3
Shingle Guide
Adjuster
Disconnect
air hose
15
Too Deep
Flush
Turn Adjuster
2
Too Shallow Flush
Turn Adjuster
2
01Eng_NV45AB2_US 2/26/09, 11:4619