2-6
SERVICING
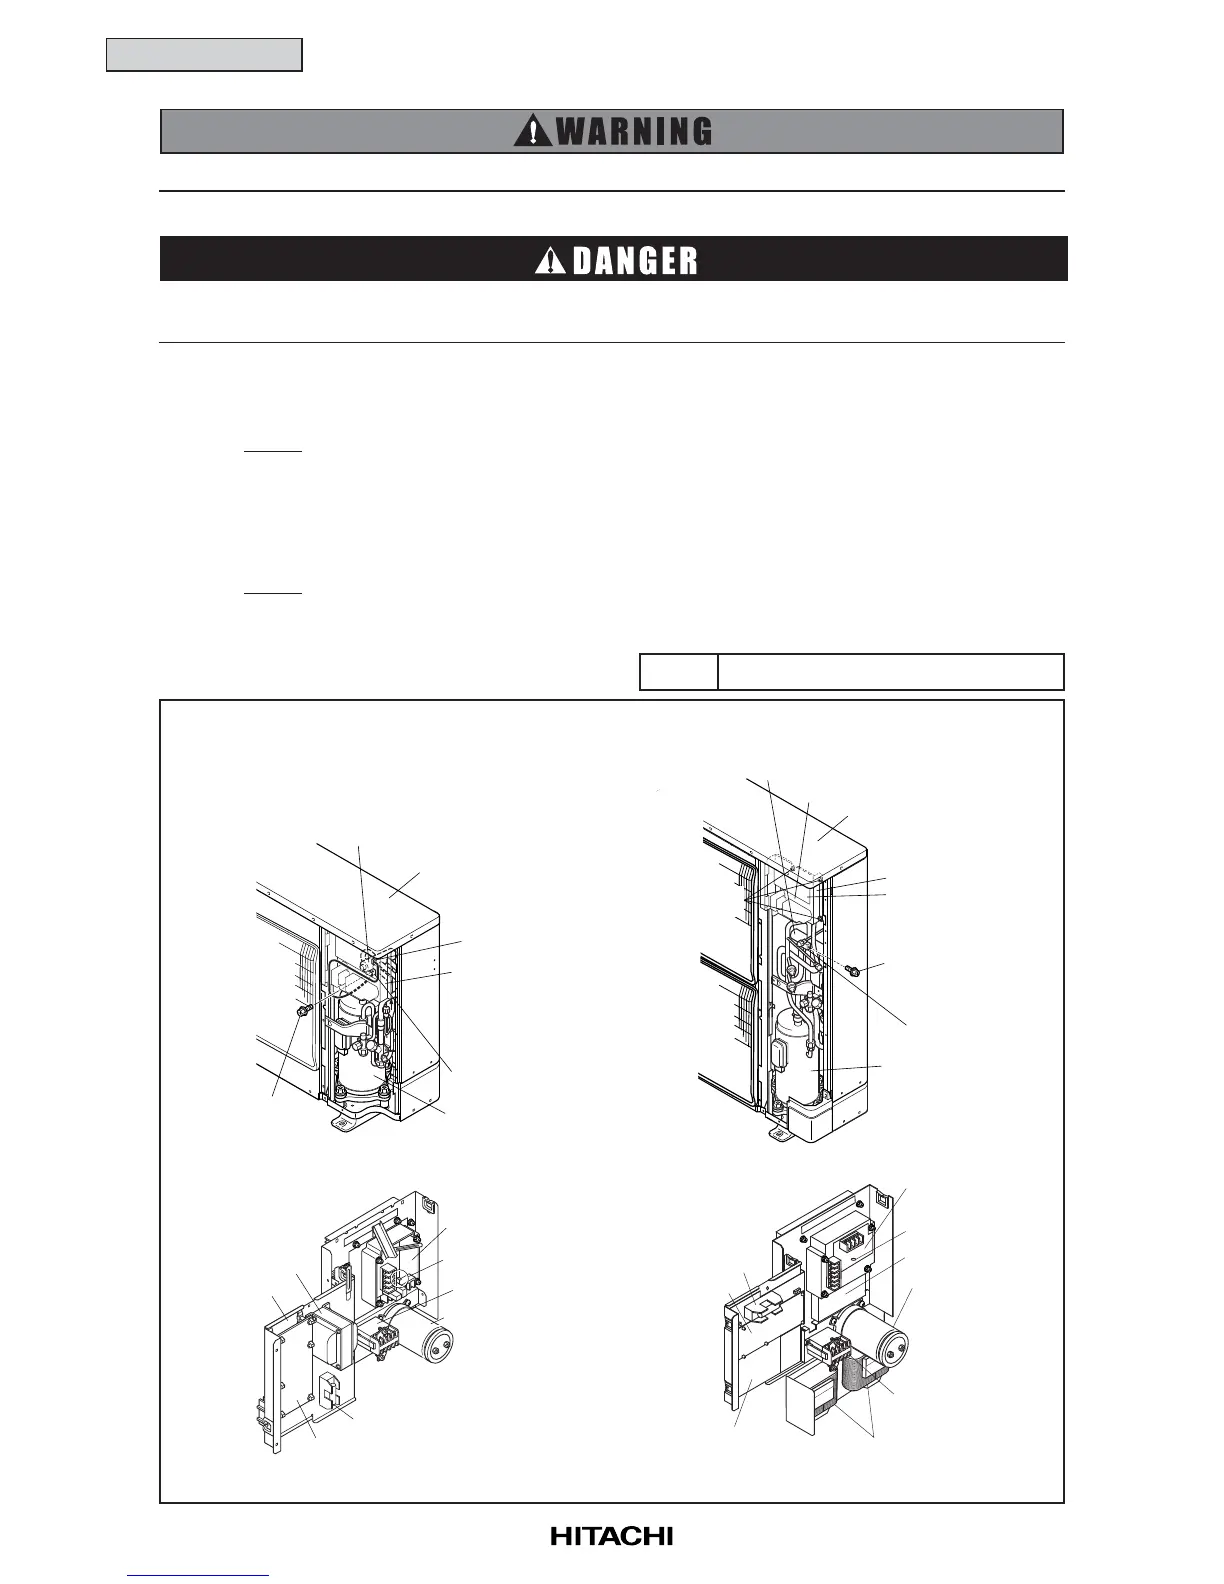
(1) Remove the service cover according to the item 2.1.1 “Removing Service Cover”.
(2) RAS-3HVRG and 4HVRG
(a) Remove three (3) screws fixing the power plate and turn the one toward the front side.
NOTE:
Check to ensure that LED201 (Red) is OFF when turning the power plate.
(b) Disconnect the PCN6 on the PCB1 of the electrical box.
(c) Remove the coil for the reversing valve after removing the fixing screw (1 piece).
RAS-5HVRG
(a) Remove three (3) screws fixing the power plate and turn the one toward the front side.
NOTE:
Check to ensure that LED201 (Red) is OFF when turning the power plate.
(b) Disconnect the PCN6 connector on the PCB1 of the electrical box.
(c) Remove the coil for the reversing valve after
removing the fixing screw (1 piece).
2.1.7 Removing Coil for Reversing Valve
TURN OFF all power source switches.
Phillips ScrewdriverTool
RAS-3HVRG and 4HVRG RAS-5HVRG
Do not touch the electrical parts when LED201 (Red) on the ISPM is lit to prevent from an
electrical shock.
Fixing Screw for
Reversing Valve Coil
Reversing Valve Coil
Upper Cover
Compressor
Remove
Screws
Reversing Valve
Electrical Box
PCN6
Reactor
ISPM
Power Plate
Noise Filter
Fuse
Capacitor
Magnetic
Contactor
LED201
(Red)
In Case of 3HP and 4HP
In Case of 5HP
ISPM
Capacitor
Power Plate
Fuse
LED201 (Red)
Reactor
Noise Filter
Magnetic Contactor
Act Module
Fixing Screw for
Reversing Valve Coil
Reversing Valve Coil
Upper Cover
P-Attaching
Plate
Compressor
Remove
Screws
Reversing Valve
Electrical Box
PCN6

 Loading...


