EasyManuals Logo
Home>Hobart>Welding System>Handler 210

Hobart Handler 210 User Manual

Hobart Handler 210
56 pages
To Next Page IconTo Next Page
To Previous Page IconTo Previous Page
Page #18 background imageLoading...
Page #18 background image
OM-227 978 Page 14
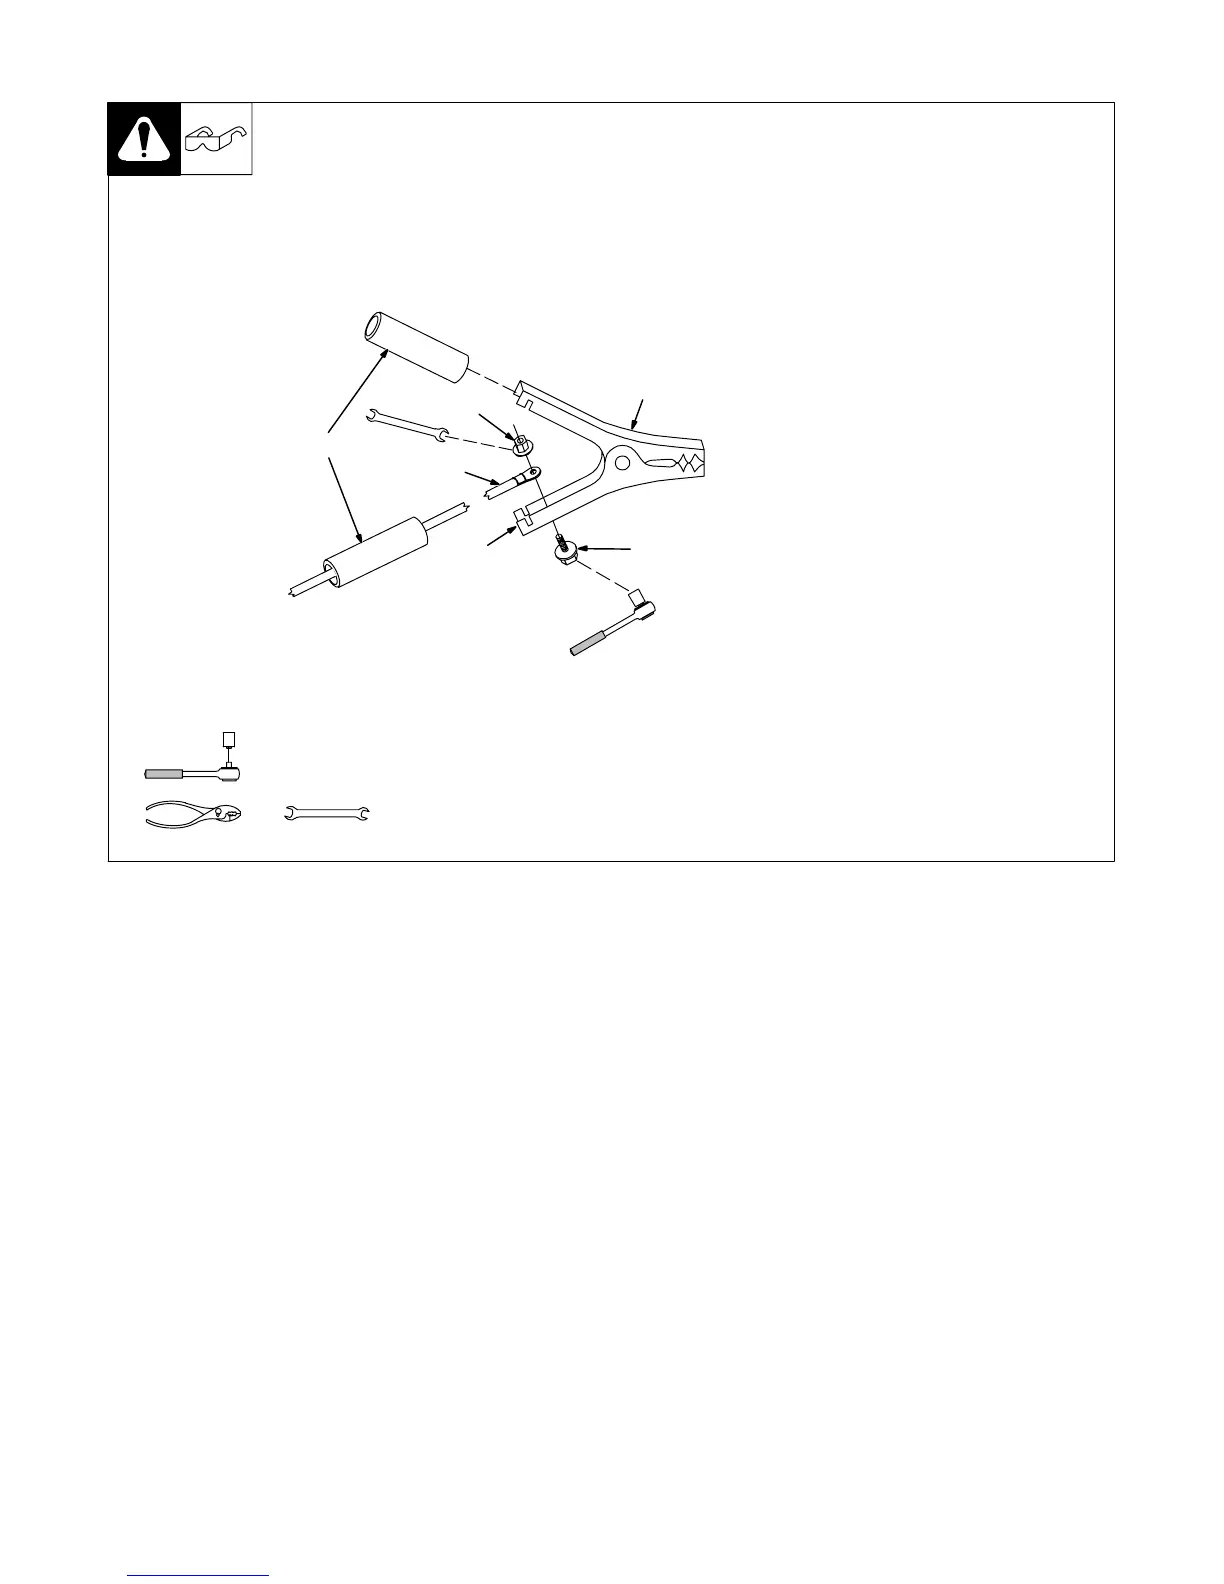
5-3. Installing Work Clamp
1 Nut
2 Work Cable From Unit
3 Work Clamp
4 Screw
5 Work Clamp Tabs
Bend tabs around work cable.
6 Insulating Sleeves
Slide one insulating sleeve over
work cable before connecting to
clamp.
Slide insulating sleeves over
handles.
802 456-A
. Connection hardware must be tightened with proper tools. Do not just
hand tighten hardware. A loose electrical connection will cause poor
weld performance and excessive heating of the work clamp.
Tools Needed:
7/16 in.
7/16 in.
1
2
3
4
5
6

Table of Contents

Questions and Answers:

Question and Answer IconNeed help?

Do you have a question about the Hobart Handler 210 and is the answer not in the manual?

Hobart Handler 210 Specifications

General IconGeneral
BrandHobart
ModelHandler 210
CategoryWelding System
LanguageEnglish

Related product manuals