EasyManua.ls Logo

Hobart Handler 175 - User Manual

Hobart Handler 175
48 pages
Print Icon
To Next Page IconTo Next Page
Loading...
Processes
OM-944 196 639C
October 2001
Handler 135 / 175
And H-10 Gun
Arc Welding Power Source And
Wire Feeder
Description
MIG (GMAW) Welding
Flux Cored (FCAW) Welding

Table of Contents

Questions and Answers

  • E
    Elizabeth RodriguezAug 8, 2025
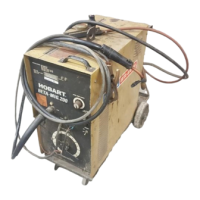
    What to do if Hobart Handler 175 Welding System has no weld output, wire does not feed, but the fan motor continues to run?
    • R
      Rebecca WilliamsAug 8, 2025
      If your Hobart Welding System exhibits no weld output and the wire doesn't feed, but the fan motor is still running, it could be due to overheating. Allow the fan to run with the gun trigger switch off; the thermostat will close once the unit has cooled down. Also, make sure the gun trigger leads are securely connected.
  • S
    sharon99Aug 14, 2025
    Why does electrode wire feeding stop during welding with my Hobart Handler 175?
    • A
      Ashley RogersAug 14, 2025
      If the electrode wire feeding stops during welding with your Hobart Welding System, try the following: * Straighten the gun cable and replace any damaged parts. * Adjust the drive roll pressure. * Change to the correct drive roll groove. * Readjust the hub tension. * Replace the contact tip if it's blocked. * Clean or replace the wire inlet guide or liner if it's dirty or plugged. * Replace the drive roll or pressure bearing if they're worn or slipping. * Secure the gun trigger leads or repair them. * Check and clear any restrictions at the drive assembly and liner. * Release the gun trigger and allow the gun and motor protection circuitry to reset. * Have a Factory Authorized Service Agent check the drive motor.
  • D
    Daniel MartinAug 20, 2025
    How to fix Hobart Welding System with no weld output, wire feed, or fan?
    • C
      Carla NewmanAug 20, 2025
      To fix a Hobart Welding System with no weld output, wire feed, or fan, start by ensuring the power cord is securely plugged into the receptacle. Next, replace the building line fuse or reset the circuit breaker if it's open. Also, make sure the power switch is in the On position and reset the welding power source circuit breaker if it's open.
  • B
    bernard95Aug 26, 2025
    What to do if Hobart Welding System has no weld output and wire feeds?
    • S
      Sarah TaylorAug 27, 2025
      If your Hobart Welding System has no weld output but the wire feeds, ensure the work clamp is connected to establish good metal-to-metal contact. You may also need to replace the contact tip. Also, check for proper polarity connections and make sure the thumbscrew securing the gun end to the feed head adapter is tight.
  • C
    Carrie EllisAug 31, 2025
    How to troubleshoot low weld output on Hobart Handler 175 Welding System?
    • M
      Michael FieldsAug 31, 2025
      To troubleshoot low weld output on your Hobart Welding System, first, connect the unit to the correct input voltage or check for low line voltage. Then, place the voltage switch in the desired position.

Summary

Hobart Handler 135;175 Owners Manual

Welder Overview and Processes

Introduces the welder model and lists supported welding processes.

Welcome and Product Information

Introduction to Your Hobart Welder

Welcome message and overview of the owner's manual.

Hobart 5;3;1 Warranty and Resources

Details of the 5/3/1 warranty and available support resources.

Safety Precautions for Operation

Symbol Usage

Explanation of safety symbols used in the manual.

Arc Welding Hazards

Details potential hazards associated with arc welding.

Installation, Operation, and Maintenance Safety

Safety considerations for installing, operating, and maintaining the equipment.

Principal Safety Standards

Lists key safety standards relevant to welding equipment.

EMF Information

Guidance on electromagnetic field exposure during welding.

Technical Specifications

Unit Specifications (115;230 VAC)

Detailed specifications for 115V and 230V models.

Duty Cycle and Overheating

Information on unit duty cycles and managing overheating.

Volt-Ampere Curves

Output voltage and amperage capabilities based on load.

Equipment Installation Guide

Installing Welding Gun

Steps for attaching the welding gun.

Installing Work Clamp

Steps for attaching the work clamp.

Process;Polarity Table

Table outlining process and polarity settings.

Changing Polarity

Instructions for changing the welding polarity.

Installing Gas Supply

Procedures for connecting the shielding gas supply.

Connecting Input Power (115 VAC)

How to connect the 115V model to power.

Connecting Input Power (230 VAC)

How to connect the 230V model to power.

Electrical Service Guide (230 VAC)

Electrical service requirements for the 230V model.

Installing Wire Spool and Hub Tension

Steps for installing the wire spool and adjusting hub tension.

Threading Welding Wire

Guide for feeding welding wire through the machine.

Operating the Welder

Controls Overview

Explanation of the welder's control panel and functions.

Weld Parameters (115 VAC)

Recommended settings for various welding tasks on the 115V model.

Weld Parameters (230 VAC)

Recommended settings for various welding tasks on the 230V model.

Maintenance and Problem Solving

Routine Maintenance

Regular tasks to keep the welder in good condition.

Overload Protection

Information on the unit's overload protection system.

Drive Motor Protection

Explanation of the drive motor protection circuit.

Changing Drive Roll or Wire Inlet Guide

Procedures for replacing drive rolls or inlet guides.

Replacing Gun Contact Tip

Steps for replacing the gun contact tip.

Cleaning or Replacing Gun Liner

Procedures for cleaning or replacing the gun liner.

Replacing Switch or Head Tube

Instructions for replacing gun switches or head tubes.

Troubleshooting Table

Solutions for common welding and machine problems.

Electrical Schematics

115 VAC Model Circuit Diagram

Wiring diagram for the 115V model.

230 VAC Model Circuit Diagram

Wiring diagram for the 230V model.

MIG Welding Techniques

Typical MIG Process Connections

Typical setup for MIG welding processes.

Typical MIG Process Control Settings

Recommended control settings for MIG welding.

Holding and Positioning Welding Gun

Proper techniques for holding and positioning the welding gun.

Conditions Affecting Weld Bead Shape

Factors influencing the shape and quality of weld beads.

Gun Movement During Welding

Guidance on proper gun movement techniques.

Poor Weld Bead Characteristics

Identification and causes of poor weld bead quality.

Good Weld Bead Characteristics

Identification and characteristics of good weld beads.

Troubleshooting Excessive Spatter

Solutions for excessive spatter during welding.

Troubleshooting Porosity

Solutions for porosity issues in weld metal.

Troubleshooting Excessive Penetration

Solutions for excessive weld metal penetration.

Troubleshooting Lack Of Penetration

Solutions for insufficient weld metal penetration.

Troubleshooting Incomplete Fusion

Solutions for incomplete fusion in welds.

Troubleshooting Burn-Through

Solutions for burn-through during welding.

Troubleshooting Waviness Of Bead

Solutions for waviness in weld beads.

Troubleshooting Distortion

Solutions for distortion caused by welding.

Common MIG Shielding Gases

Common shielding gases and their applications.

Spare Parts List

Main Assembly Parts

List of parts for the main welding unit assembly.

H-10 Gun Parts List

List of parts for the H-10 welding gun.

Optional Drive Rolls and Accessories

Details on optional drive rolls and other accessories.

Hobart Welder Warranty Policy

Limited Warranty Terms and Duration

Specific warranty coverage periods for components.

Warranty Exclusions and Limitations

Conditions under which the warranty is voided or does not apply.

Owner Information and Resources

Owners Record Log

Section for personal record-keeping of equipment details.

Available Support and Resources

Contact information for distributors, technical assistance, and literature.

Hobart Handler 175 Specifications

General IconGeneral
Input Voltage230 V
Duty Cycle30% at 130 A
Welding ProcessesMIG (GMAW), Flux-Cored (FCAW)
Input Current20 A
Input PhaseSingle-phase
Input Frequency60 Hz
Welding Amperage Range25 - 175 A
Wire Feed Speed Range40 - 700 IPM
Wire Size Capacity4 or 8 inch spools
Output Current Range30-175A
Wire Size Range0.023-0.045 in

Related product manuals