HOLUX GPSlim240 Wireless Bluetooth GPS Receiver User Guide
10
5. Getting Started
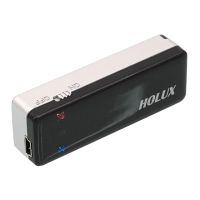
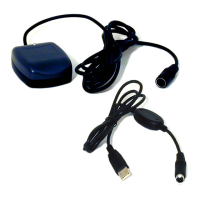
Step 1. Battery Charging
Before using the GPS receiver for the first time charge the battery until the
battery LED indicator goes out. This indicates that the battery is fully charged.
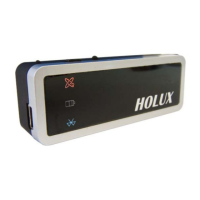
Connect Power Supply Connect the power cable to the power socket of
the Mini USB
↓
Charge Battery
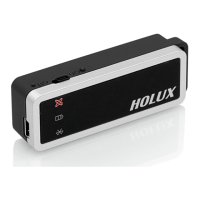
Battery indicators:
Low Battery ------------------------------------- Red LED
Charging ----------------------------------------- Green LED
Charging Complete/ Battery Full----------- LED unlit
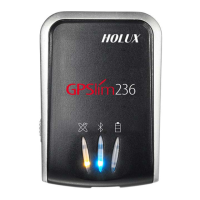
Step 2. Power Up
Bluetooth Indicators –
Fixing A Position -
For strong signal strength, activate the device in an unobstructed space.
↓ ↓
Positioning --- Power on/ off ---
↓
Positioning Completed ---
Turn the device on
Has PDA or Notebook
found compatible
Bluetooth device?
Yes
No
Processing……
Blue LED flashes
(once a second)
Blue LED flashes
(once a second)
Terminate data
transfer?
Yes
Transferring……
Blue LED flashes
(once every 3
seconds)
Turn on Bluetooth in
device?
Yes
No
No
Orange LED
is on
Turn the device on
Orange LED will
flash
Turn the device off
Orange LED
will go out
Note: This power cable is strictly for
battery charging. It cannot be used
for data transfer.
Note:
1) To make the connection,
some PDAs require turning
the Bluetooth feature OFF
and then ON.
2) For use on Notebooks
with Bluetooth feature.
Mini USB power socket
Yes