24
Start-up
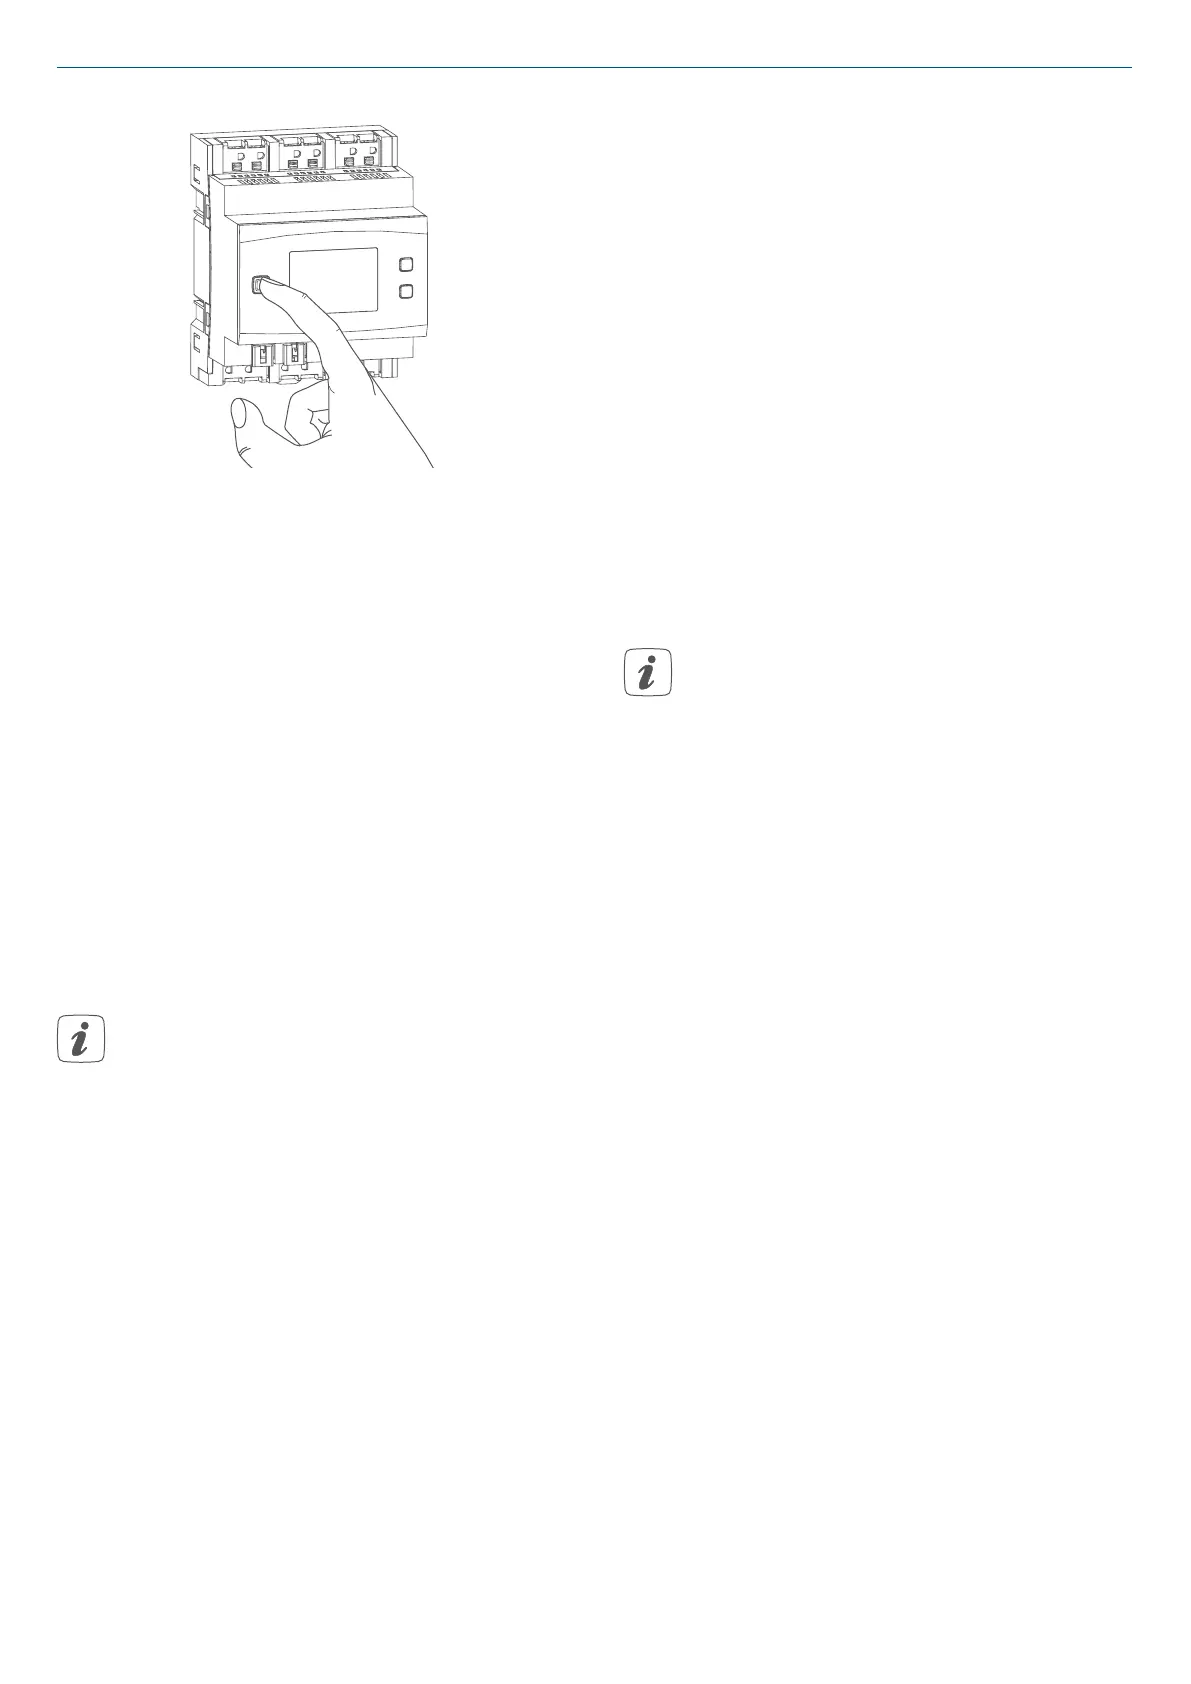
Figure 9
• After a short time, the newly con-
nected device appears in the inbox
of your software interface.
Newly connected devices and the
corresponding channels are ready for
operation and configuration only after
they have been configured in the in-
box. You will find further information
in the HomematicIP Wired Installation
Guide, available for download at
www.eQ-3.com.
For operation without Internet
connection, please select the
option “Pairing of HomematicIP
device without Internet connec-
tion”. Please enter the SGTIN and
key of the device into the corres-
ponding fields. You will find the
SGTIN and the key on the supplied
sticker. Please keep the sticker in
safe place.
6.4.2 Connecting to the
HomematicIP cloud via Wired
Access Point
If you want to control your
HomematicIP Wired devices flexibly
via smartphone app, they can be con-
nected to the HomematicIP cloud. To
do this, please proceed as follows:
• Open the HomematicIP app on
your smartphone.
• Connect the HomematicIP Wired
Access Point via the smartphone
app to the HomematicIP cloud,
as described in the corresponding
user manual
• Select the menu item “Pairing de-
vice”.
• After connecting to the bus line, the
pairing mode of the blind actuator
remains activated for 3 minutes.
You can manually start the pairing
mode for another 3 minutes by
pressing the system button (A)
briefly (see figure 9).
• Your device will automatically ap-
pear in the HomematicIP app.
• To confirm, please enter the last
four digits of the device number
(SGTIN) in your app or scan the QR
code. Therefore, please see the
sticker supplied or attached to the
device.
• Please wait until pairing is comple-
ted.
• If connecting was successful, the
LED (A) lights up green. The device
is now ready for use.
• If the LED lights up red, please try
again.
• Select the desired solution for your
device.
• In the app, give the device a name
and allocate it to a room.
 Loading...