CONFIDENTIAL
Website: http://www.honeywellaircoolers.com
13
2.4 How To Change Main Motor
Remove the rear panel follow the procedure 2.1.1.
Remove the top panel follow the procedure 2.3.1.
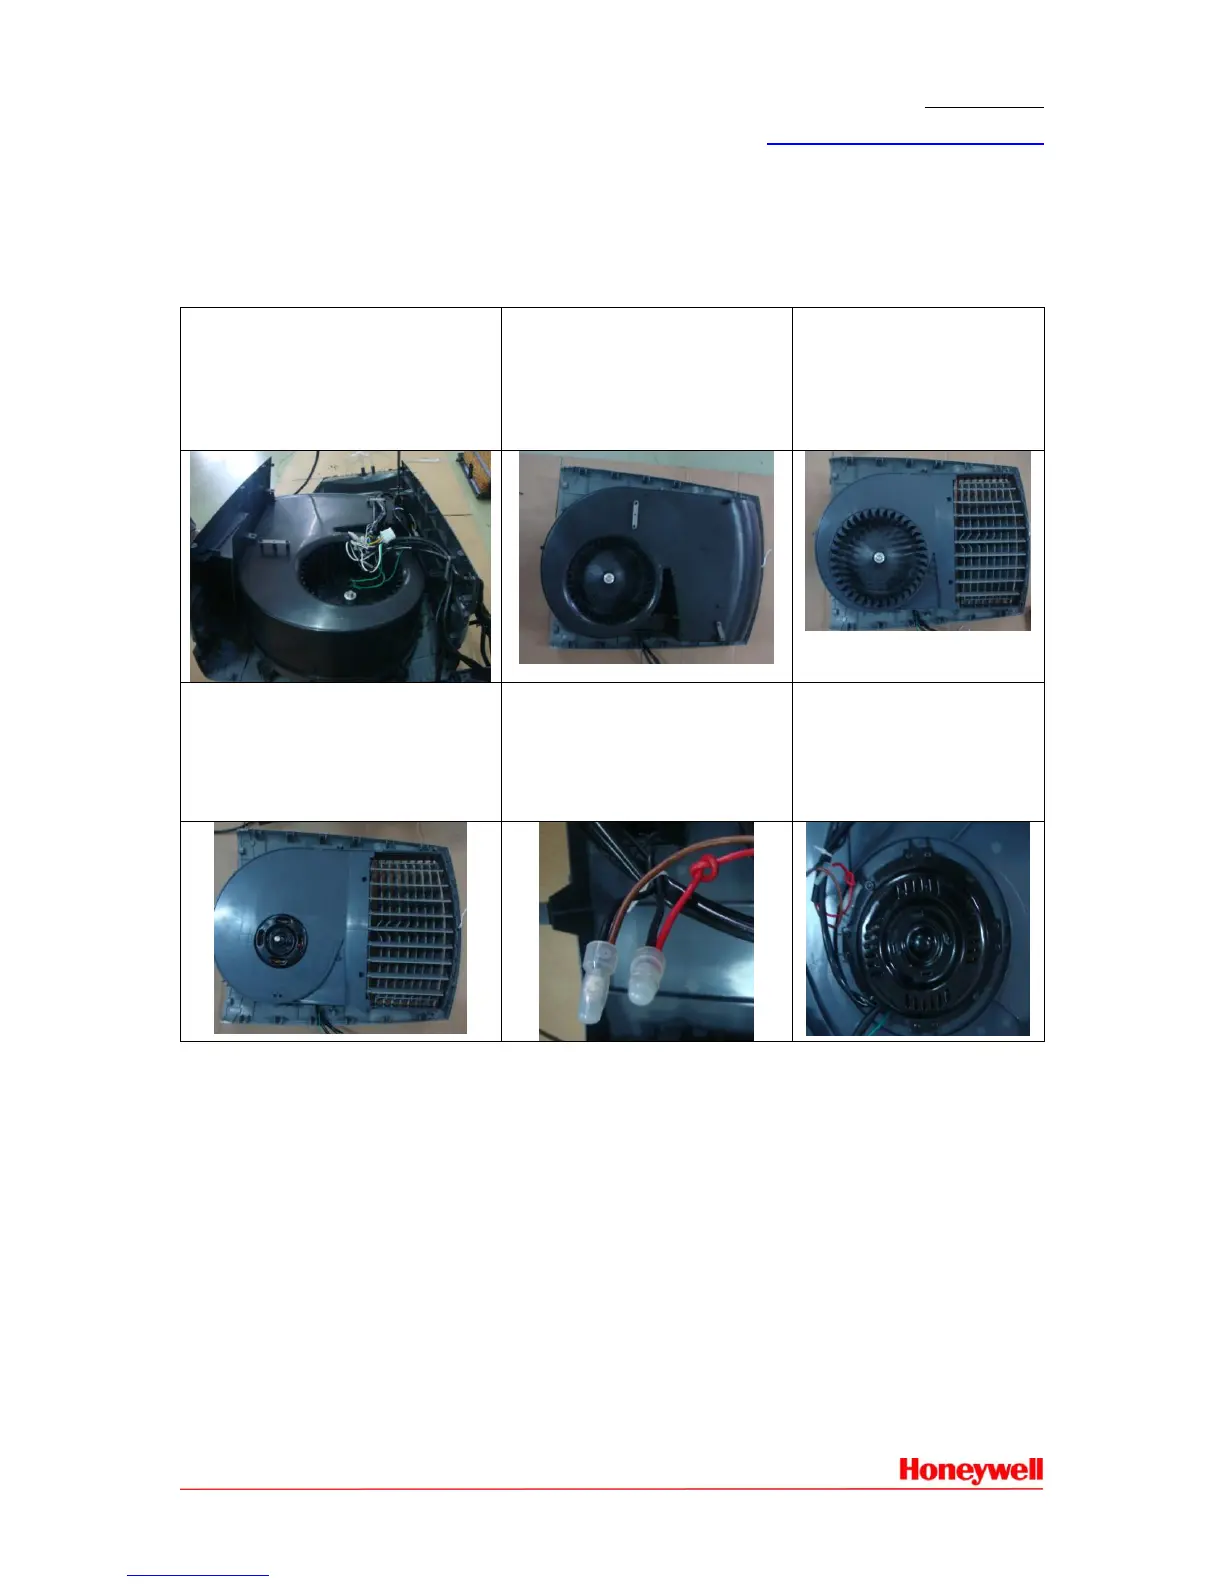
2.4.1 Blower Housing
Use screw driver to remove 2
galvanized screw with plate
head (ST3.5*15) and (ST3.5*10)
to remove left & right panel
and blower housing.
Use screw driver to remove
9 galvanized screw with
plate head (ST3.5*15) to
remove the blower housing.
Use hex nut spanner
(S=3) to remove retainer
nut of the blower.
Use screw driver to remove 7
and 4 galvanized screw with
plate head (ST3.5*15) and
(ST3.5*10) to remove left &
right panel and blower
housing.
Remove the wiring cap
(below picture shown).
Note: connection is
between capacitor and the
motor.
Use screw driver to
remove 8 galvanized
screw with plate head
(ST3.5*15) to remove
the motor.
2.4.2 Main Motor Wiring Connection
Main motor wiring connection refers to part 4.2 Wiring Color Description.
 Loading...