PW-7000 Two-Reader Module Installation Guide, Document 800-25676V1 19
Relays 1 and 3 are dry-circuit level signal relays typically used to indicate the sta-
tus of the door lock.
Relays 4 and 5 are general-purpose relay outputs and are not available when the
board is rack-mounted.
Use sufficiently large gauge of wires for the load current to avoid voltage loss.
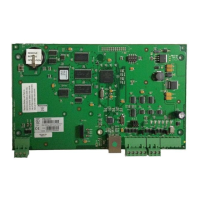
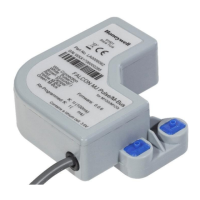
Mounting Options
This board can be mounted on-edge in the rack-mount enclosure provided by
Honeywell or it can be mounted flat against any surface using standoffs under the
mounting holes provided in each of the four corners of this board.
When this board is rack-mounted, the connectors for two general-purpose inputs,
two general-purpose outputs, and two dedicated inputs are not accessible and
should not be used.
The most common reason for mounting a board flat is that it is being installed
remotely to be located near the door(s) being monitored. In this case it will be
mounted in its own enclosure creating the need to monitor cabinet tamper and
power fault detection inputs. The two additional general-purpose inputs and out-
puts provided allow for the monitoring of extra sensors and control of local horns
or other equipment.
Installing the Module
Step 1. Set Jumpers and DIP switches.
Step 2. Mount this board in the appropriate enclosure - If this board is being
mounted in a rack, the component side of the board is to your right as you
face the rack.
Step 3. Connect the communications and power supply to the circuit boards with
the Power Supply Harness.
Step 4. Connect wiring to the reader interfaces as appropriate.
Step 5. Connect wiring to input sensors or install jumper wire as appropriate.
Step 6. Connect relay output wiring as appropriate.
Step 7. Connect communications wiring to the Intelligent Controller.
Step 8. Recheck wiring for correct connections and continuity.
Step 9. When all boards have been installed, connect the power supply cord for
proper connections and power.
Step 10. Set up the panel controls using the host software.
Warning: DO NOT CONNECT THE POWER SUPPLY TO THE AC SOCKET
UNTIL ALL WIRING HAS BEEN INSTALLED AND RECHECKED.
 Loading...