Revision 4 STT750 Temperature Transmitter User’s Manual Page 3
1.3. STT750 SmartLine Transmitter Nameplate
The Transmitter nameplate mounted on the bottom of the electronics housing (see Figure 1) lists its
model number, physical configuration, electronics options, accessories, certifications, and
manufacturing specialties. Figure 3 is an example of a typical Temperature Transmitter nameplate.
The model number format consists of a Key Number with several table selections.
Figure 3 –Typical STT750 Nameplate
You can readily identify the series and basic Transmitter type from the key number. The letter in the
third digit represents one of these basic transmitter types:
For a complete selection breakdown, refer to the appropriate Specification and Model Selection
Guide provided as a separate document.
1.4. Safety Certification Information
An “approvals” nameplate is located on the bottom of the Electronics Assembly; see Figure 1for
exact location. The approvals nameplate contains information and service marks that disclose the
Transmitter compliance information. Refer to Appendix A of this document for safety certification
requirements and details.
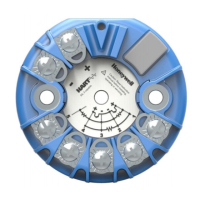
1.5. Transmitter Adjustments
Span adjustments are possible in STT750 SmartLine Temperature Transmitters with the optional
three-button assembly located at the top of the Electronic Housing (see Figure 2).
The user can also use the Honeywell MC Toolkit or other third-party hand-held to make any
adjustments to an STT750 SmartLine Temperature Transmitter.

 Loading...