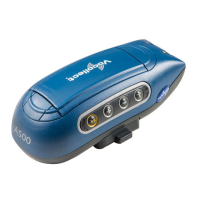
| Talkman A500 | 83
The A500/T5 battery is a high-performance model. Unlike the T2 series batteries, which have contact points that are
flush with the case, the A500/T5 battery features a pin-out design.
CAUTION: A500/T5 series batteries and other Honeywell batteries are not interchangeable. If you try to
insert the wrong battery into a device, you may damage the device and the battery.
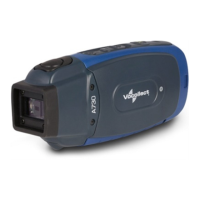
The A500 and T5 devices use a Honeywell Combination Charger that charges the high-performance battery while still
seated in a device or when removed from the device.
A500/T5 High-Performance Batteries Specifications
The A500 and T5-Series devices use a standard battery.
Standard Battery Weight 4.7 ounces (133.24g)
Electrical Specifications
• Cells: The high capacity battery pack uses two lithium ion cells.
• Voltage = 3.7V
• Watt Hours = 19WHr
• Protection circuit characteristics: The pack contains a protection circuit that prevents over and under voltage
conditions on the cells and protects the pack from damage as a result of a short circuit between the positive and
negative terminals of the battery.
• The battery pack contains custom electronics that provide performance, temperature, and pack identification to the
device. This information is made available to voice management software.
• Battery Charging: The battery pack must be charged only in a Honeywell designated charger.
Mechanical and Environmental Specifications
• Drop-test specifications: The high capacity battery meets the MIL STD 810F specification for shock and transient
drop criteria.
• Environmental specifications: The battery pack halves are sonically welded together to protect the internals from
water and dust. The battery functions properly in the following conditions:
Temperature: -40°C to 55°C (-40°F to 131°F)
Humidity: 95% non-condensing
Rain/dust: IP67
Battery Notifications
Battery warnings for a Talkman battery occur at the following levels:
• First warning = 3,45 mV
• Critical warning = 3,350 mV
Charging an A500 or T5 Battery in a Device
1.
Remove the device from the belt clip.
2.
Disconnect any other peripherals.
3.
Insert the device into an open slot on the charger, pressing down and then back until the device clicks into place.
4.
After the device has been placed into the charger, make sure that the LED indicator on the device turns on and
begins to blink green.
a) If the LED does not turn on after 30 seconds, remove the device from the charger slot and then place it into the
slot again.
b) If the LED indicator still does not turn on, try another charger slot.