13 - 2
Replacing an Interface Cable
1. Turn the power to the host system OFF.
2. Disconnect the scanner’s cable from the terminal or computer.
3. Rotate the two screws counter clockwise to loosen the screws.
4. Gently pull the connector.
5. Replace with the new cable.
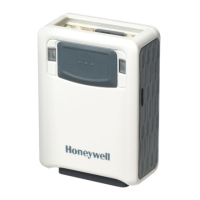
Insert the connector into the socket on the 3330. Rotate the two screws
clockwise to tighten.
Troubleshooting a Corded Scanner
The scanner automatically performs self-tests whenever you turn it on. If your scan-
ner is not functioning properly, review the following Troubleshooting Guide to try to
isolate the problem.
Is the power on? Is the aimer on?
If the aimer isn’t illuminated, check that:
• The cable is connected properly.
• The host system power is on (if external power isn’t used).
• The button works.
Is the scanner having trouble reading your symbols?
If the scanner isn’t reading symbols well, check that the symbols:
• Aren’t smeared, rough, scratched, or exhibiting voids.
• Aren’t coated with frost or water droplets on the surface.
• Are enabled in the scanner or in the decoder to which the scanner connects.
Is the bar code displayed but not entered?
The bar code is displayed on the host device correctly, but you still have to press a key to enter it (the Enter/Return key or
the Tab key, for example).
• You need to program a suffix. Programming a suffix enables the scanner to output the bar code data plus the key you
need (such as “CR”) to enter the data into your application. Refer to Prefix/Suffix Overview on page 4-1 for further
information..
The scanner won’t read your bar code at all.
1. Scan the sample bar codes in the back of this manual. If the scanner reads the sample bar codes, check that your bar
code is readable.
Verify that your bar code symbology is enabled (see Chapter 7).
2. If the scanner still can’t read the sample bar codes, scan All Symbologies On, page 7-1.
If you aren’t sure what programming options have been set in the scanner, or if you want the factory default settings
restored, refer to Activate Custom Defaults on page 1-4.

 Loading...
