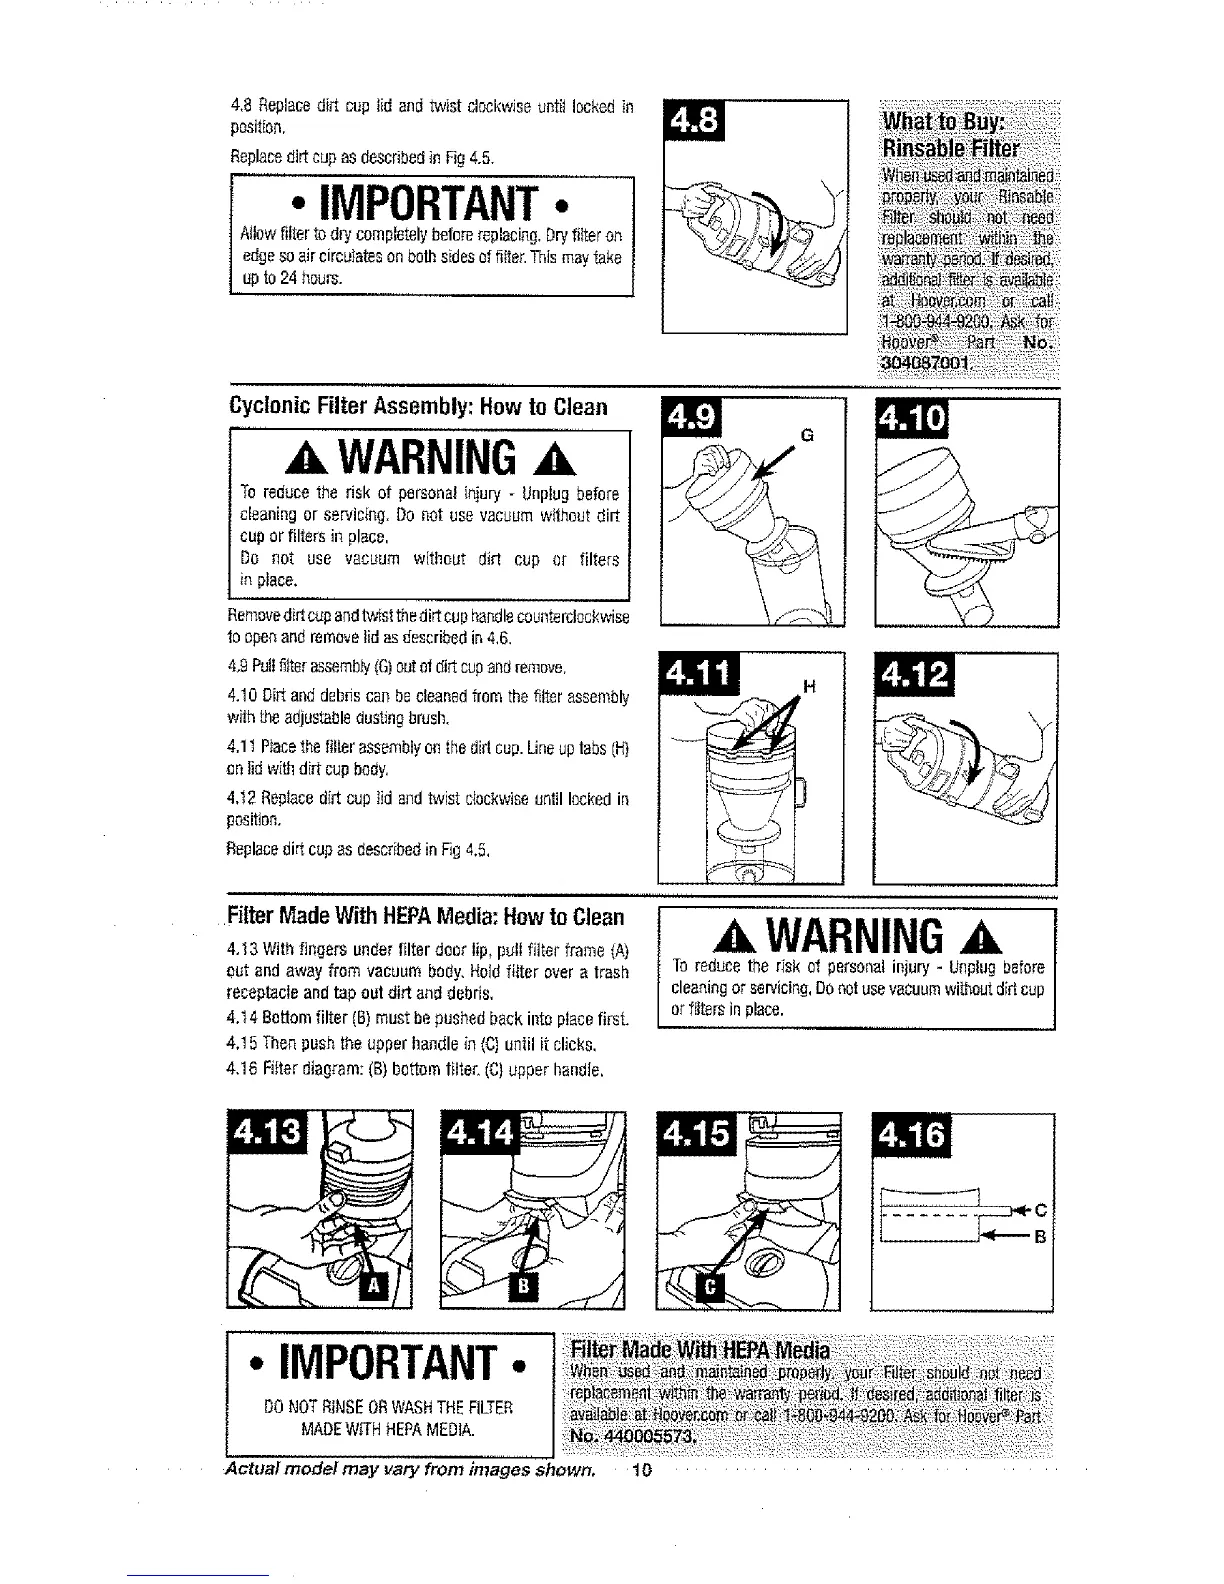
4,8 Replacedid cup lid and twist clockwise until locked in
position.
Replacedirt cup asdescribedin Fig4,5.
• IMPORTANT•
Ailowfilter to dry completely beforereplacing,Dryfilter on
edgesoair circulateson both sidesof filter.This maytake
up to24 hours.
CyclonicFilterAssembly:HowtoClean
WARNING,&
To reduce the risk of persona[ injury - Unplug before
c[eanthgor servicing. Do not use vacuum without di_
cupor filters in place,
Do not use vacuum without dirt cup or filters
in piace.
Removedirt cupandtwist thedirtcup handlecounterclockwim
to oper_and removelid asdescribed in 4,6.
4,9 Pullfi_terassemb,B/(G)outet dirt cupandremove,
4,10 Dirt and debrmcan becleaned from the filter assembly
with the adjustabledusting brdsh,
4.1t Placethe filler assemblyon thedirI cup.Lineup tabs[H)
_ri tidwith dirt cup body,
4,t2 Replacedirt cup tid and twist clockwiseuntil locked in
position,
Replacedirt cup as describedin Fig 4.5,
G
FilterMadeWithHEPAMedia:HowtoClean
4,13 With fingers under filter door lip, pull filter frame (A)
gut and away from vacuum body, Reid filter over a trash
receptacle and tap out dirt and debris,
4,14 Bottomfilter (g) must be pushed back into placefirst.
4.15 Then pushthe upper handle in (C] until it clicks,
4,16 Fitter diagram: (B) bottom filter. (C}upper handJe,
A WARNING
To reduce the risk of persenat injury - Unplug before
cleaningor servicing,DOnot usevacuum wi[houtdidcup
orfilters in place.
i
c
B
• IMPORTANT•
DONOTRINSEORWASHTHE FILTER :I,_Q_!_ _:_ii_:l:,_:::_i_aii _S()_920_:_!i_il;_q-_,_:i_a_:::i
MADEWITHHEPAMEDIA. _8_3i::i', : i::i :_:::ii:i: :i:!i: :i:i:i__:i:i_i_,!!:II::: '! ::_:i_: :,i::::::i::
Actual model may vary from images shown, 10
 Loading...