EasyManuals Logo

HP 17 Series User Manual

HP 17 Series
104 pages
To Next Page IconTo Next Page
To Previous Page IconTo Previous Page
Page #44 background imageLoading...
Page #44 background image
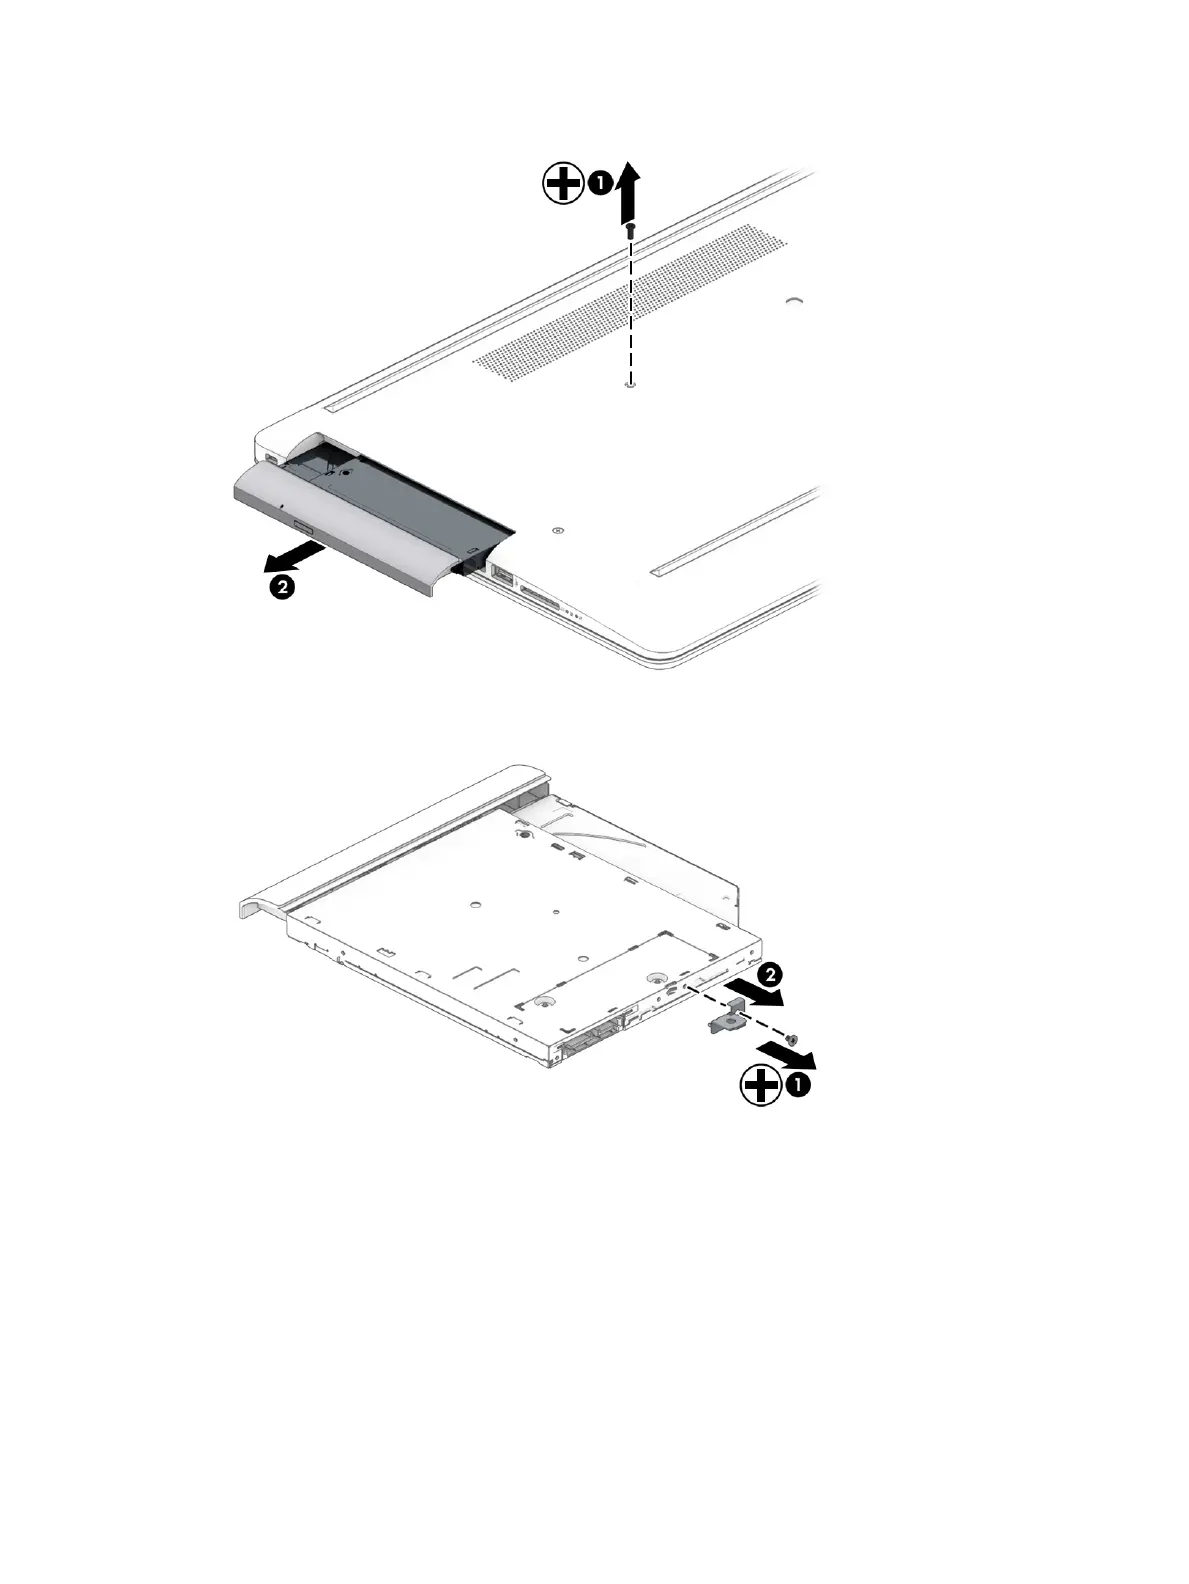
2. Slide the optical drive out of the computer (2).
3. If it necessary to remove the bracket from the rear of the optical drive, remove the Phillips M2.0 × 3.0
screw (1), and the remove the bracket from the drive (2).
4. If it necessary to remove the bezel from the front of the optical drive:
a. Insert a paper clip into the release hole on the front of the bezel (1). The left side of the bezel
rotates outward (2).
b. Press the tab to release the bezel from the drive (3).
c. Rotate the side of the bezel (4), and then remove it (5).
34 Chapter 5 Removal and replacement procedures for Customer Self-Repair parts

Table of Contents

Questions and Answers:

Question and Answer IconNeed help?

Do you have a question about the HP 17 Series and is the answer not in the manual?

HP 17 Series Specifications

General IconGeneral
Display Size17.3 inches
Operating SystemWindows 10 or Windows 11
Battery LifeVaries by model and usage
Battery3-cell or 4-cell Li-ion
PortsUSB Type-A, USB Type-C, HDMI, SD card reader, headphone/microphone combo (varies by model)
WirelessWi-Fi 802.11ac or 802.11ax, Bluetooth

Related product manuals