Section
V
Check Point
b. Adjust rear panel OHMS ADS (R36) for meter
indication
of
aD
(corresponding to
1.0
on upper
scale).
Voltage
525.
TROUBLESHOOTING.
5-26. When the Model 412A/AR operates improperly, first
adjust and calibrate it according
to
the procedures outlined
in Paragraph
5-15.
If
calibration
is
not possible, procecd
with the troubleshooting steps.
CONTAMINATION OR
FINGERPRINTS ON THE RANGE
SWITCH
OR
THE COMPONENTS
MOUNTED
ON
THE RANGE SWITCH
MAY REDUCE ACCURACY OF
INSTRUMENT.
5-27.
FRONT
PANEL INDICATIONS.
5-28.
If the malfunction is common
to
all
ranges and
functions, the trouble may be in the amplifier or power
supply areas. If the instrument operates improperly on only
one range
or
function, the trouble
is
probably in the
switching section
or
input cables.
5-29.
POWER SUPPLY
AND
AMPLIFIER CHECKS.
5-30.
Check power supply voltages at points listed in Table
5-4.
Voltages are measured with respect
to
circuit common
(A).
Figure
7-2
shows the location
of
components.
53
1.
Tubes are
a
coinmon source
of
trouble and are most
easily checked by substitution. Following replacement
of
a
particular tube, iiiake the adjustrneiits indicated
in
Table
5-5.
5-32.
Additional
checks
of
amplifier operation niay be
made
by
cliecking
voltages shown
on
the amplifier section
of
tlic
sclrwutic diagram.
Be
sure
to
observe conditions
in
Note
I1
in
Paragraph
7-2.
Allow
3
tolerance
of
210%.
5-6
Model
4
12A
Table
5-5.
Tube Iteplacement
Tube Iteplaced
VI01 (12AX7) Amplifier
V102 (6AU8) Amplifier/
Cathode Follower
V103 (6x4) Rectifier
V104 (OA2) Regulator
VI05 (OB2) Regulator
5-33.
MODULATOR
CHECK.
Adjustment
Huni
Bal.
Par.
5-20
Gain Cal. Par.
5-23
Bias
Adj.
Par.
5-21
Cain
Cal.
Par.
5-23
None
Ohms Adj.
Par.
5-24
-71
a.
An oscilloscope and
a
10
Maresistor are required
for this test.
b.
Disconnect 412A from power source and remove
cabinet.
c.
Remove VlOl and reconnect 412A to power
source.
d. Connect
a
clip lead
from
the center arm
of
R116
(rear panel
BIAS
ADJ) to the termination
of
the
VOLTS input cable (terminal
4
in Figure
5-7).
e. Set 412A FUNCTION to VOLTS, RANGE to
.001.
f.
Set oscilloscope input to
DC.
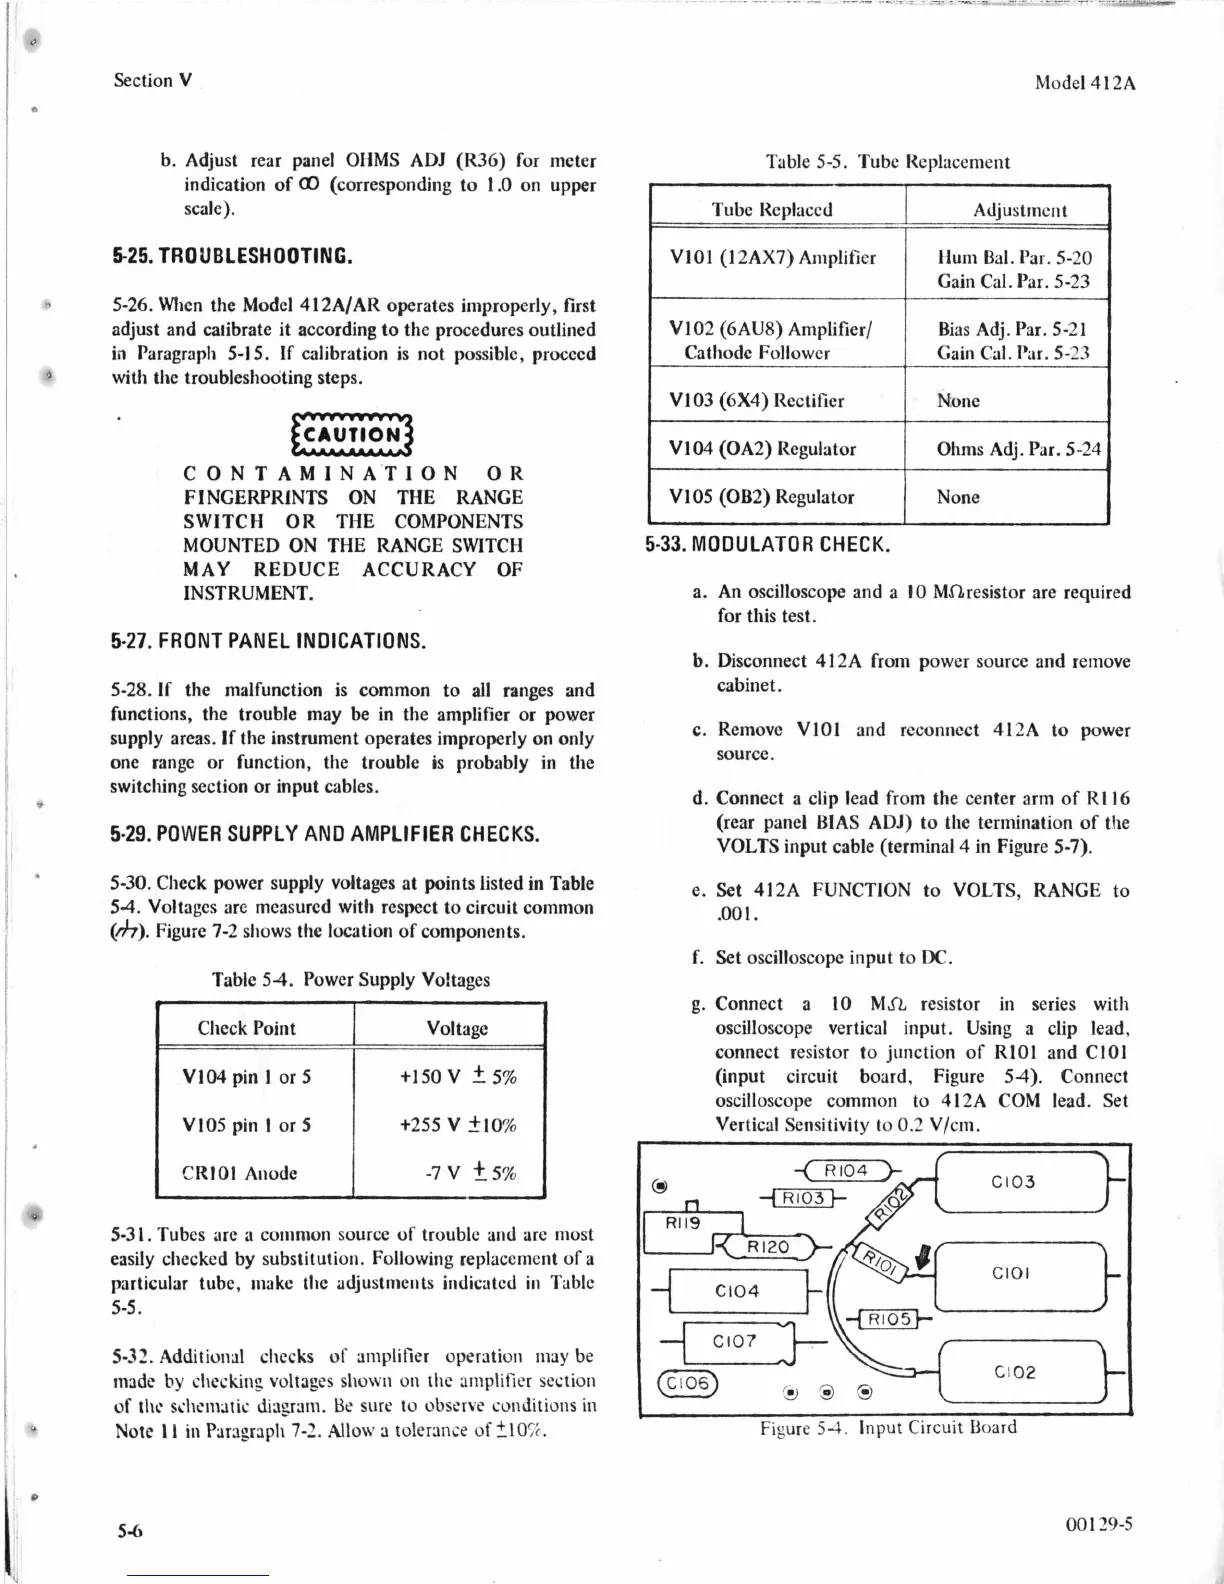
g.
Connect a
10
Mfi
resistor in series with
oscilloscope vertical input. Using a clip lead,
connect resistor
to
junction
of
RlOl and ClOl
(input circuit board, Figure 54). Connect
oscilloscope common to 412A COM lead. Set
Vertical Sensitivity
to
0.2
V/cm.
I
Figure
54.
Input
Circuit
Board
00
1
29-5