7. Attach the AP to the wall-mounting bracket. For more information, see
"Mounting the AP on a wall."
Mounting the AP on a ceiling tile
You can mount the AP on a ceiling tile if the ceiling tile is less than 18 mm
(0.71 in) and is able to bear a minimum weight of 5 kg (11.02 lb).
Caut ion: Do not mount the AP on a ceiling that is made of low-intensity
material such as plaster. If you need to mount the AP to such a ceiling, put a
high-intensity plate beneath the ceiling to secure the installation.
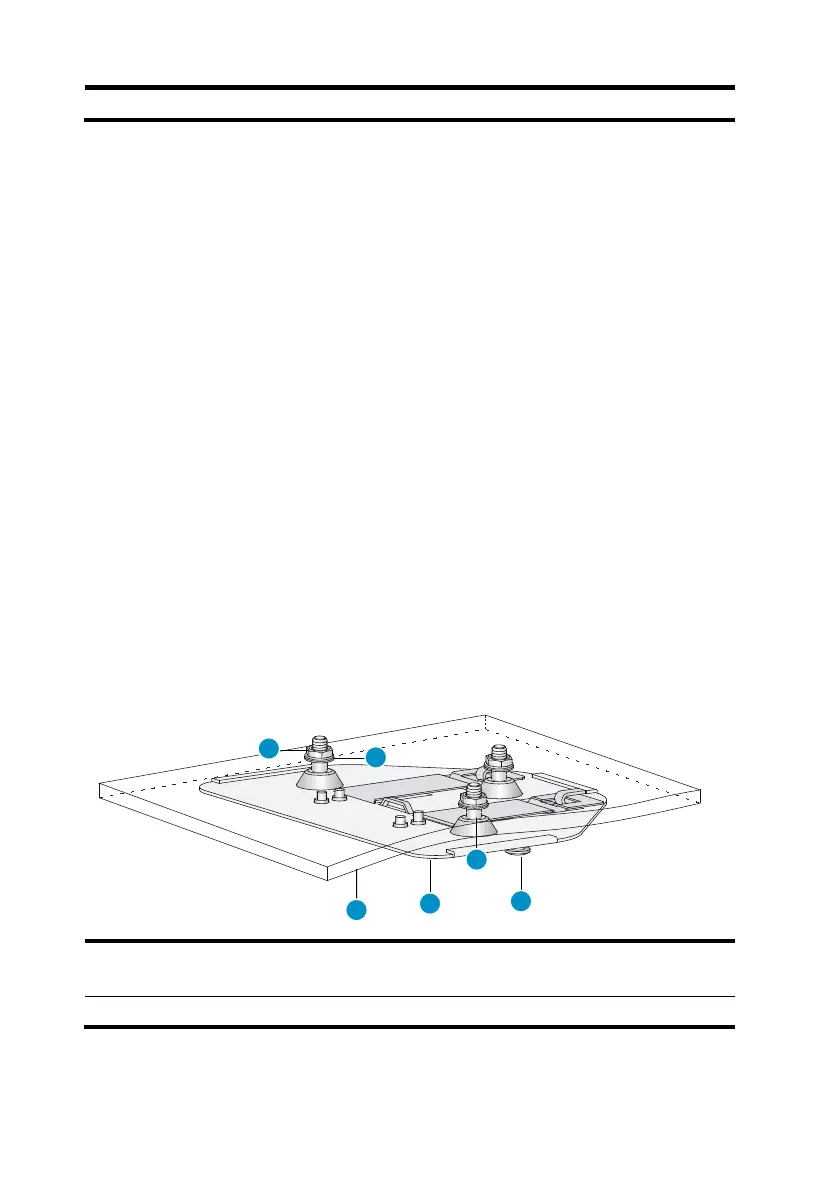
1. Hold the mounting bracket up against the ceiling tile where you want to
install it. Mark the location of the screw holes.
2. Drill three 5.0 mm (3/16 inch) holes in the ceiling tile.
3. Insert the hex-head bolts into the mounting bracket screw holes and
through the holes in the ceiling tile.
4. Fasten the washers and hex nuts to the hex-head bolts on the other side
of the ceiling tile.
Figure 8 Attaching the mounting bracket to a ceiling
1: Nut, Length ( 4.5mm /0.18in ),
Diameter ( 10mm / 0.39in)
2: Washer
11