EasyManuals Logo

HP 5890 Series II User Manual

HP 5890 Series II
326 pages
To Next Page IconTo Next Page
To Previous Page IconTo Previous Page
Page #141 background imageLoading...
Page #141 background image
SVC 4-71
11. Release the extension spring securing the PMT assembly to its support bracket.
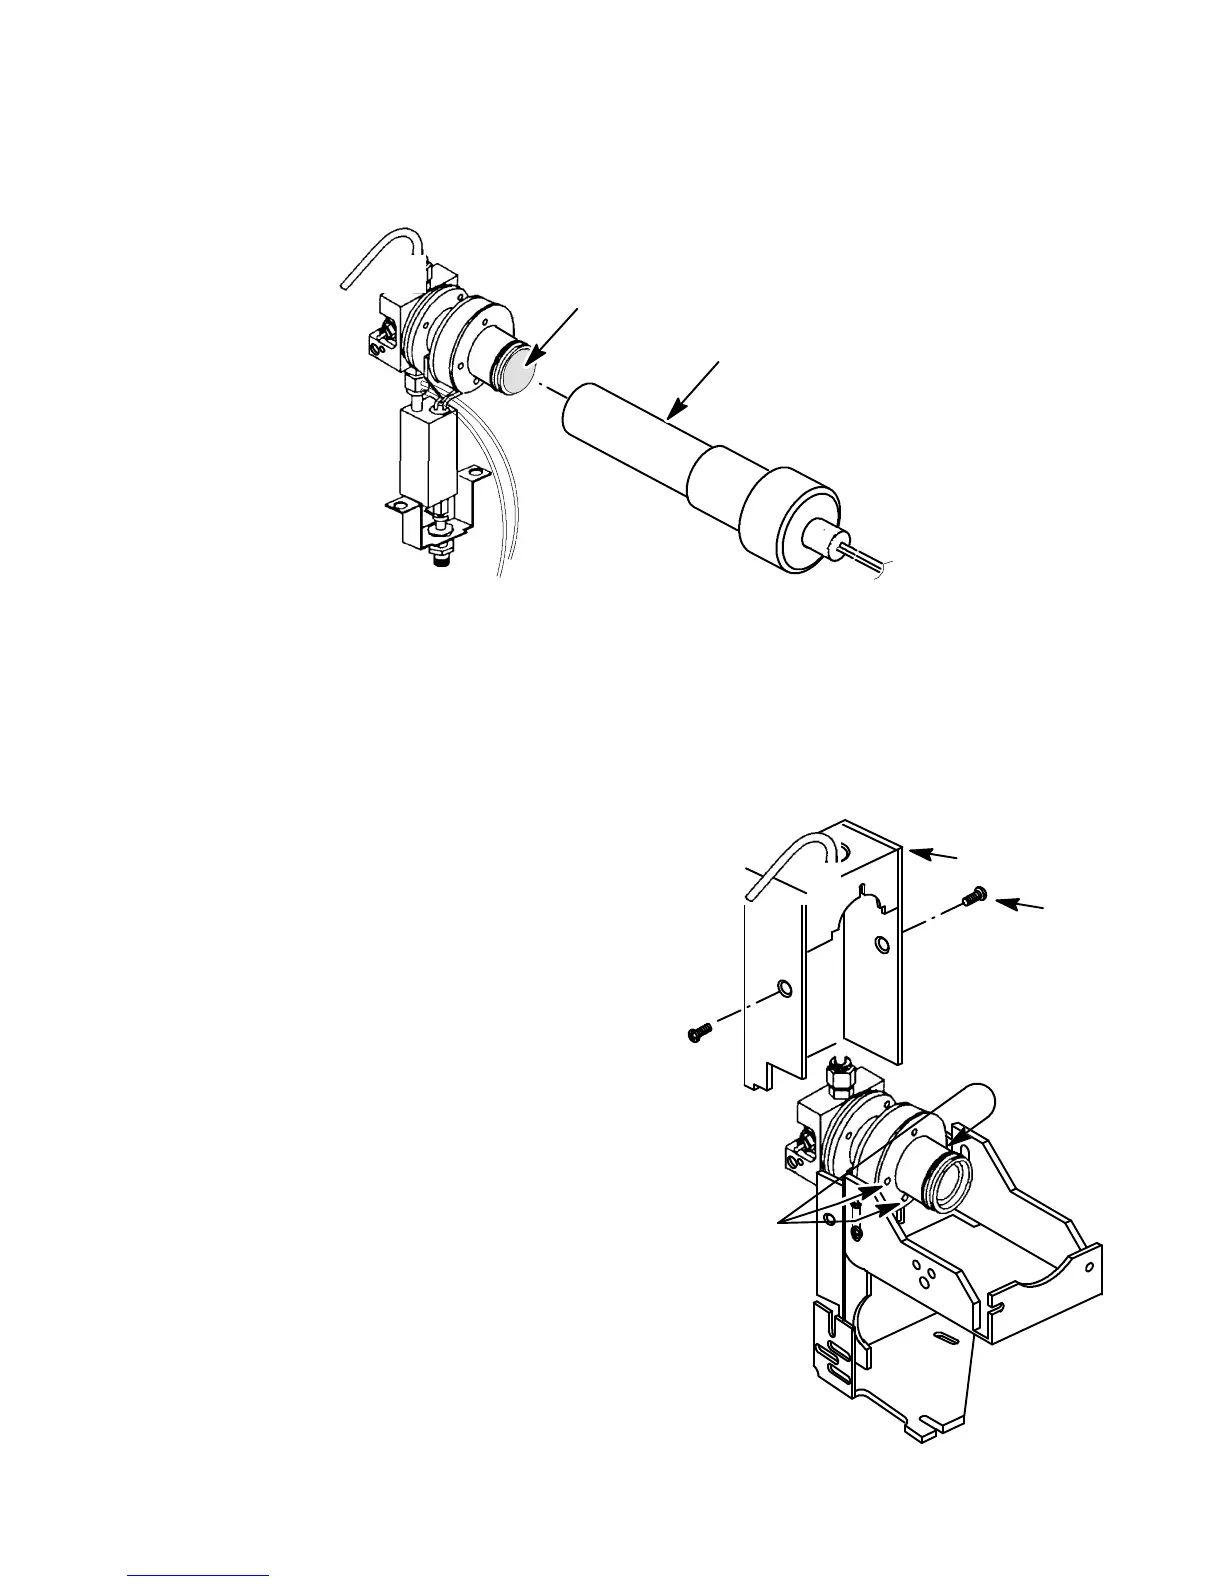
12. Remove the photomultiplier tube (PMT) assembly and sulphur filter from the detector assembly
and set it aside.
13. Remove the drip tube from the exhaust tube at the top of the detector.
14. Remove the exhaust tube from the detector using a
9/16-inch wrench.
15. Remove the chimney assembly by removing
the two screws securing it to the chimney back.
16. Loosen the three screws which secure the
clamp which secure the detector to the chim-
ney back.
PMT ASSEMBLY
(CHIMNEY AND BRACKETRY
REMOVED FOR CLARITY)
SULPHUR FILTER
CHIMNEY
SCREW
CLAMP
SECURING
SCREWS
Artisan Scientific - Quality Instrumentation ... Guaranteed | (888) 88-SOURCE | www.artisan-scientific.com

Table of Contents

Questions and Answers:

Question and Answer IconNeed help?

Do you have a question about the HP 5890 Series II and is the answer not in the manual?

HP 5890 Series II Specifications

General IconGeneral
TypeGas Chromatograph
Oven Temperature RangeAmbient + 4°C to 450°C
Data System CompatibilityHP ChemStation
Injection Ports2
DetectorsUp to 2
Detector OptionsFID, TCD, ECD, NPD
Inlet OptionsSplit/Splitless, Cool on-column
Temperature ControlElectronic
Data OutputAnalog, Digital
Power Requirements50/60 Hz
Carrier GasHelium, Nitrogen, Hydrogen

Related product manuals