SVC 4-72
17. Use a 9/16 inch wrench to loosen the nut hold-
ing the weldment exit tube to the jet assembly.
It will be necessary to hold the jet assembly
with a 1/2-inch wrench to prevent rotation.
18. Pull the heater and sensor from the detector
weldment assembly.
19. Carefully lift the detector, vertically, from the
transfer tube, so as not to damage the fused
silica liner.
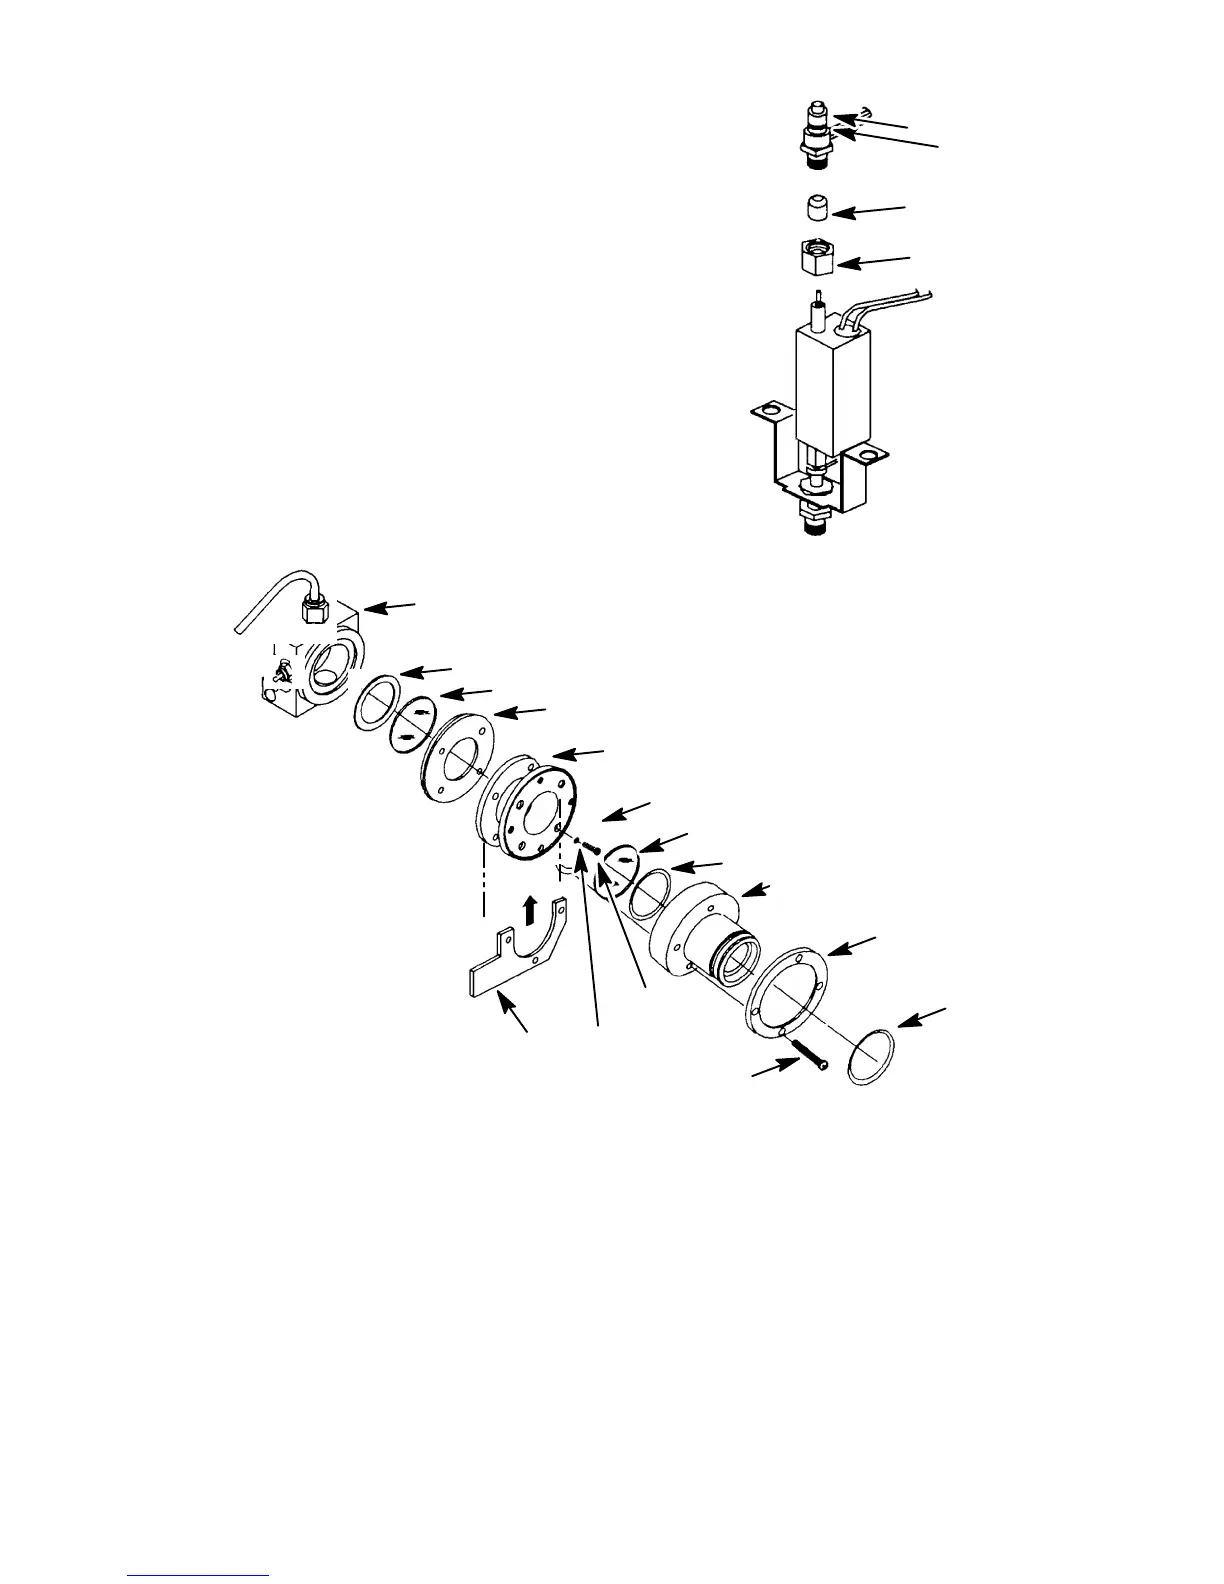
20. Remove the o-ring from the flange adapter on
the detector weldment.
O-RING (0905-0955)
SECOND HEAT
SHIELD WINDOW
O-RING (0905-1104)
FLANGE ADAPTOR
FLANGE RING
O-RING
CLAMP
SCREW
WELDMENT
HEAT SHIELD GASKET (19256-80040)
FIRST HEAT SHIELD WINDOW
HEAT SHIELD DISK
STAINLESS STEEL
COUPLING
LOCK WASHER
SCREW
21. Remove the flange adapter and flange ring by removing the four screws securing them to the
stainless steel coupling.
22. Remove the second heat shield window and two associated o-rings from the stainless steel
coupling.
23. Remove the stainless steel coupling and heat shield disk from the detector weldment by remov-
ing four screws and lock washers.
O-RING
JET WELDMENT
VESPEL FERRULE
BRASS NUT
Artisan Scientific - Quality Instrumentation ... Guaranteed | (888) 88-SOURCE | www.artisan-scientific.com

 Loading...


