EasyManuals Logo

HP 5900 Installation Guide

HP 5900
63 pages
To Next Page IconTo Next Page
To Previous Page IconTo Previous Page
Page #19 background imageLoading...
Page #19 background image
15
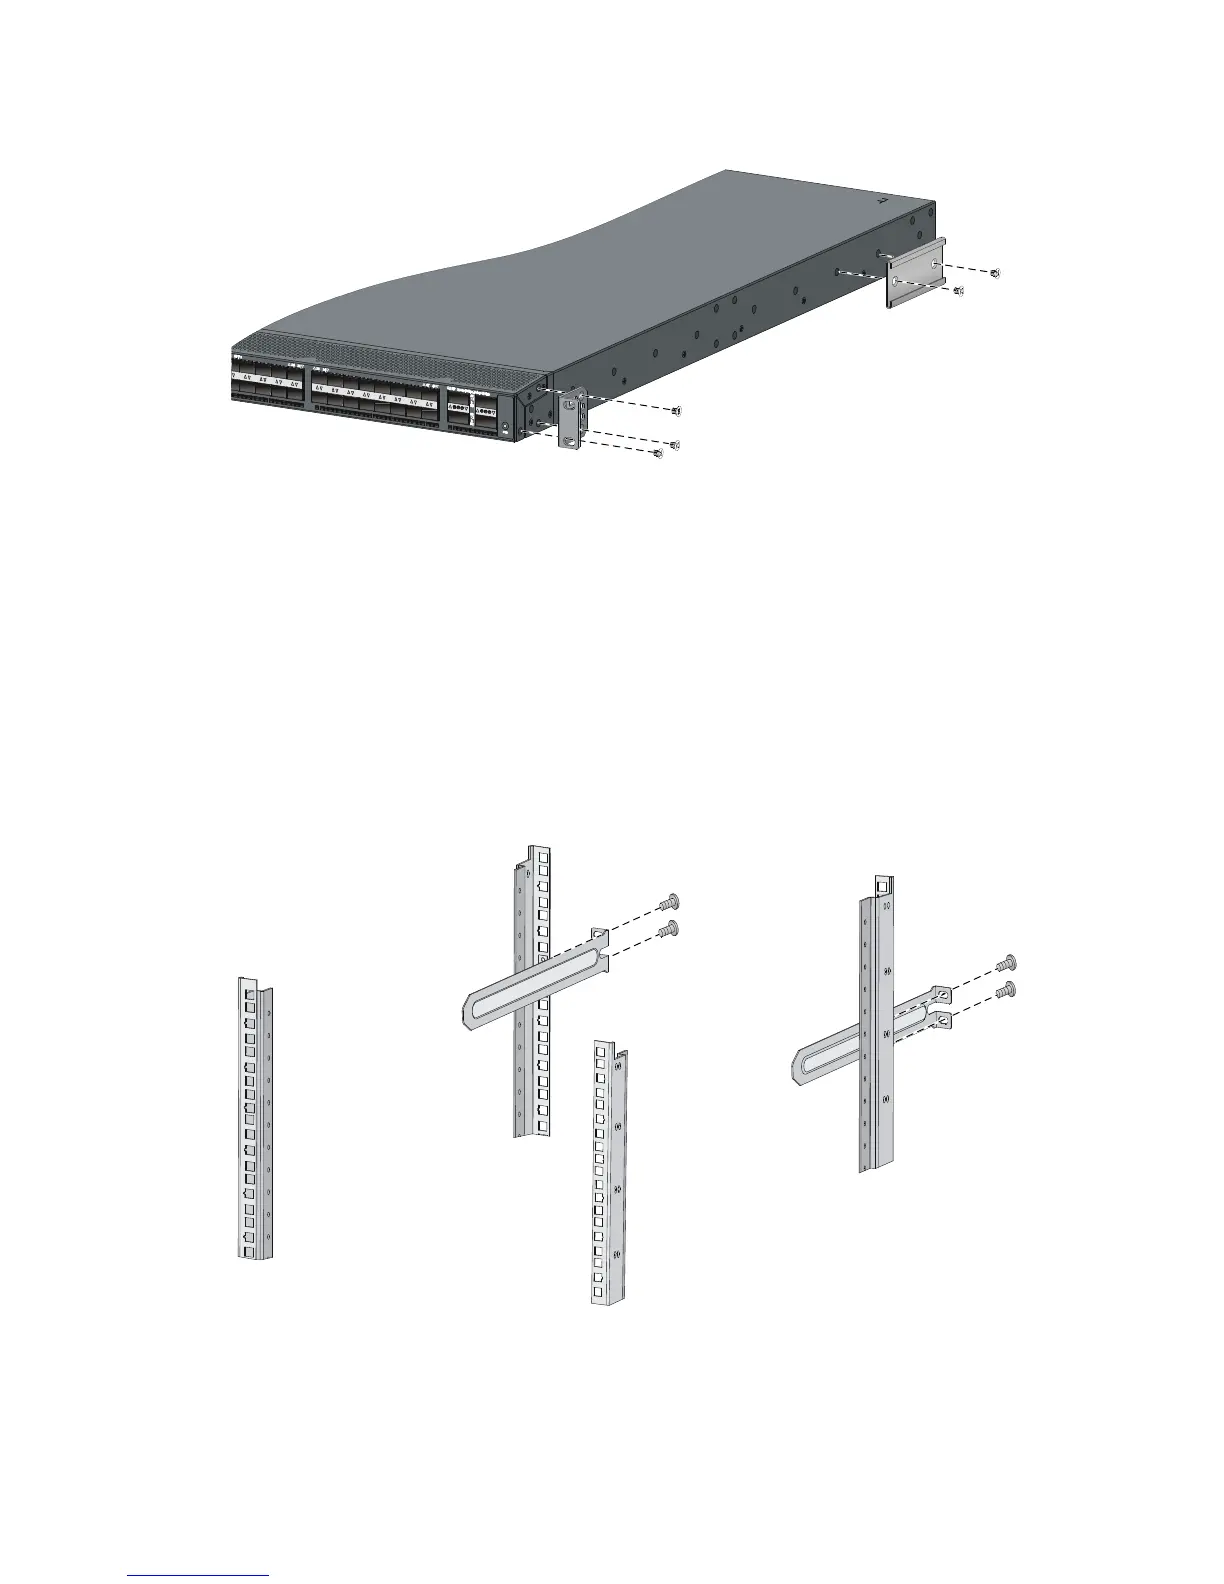
Figure 21 Attaching the front mounting brackets/chassis rails to the chassis
Attaching the slide rails to the rack
To attach the slide rails to the rack:
1. Identify the rack attachment position for the slide rails.
2. Install cage nuts (user-supplied) in the mounting holes in the rack posts.
3. Align the screw holes in one slide rail with the cage nuts in the rack post on one side, and use
screws (user supplied) to attach the slide rail to the rack, as shown in Figure 22.
4. Repeat the preceding step to attach the other slide rail to the rack post on the other side.
Keep the two slide rails at the same height so the slide rails can attach into the chassis rails.
Figure 22 Installing the slide rails
Mounting the switch in the rack
This task requires two people. To mount the switch in the rack:

Table of Contents

Other manuals for HP 5900

Questions and Answers:

Question and Answer IconNeed help?

Do you have a question about the HP 5900 and is the answer not in the manual?

HP 5900 Specifications

General IconGeneral
ModelHP 5900
Rack MountableYes
MAC Address Table Size128K
Jumbo Frame SupportYes
Routing ProtocolOSPF, BGP, RIP, IS-IS, IGMP
Remote Management ProtocolSNMP, CLI
FeaturesQuality of Service (QoS), Jumbo Frames support, IPv4 support, IPv6 support
Operating Temperature0 °C to 45 °C
Operating Humidity10% to 90% non-condensing
Power SupplyInternal power supply - hot-plug / redundant

Related product manuals