Do you have a question about the HP ac200w and is the answer not in the manual?
Overview of the user manual's content, accuracy, and availability of updates.
Information on the manual's proprietary nature and restrictions on reproduction.
FCC compliance statement for the digital device and guidance on interference.
Essential safety and handling guidelines to prevent damage or injury.
Environmental and temperature limits for safe and optimal camcorder operation.
Guidelines for using the correct battery and safe charging practices.
Details on case rating, underwater limits, and pre-dive checks.
Important handling, accessory, and camcorder operation guidelines with the case.
Procedures for maintaining the case, cleaning, and other advisories.
Recommendations for test shots and initial setup before regular use.
Guidance on respecting photography notices and copyright laws.
PC specifications needed for full HD playback and software compatibility.
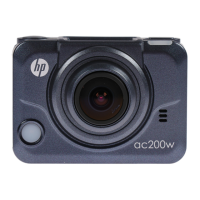
Overview of the camcorder's key features and capabilities.
List of items expected in the camcorder package.
Diagrams identifying the camcorder's buttons, ports, and indicators.
Operation of the Power/Mode and Shutter buttons for device control.
Table describing the meaning of different Power/Status and Battery LED lights.
Step-by-step guide for inserting the microSD card.
Instructions for safely ejecting and removing the microSD card.
Step-by-step guide for inserting the camcorder battery.
Instructions for safely removing the camcorder battery.
Procedure for charging the battery using the micro USB cable or AC adapter.
How to power the camcorder on and off using the Power button.
Explanation of icons and information displayed on the camcorder's OLED screen.
How to capture multiple photos with a single button press.
Capturing photos at intervals to create time-lapse video.
Taking photos with a delayed shutter release.
How to enter Set mode and the function of buttons within it.
Indicator showing the total number of videos and photos saved.
Indicator showing the current battery capacity.
Diagram showing the sequence for switching between different camcorder modes.
Instructions for connecting the camcorder to a TV using an HDMI cable.
Instructions for connecting the camcorder to a computer via micro USB.
Procedure for starting and stopping video recording, including dual stream function.
Procedure for taking still photos with the camcorder.
Connecting the camcorder to a smartphone via WiFi using the HP Xcam app.
Capturing multiple photos with a single button press.
Capturing photos at intervals to create time-lapse video.
Taking photos with a delayed shutter release.
How to enter the Setup menu for capture settings.
Selecting the desired video resolution from available options.
How to enter the More menu for basic camera settings.
Setting the direction of the OLED screen display.
Turning the status LEDs on or off.
Adjusting the OLED screen brightness level.
Procedure for selecting video resolution: 16:9 Full HD, 4:3 Widest HD, 16:9 HD.
Selecting the camcorder lens view angle: ULTRA or WIDE.
Setting the interval options for capturing photos in Lapse mode.
Enabling upside-down capture for mounting the camera upside down.
Options for deleting files or formatting the micro SD card.
Procedure to delete the last captured file or all files on the card.
Configuring the OLED screen display to be upside down.
Controlling the status LEDs on the camcorder.
Adjusting the brightness level of the OLED screen.
Enabling or disabling beep sounds for button presses.
Programming the camcorder to automatically turn off after idle periods.
Setting the camcorder's date and time.
Steps to pair the RF wrist strap remote control with the camcorder.
Using the paired remote control for recording videos and capturing photos.
Important notes on mode switching, photo capture, and operating distance.
Procedure to restore the camcorder to its default factory settings.
Steps for releasing the lock and installing the camcorder inside the case.
Instructions for detaching and attaching the T tip adapter to the case.
Procedure for changing the waterproof or vented housing back door.
How to install the Velcro strap to secure the waterproof case onto objects.
Locking the T tip adapter to connect accessories to the camcorder.
Steps to pair the RF wrist strap remote control with the camcorder.
Using the paired remote control for recording videos and capturing photos.
Switching camcorder modes to use remote control for burst, time lapse, or self-timer.
Taking photos while the camcorder is in Video mode using the remote.
Maximum operating distance for the RF wrist strap remote control.
Technical details including sensor, storage, optics, image, and movie clip formats.
Specifications for EV compensation, PC interface, and wireless connectivity.
Details on shutter speed ranges, auto power off, power supply, dimensions, and weight.
Solutions for battery LED flashing red, indicating low power.
Troubleshooting for full or unformatted Micro SD cards, and insertion problems.
| Video Resolution | 1080p |
|---|---|
| Screen Size | 2.0 inches |
| Frame Rate | 30fps |
| Lens | Wide-angle lens |
| Storage | MicroSD card up to 32GB |
| Waterproof | Waterproof case required (up to 30m) |
| Battery Life | Up to 90 minutes |