92 Chapter3
Remove/Replace System Components
Removing/Replacing System Components
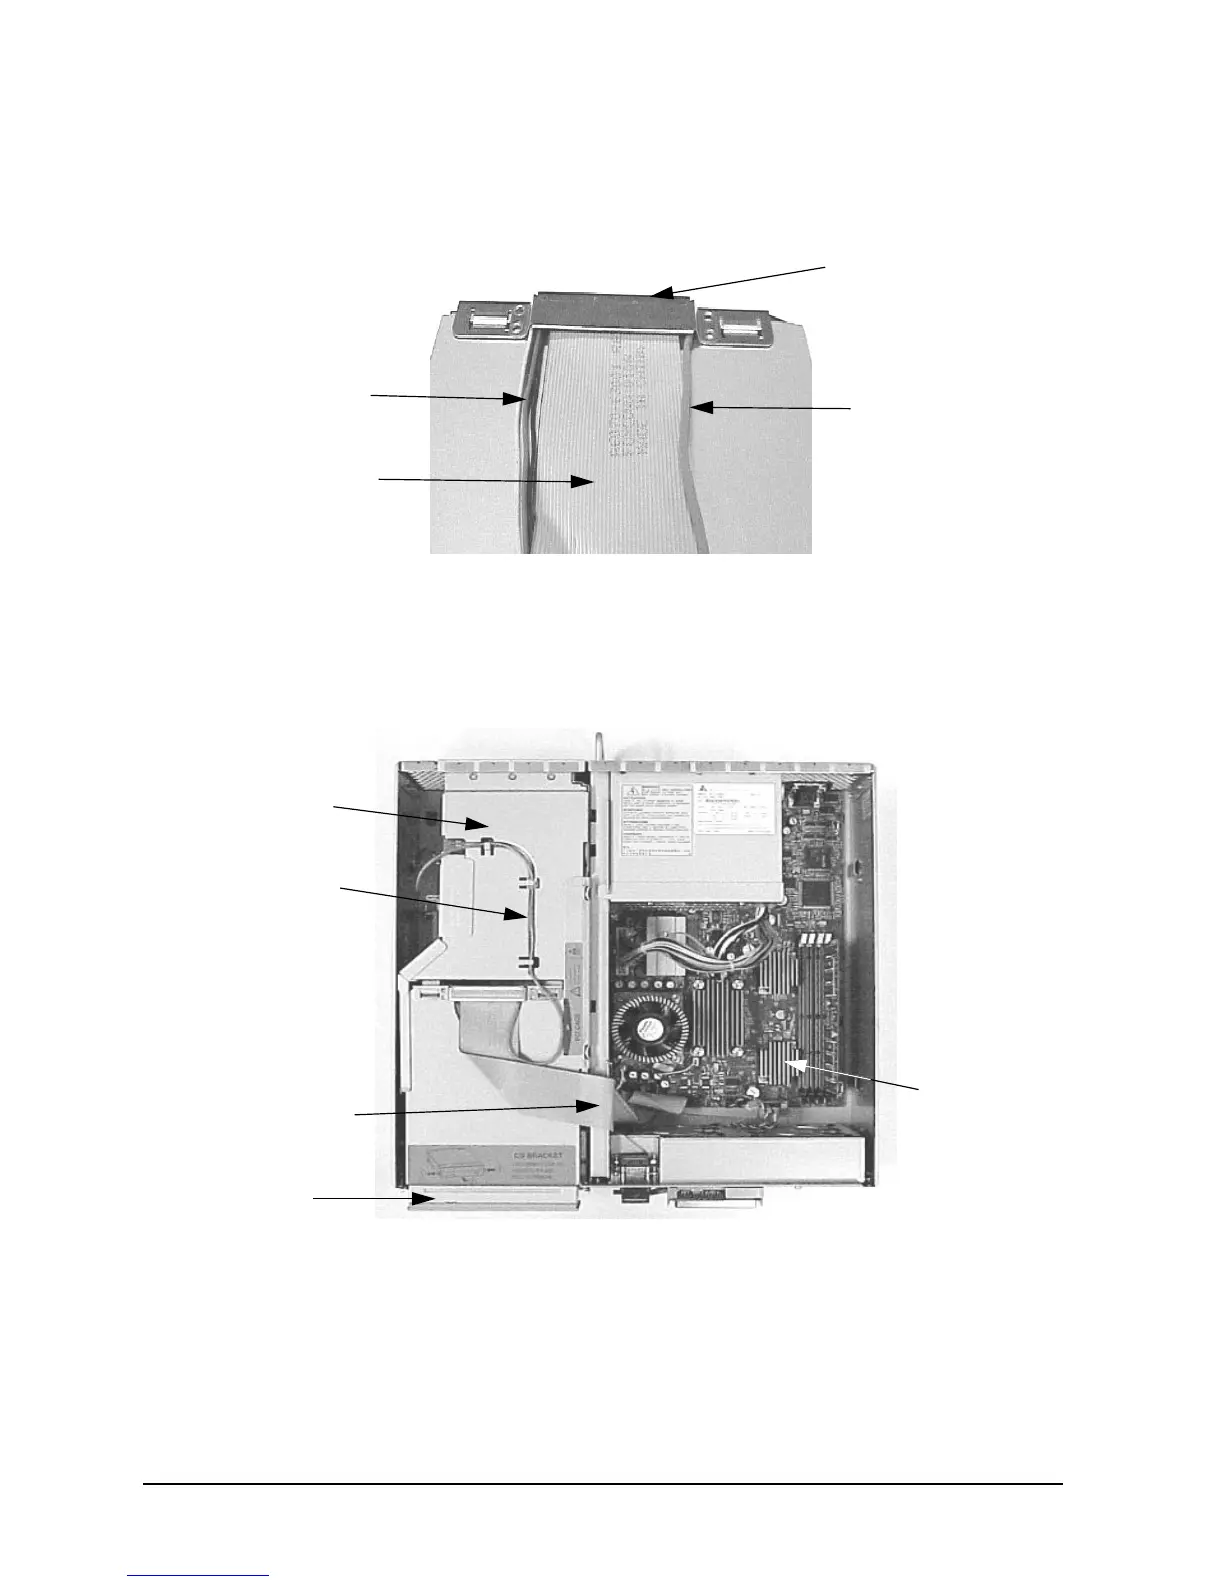
them. See Figure 3-87.
Figure 3-87. Dressing the CD Drive Cables
9. Insert the CD drive into the workstation. Next, reconnect the power and control cables
to the system board. The audio-extender cable must be connected to the audio cable and
the audio cable must be routed above the PCI cage as shown. See Figure 3-88.
Figure 3-88. Insert the CD Drive into the Workstation and Connect Cables
10.Replace the workstations top cover and front bezel. To do this, read the section
“Replacing the Front Bezel and Top Cover” found in this chapter.
11.Determine that your audio card replacement was successful. To do this read the section
“Using Your Audio Card (Optional)” in Chapter 1 of the Getting Started Guide for the
HP B2600 workstation.
Raised CD drive back
cover, which allows the
the cables to be
routed out of the back
Audio Cable
Control Cable
Power Cable
of the CD drive bay.
Audio Cable
Control and
Power Cables
CD Drive
PCI Cage
System
Board
 Loading...