Removal and replacement procedures 22
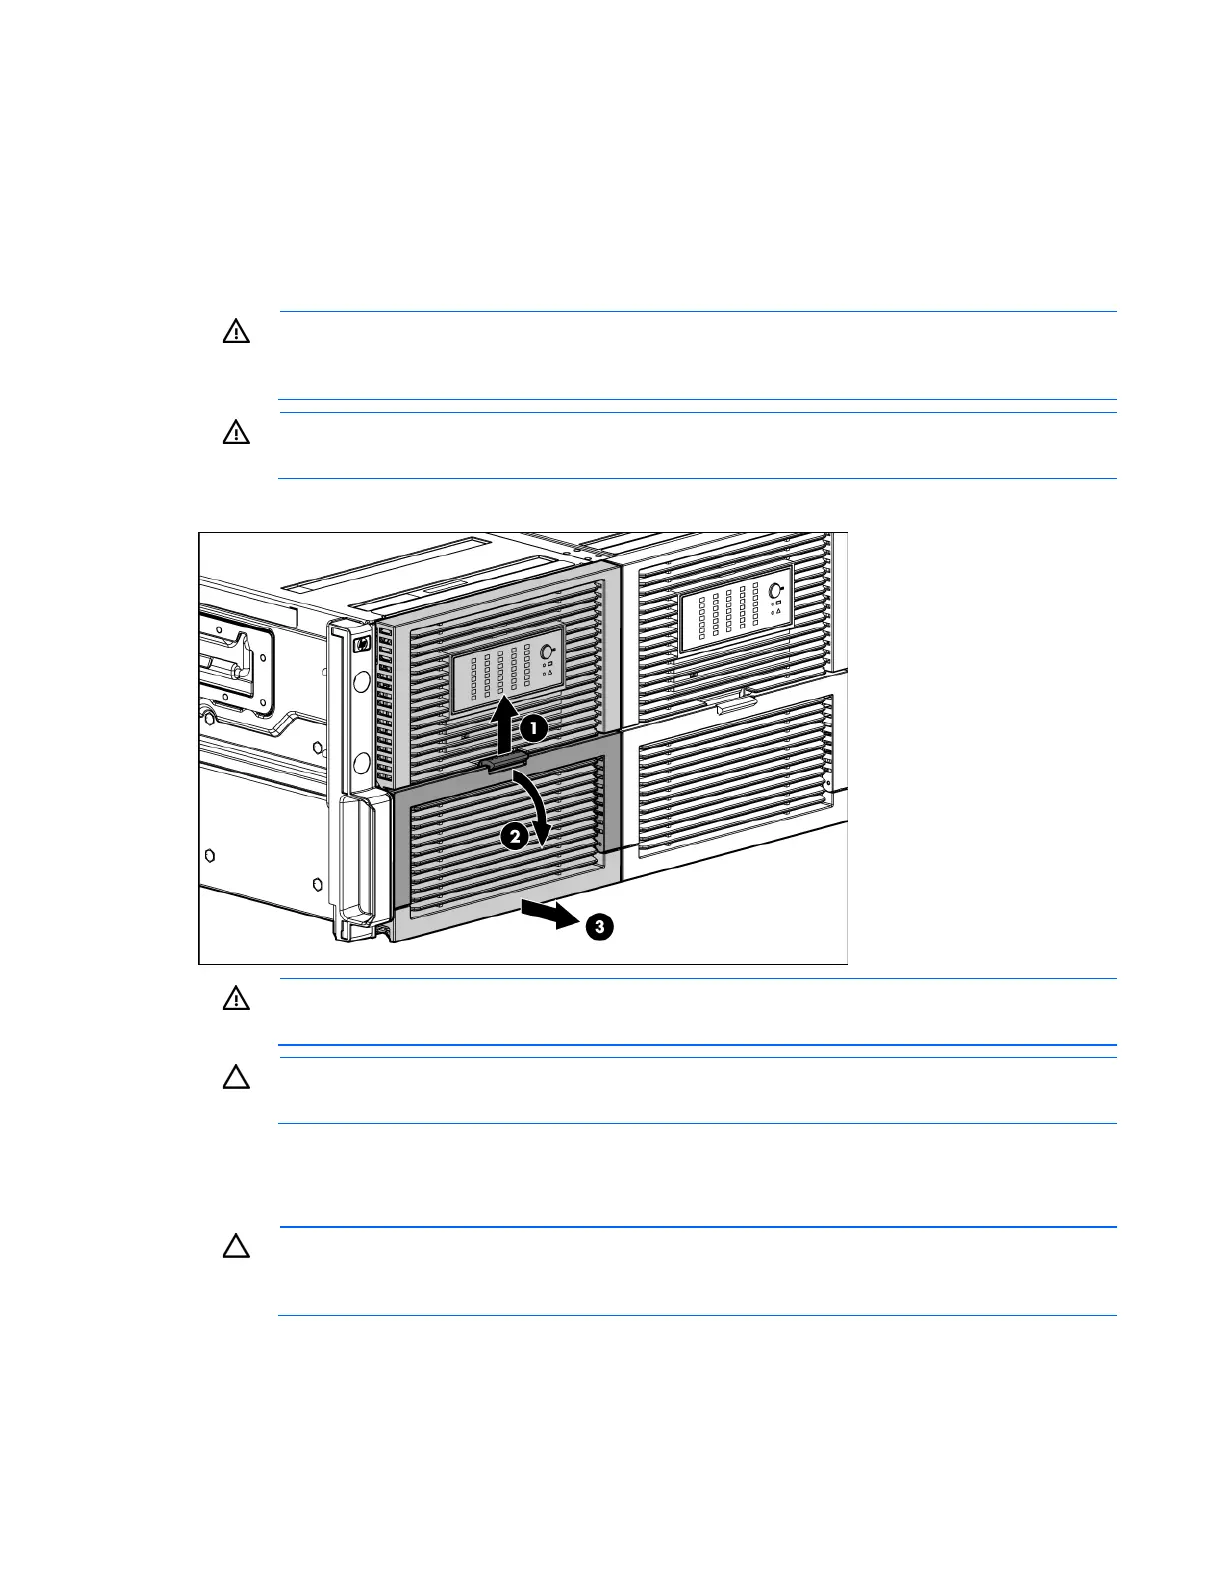
Extend the hard drive drawer
1. Be sure all I/O bays contain either an I/O module or an I/O blank. The hard drive drawer does not
open if I/O bays are empty.
2. Be sure the I/O modules or I/O blanks are fully seated and their handles are in the locked position. The
hard drive drawer does not open if I/O modules or I/O blanks are not fully seated with their handles
in the locked position.
WARNING: TIP HAZARD! To reduce the risk of personal injury or damage to the equipment, do
not extend the hard drive drawers beyond the supporting surface when the unit is not installed in
a rack.
WARNING: To reduce the risk of personal injury or damage to the equipment, ensure that only
one hard drive drawer is extended at a time.
3. Extend the hard drive drawer.
WARNING: Pinch hazard—Keep hands out of front and rear of chassis when closing hard drive
drawers.
CAUTION: To prevent improper cooling and thermal damage, do not operate the D6000 for an
extended period of time with the drawer open.
Hard drive blank
CAUTION: To prevent improper cooling and thermal damage, do not operate the D6000 unless
all bays are populated with either a component or a blank. Remove a blank only when there is a
drive ready to install or the D6000 is powered down.
To remove the component:
1. Extend the hard drive drawer (on page 22).