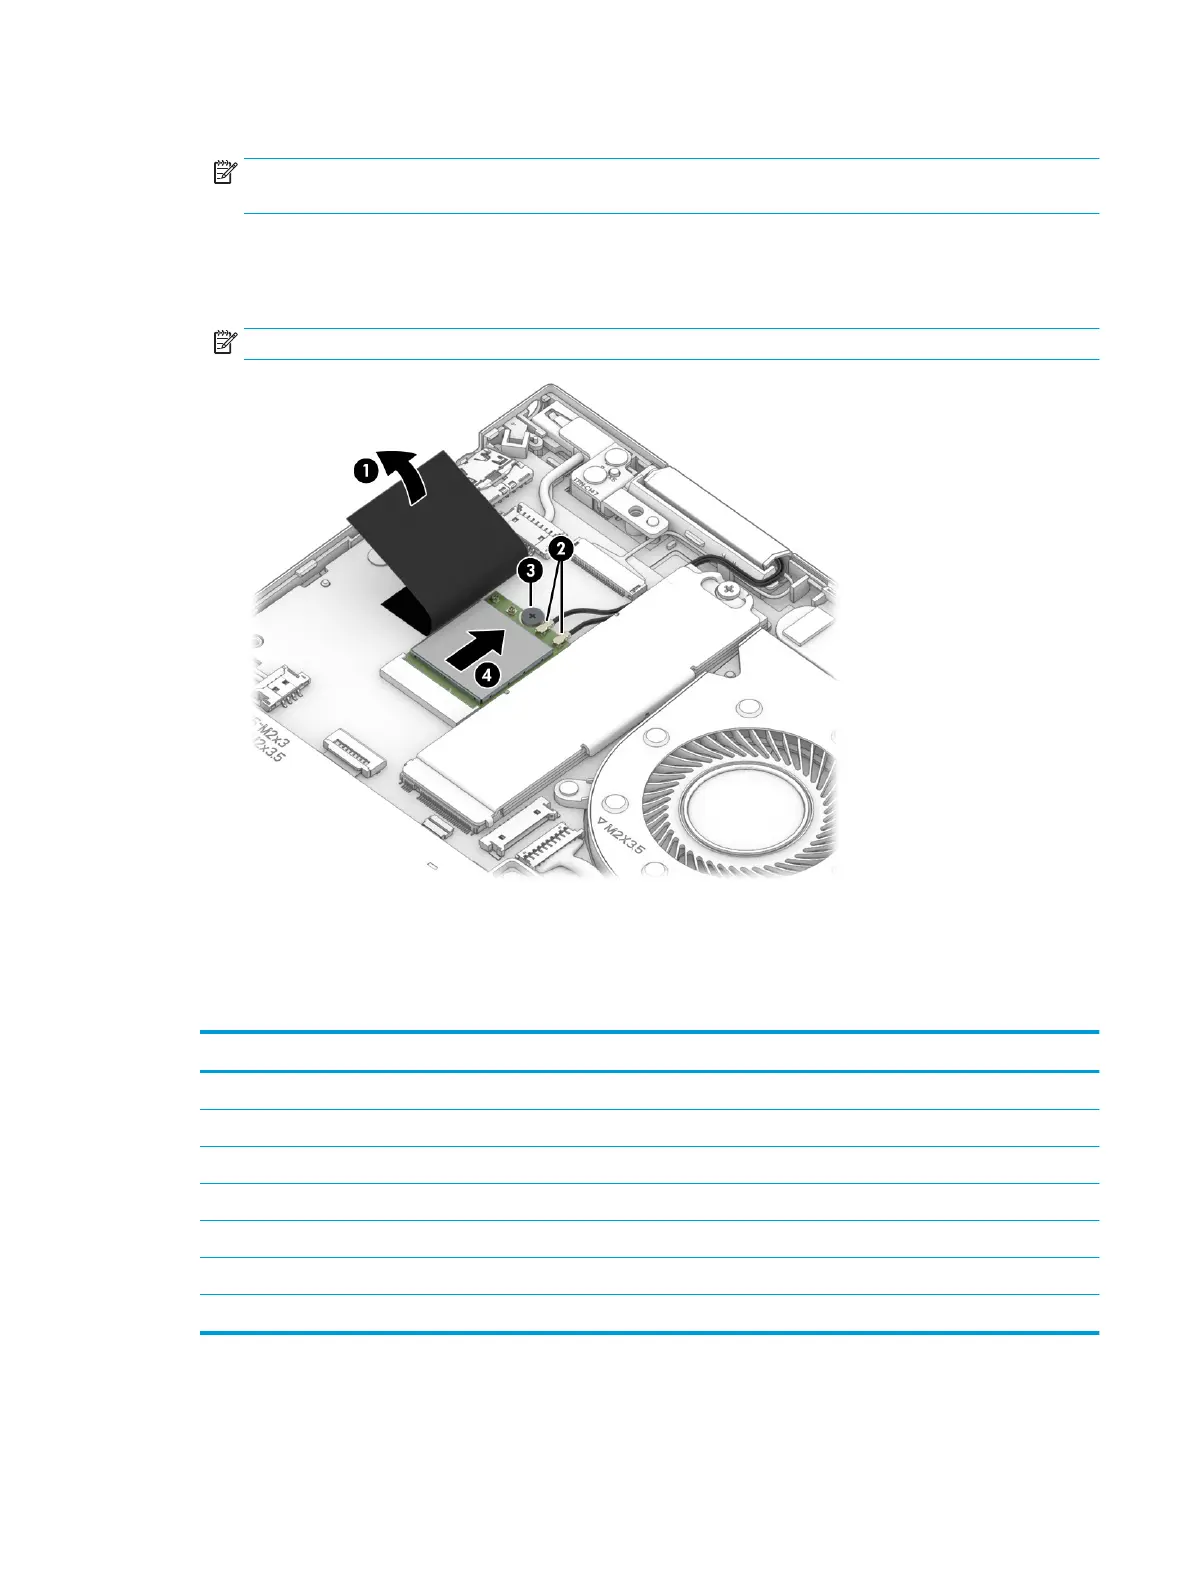
3. Disconnect the WLAN antenna cables (2) from the WLAN module terminals.
NOTE: The #1/white WLAN antenna cable connects to the WLAN module #1/Main terminal. The #2/black
WLAN antenna cable connects to the WLAN module #2/Aux terminal.
4. Remove the Phillips M2.0×3.0 screw (3) that secures the WLAN module to the system board.
(The WLAN module tilts up.)
5. Remove the WLAN module (4) by pulling the module away from the slot at an angle.
NOTE: WLAN modules are notched to prevent incorrect installation.
Reverse this procedure to install the WLAN module.
Solid-state drive
Table
5-4 Solid-state drive spare part information
Description Spare part number
1 TB, M.2 2280, PCIe, NVMe-3×4, SS solid-state drive with TLC L85348-005
1 TB, M.2 2280, PCIe, NVMe, value solid-state drive L85370-005
512 GB, M.2 2280, PCIe-3×4, SS solid-state drive with TLC L85360-005
512 GB, M.2 2280, PCIe, NVMe, value solid-state drive L85364-005
256 GB, M.2 2280, PCIe-3×4, SS solid-state drive with TLC L85350-005
256 GB, M.2 2280, PCIe, NVMe, value solid-state drive L85354-005
128 GB, M.2 2280, PCIe, NVMe, solid-state drive with TLC L90345-005
Before removing the solid-state drive, follow these steps:
Component replacement procedures 35
 Loading...