HP4402.book : chapter2.fm 13 Tue Apr 22 15:20:23 1997
Power Meter Operation
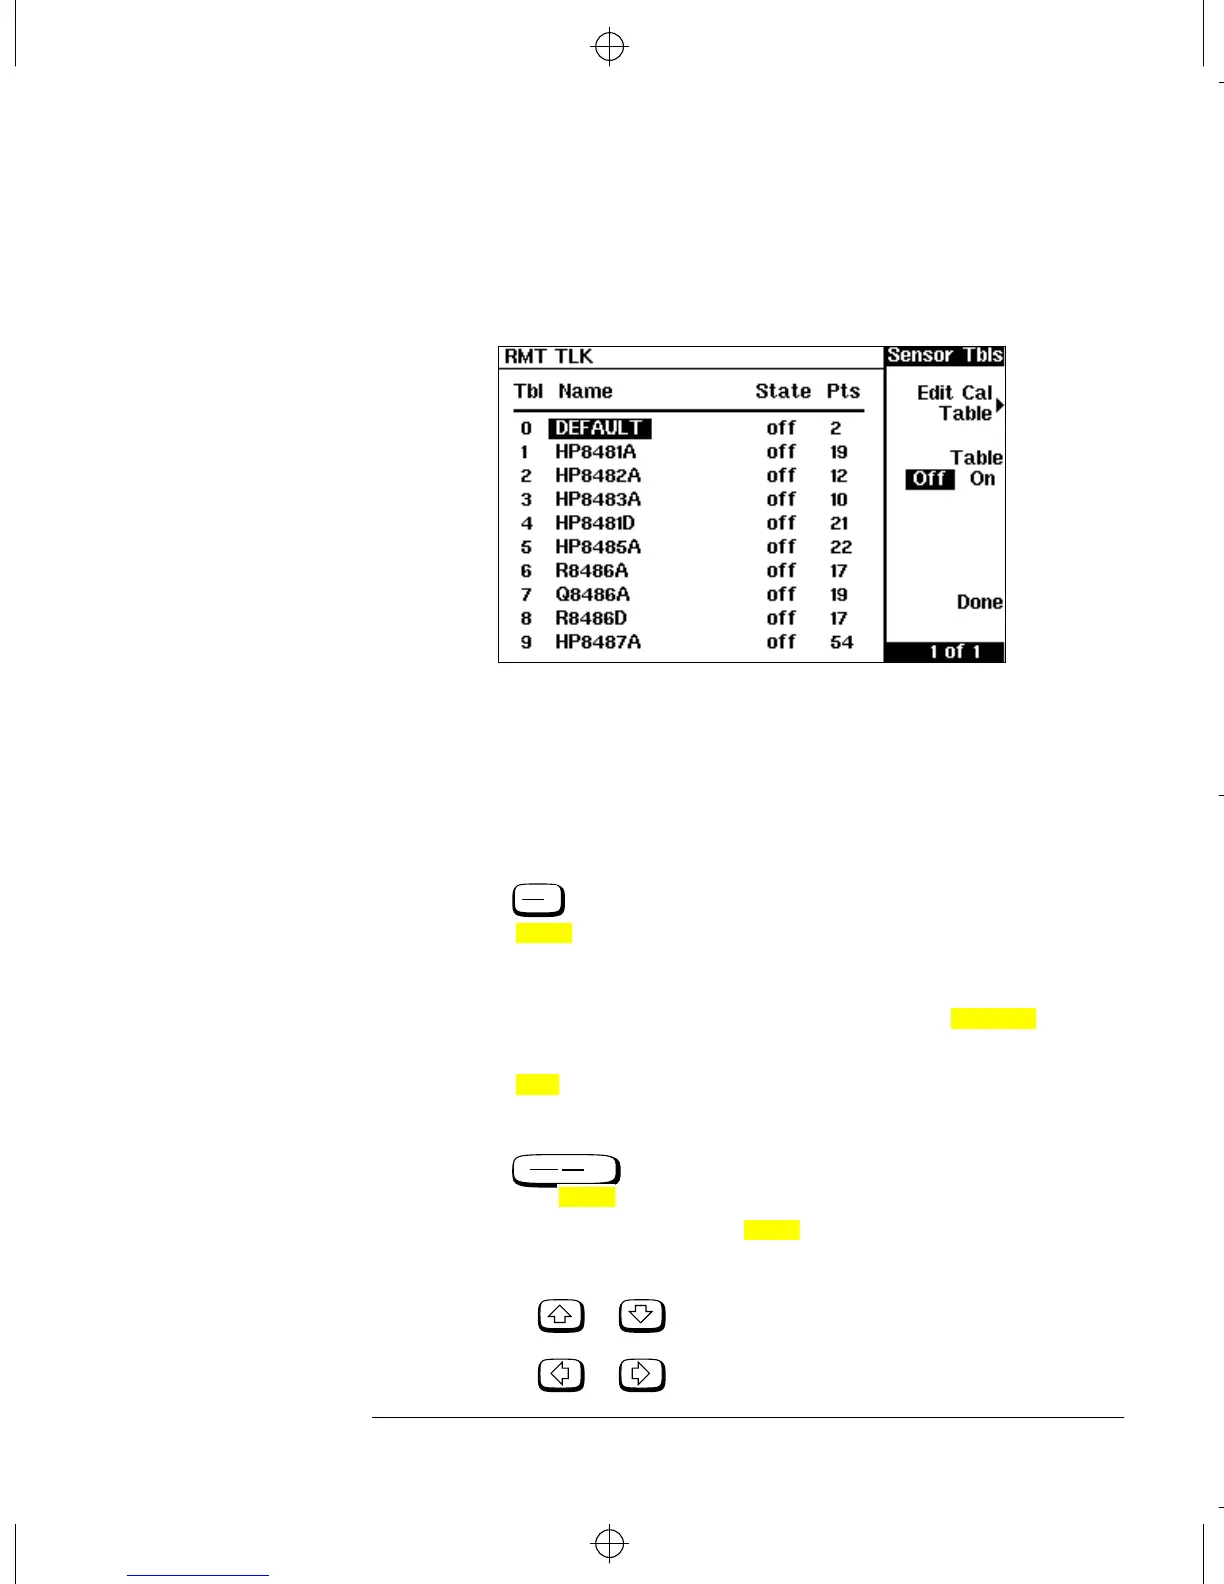
Making Measurements using Sensor Calibration Tables
HP EPM-441A User’s Guide 2-13
any sensor calibration tables are currently selected. The “Sensor Tbls”
screen is displayed as shown in Figure 2-1.
Figure 2-1: “Sensor Tbls” Screen
Making the Measurement
To make the power measurement, you zero and calibrate the power meter,
then set it for the frequency of the signal you want to measure. The power
meter automatically selects the calibration factor from the sensor
calibration table.
1. Press .
2. Press . During zeroing, which takes approximately 10
seconds, the wait symbol is displayed.
3. The setting of the reference calibration factor is obtained from the
sensor calibration table and displayed under the softkey.
4. Connect the power sensor to the POWER REF output.
5. Press to calibrate the power meter. During calibration the
wait symbol is displayed. (The power meter automatically turns
on the POWER REF output.)
6. Press . The current setting of the frequency is displayed
under the softkey.
7. To change this setting press . The power meter displays the
frequency in a pop up window. Modify this frequency (see below)
as desired.
■ Use or to modify the digit on which the cursor is
currently positioned.
■ Use or to move to other digits.
Zero
Cal
Zero
Ref CF
Cal
Frequency
Cal Fac
Freq
Freq