Removing or replacing the bottom cover
CAUTION: To prevent information loss or an unresponsive system:
Save your work and shut down the computer before adding or replacing a memory module or hard
drive.
If you are not sure whether the computer is off or in Hibernation, turn the computer on by pressing the
power button. Then shut down the computer through the operating system.
Removing the bottom cover
Remove the bottom cover to access the memory module slot, hard drive, regulatory label, and other
components.
To remove the bottom cover:
1. Remove the battery (see
Inserting or removing the battery on page 33).
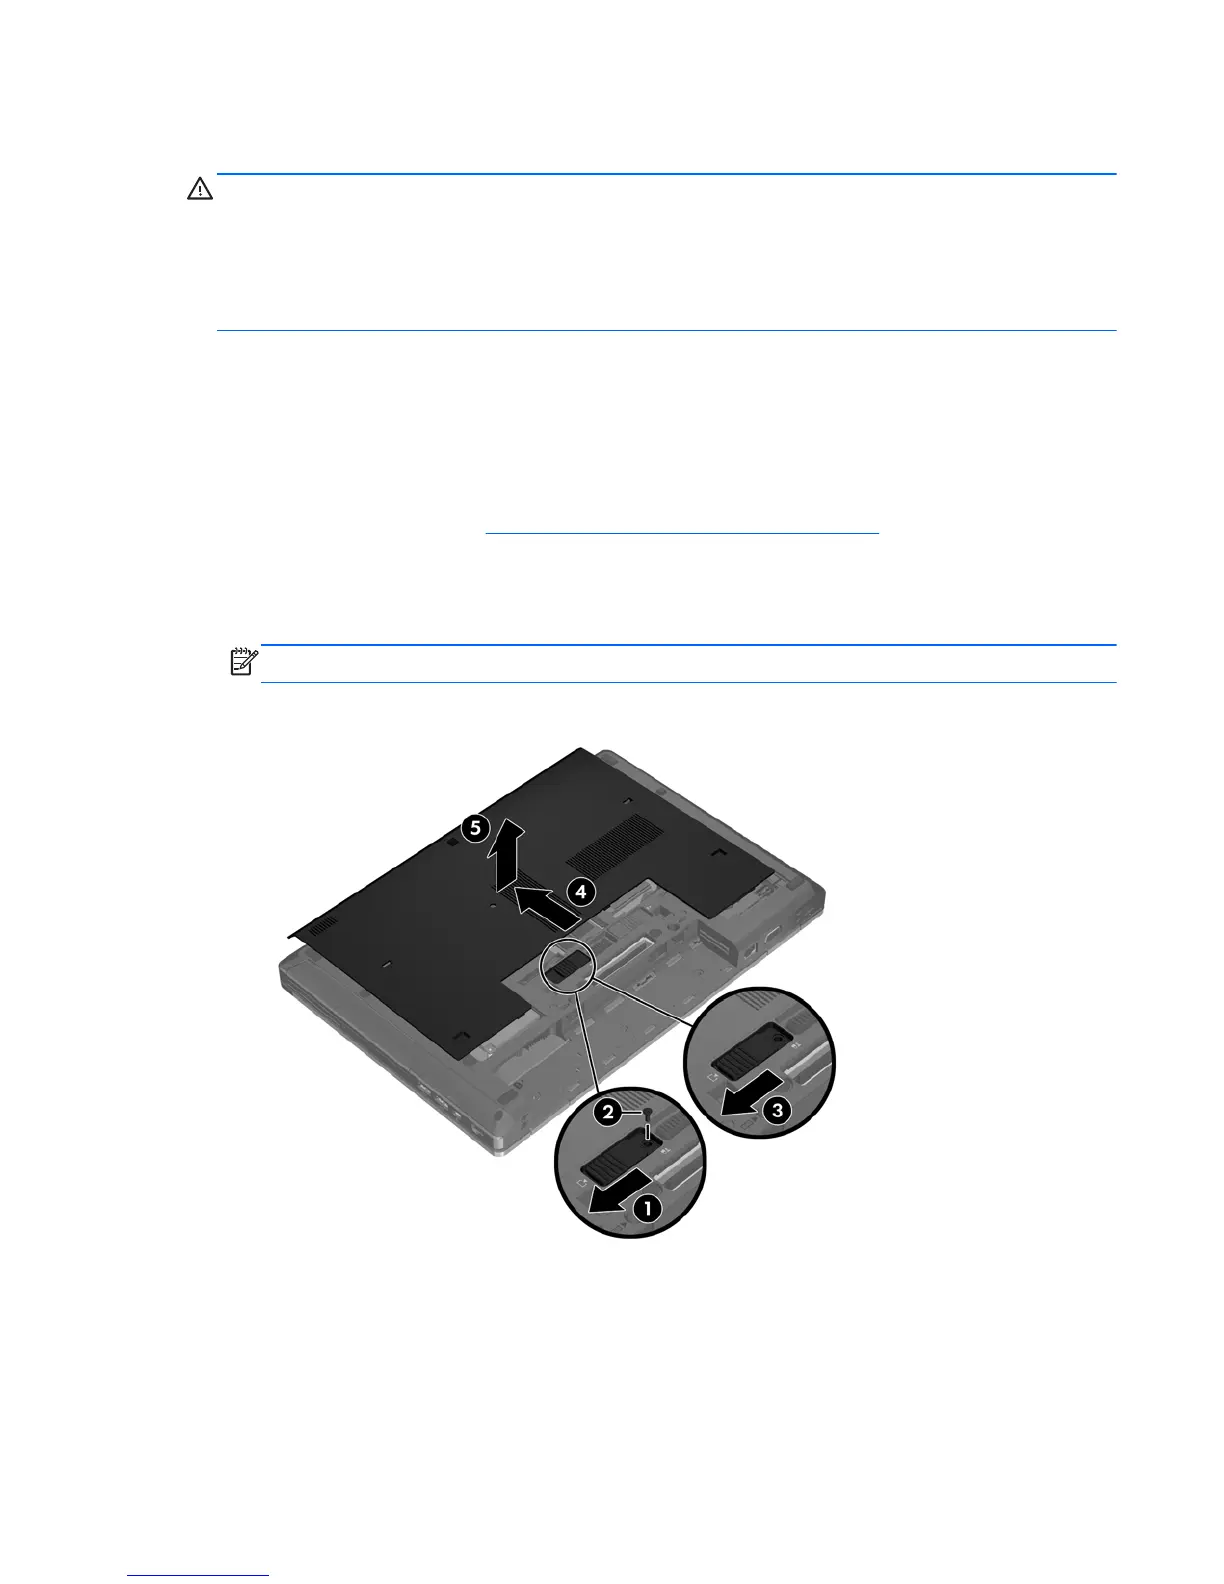
2. With the battery bay toward you, slide the bottom cover release latch (1) to the left, remove the
screw (if the optional screw is being used) (2), and then slide the release latch again (3) to
release the bottom cover.
NOTE: If you want to use the optional screw, it is stored inside the bottom cover.
3. Slide the bottom cover towards the front of the computer (4) and lift it up (5) to remove the cover.
Removing or replacing the bottom cover 35