To remove an optical drive from the upgrade bay:
1. Save your work.
2. Shut down the computer and close the display.
3. Disconnect all external hardware devices connected to the computer.
4. Unplug the power cord from the AC outlet.
5. Turn the computer upside down on a flat surface, with the upgrade bay toward you.
6. Remove the battery (see
Inserting or removing the battery on page 33).
7. Remove the bottom cover (see
Removing the bottom cover on page 35).
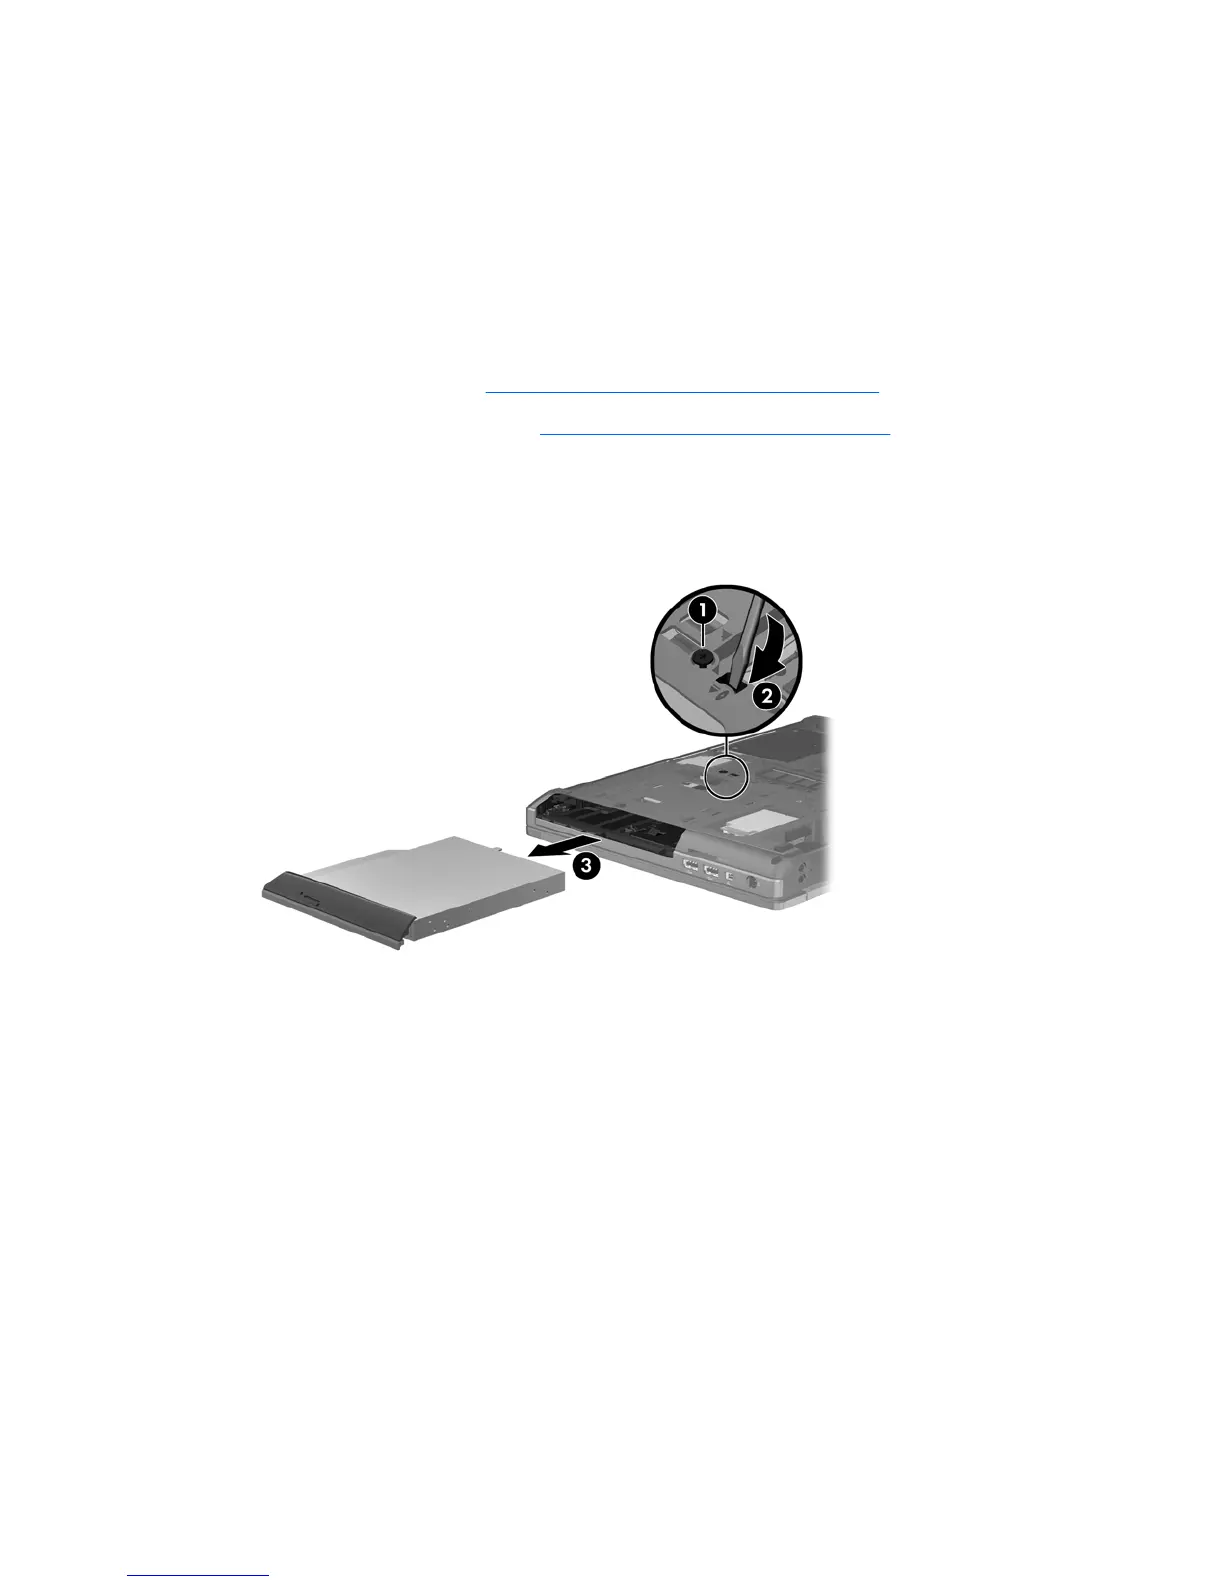
8. Loosen the upgrade bay screw (1).
9. Using a flat-bladed screwdriver, gently push the tab to release the optical drive (2).
10. Remove the optical drive from the upgrade bay (3).
To install an optical drive in the upgrade bay:
1. Insert the optical drive into the upgrade bay (1).
Replacing a drive in the upgrade bay 41