Do you have a question about the HP OMEN 32q and is the answer not in the manual?
Provides crucial safety instructions and precautions for servicing the monitor to minimize risks to personnel.
Details essential service procedures, high-voltage warnings, and handling guidelines for qualified repair personnel.
Explains RoHS compliance for electronic products and replacement parts, outlining requirements for service and maintenance.
Provides general information about the monitor and defines two levels of service: cosmetic and circuit board replacement.
Informs users where to find firmware updates for the monitor and when an update is necessary for optimal performance.
Specifies the AC leakage current check and safety requirements before returning a repaired monitor to ensure operational safety.
Details the monitor's display specifications, including resolution, panel technology, color gamut, and viewing angles for optimal visual experience.
Lists the available video and audio input connectors on the monitor, such as DisplayPort and HDMI, for system connectivity.
Describes the monitor stand features, including quick release, VESA mounting, and workstation compatibility for flexible positioning.
Identifies and illustrates the components located on the rear of the monitor, including ports, buttons, and connectors.
Explains where to find the serial number and product number on the monitor for support purposes and warranty claims.
Guides users on how to order spare parts, including HP spare part numbers and authorized distributor information.
Provides essential information and equipment needed to safely prepare for disassembling and reassembling the monitor.
Details the steps for removing and replacing the power board, including part numbers and distributor information.
Covers repair procedures for HDMI, DisplayPort, and Phone Jack connectors, including component identification and soldering.
Details the steps required to remove the rear cover of the monitor, including pre-disassembly checks and tools.
Confirms that all monitor functions are working correctly after repair, using specific test items and tools.
Lists common problems, their possible causes, and recommended solutions for troubleshooting the monitor.
This document serves as a comprehensive Maintenance and Service Guide for the OMEN 32q model, providing essential information for trained service personnel. It outlines procedures for maintenance, part replacement, diagnostic testing, and troubleshooting, ensuring the safe and reliable operation of the device.
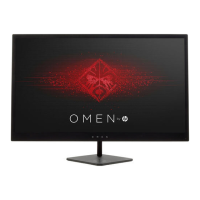
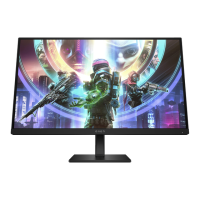
The OMEN 32q is a monitor designed for various applications, offering a range of display and connectivity features. Its primary function is to provide a visual interface, supporting high-resolution displays and a wide color gamut for enhanced visual experiences. The monitor is equipped with an LED backlight and a nonglare panel, making it suitable for extended use.
The monitor boasts several user-centric features that enhance its versatility and ease of use. It supports a high QHD resolution at a 165 Hz refresh rate, with full-screen support for lower resolutions, including custom scaling to maintain the original aspect ratio. Depending on the specific model, it may feature either a Liquid Crystal Display (LCD) with active matrix and in-plane switching (IPS) technology or VA panel technology, both designed to deliver vibrant and accurate colors. The wide color gamut ensures coverage of sRGB/DCI-P3 color spaces, catering to users who require precise color representation.
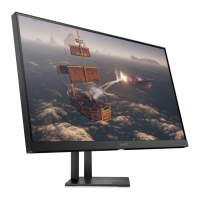
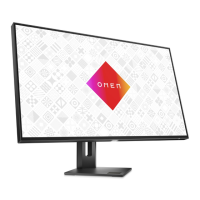
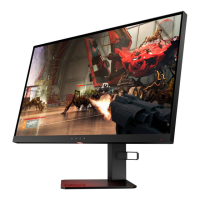
For ergonomic comfort, the OMEN 32q offers tilt, swivel, and height adjustment capabilities. Select models also include pivot functionality, allowing the monitor head to rotate from landscape to portrait orientation, which can be particularly useful for certain professional tasks or content viewing. On-screen display (OSD) adjustments are available in multiple languages, simplifying setup and screen optimization. An energy saver feature is integrated to meet requirements for reduced power consumption, contributing to environmental sustainability and lower operating costs. Cable management features are also included to help organize cables and cords, maintaining a tidy workspace.
Connectivity options are robust, featuring a DisplayPort™ video input (with a cable included) and two High-Definition Multimedia Interface® (HDMI) video inputs, enabling connection to various source devices such as computers or game consoles. An audio-out (headphone) jack is provided for connecting optional powered stereo speakers, headphones, earbuds, or a television audio cable. The monitor also supports Plug and Play functionality, if supported by the operating system, for quick and easy setup.
The monitor stand is designed for flexibility and ease of installation. It is removable, allowing for alternative mounting solutions. The HP Quick Release 2 device facilitates quick attachment of the monitor head to the stand with a simple click and easy removal via a sliding tab release. Furthermore, the monitor is equipped with a VESA® mounting bracket (100 × 100 mm) for attaching the monitor head to a wall-mount device or swing arm, and it supports a mounting bracket for attachment to a workstation.
The guide emphasizes that only trained service personnel familiar with the product should perform maintenance or service. It provides critical safety information, including precautions against electrostatic discharge (ESD) when handling electrical components and warnings about battery handling. The document highlights the importance of disconnecting the power cord before opening the monitor to prevent component damage.
For repairs, the guide specifies that professional service technicians in a repair center should perform these procedures, and end-users are advised against attempting them. It notes that the primary side of the monitor contains high voltage areas, requiring careful handling. The monitor adheres to RoHS requirements, mandating the use of lead-free solder wire and ensuring that replacement parts are RoHS compliant if the original parts were. When replacing capacitors, technicians must match polarity, specification, and part number, and insert new parts carefully to prevent short circuits. Avoiding moisture on the board is also crucial to prevent malfunctions.
The guide details a two-level service approach: Level 1 for cosmetic/appearance/alignment service and Level 2 for circuit board or standard parts replacement. Firmware updates, if available, can be found on support.hp.com. Before returning a repaired product to the customer, an AC leakage current check on exposed metallic parts is required to ensure electrical safety.
The document includes an illustrated parts catalog to identify major components and provides instructions on how to order parts, including the power board, capacitors, and connectors from authorized distributors. Specific repair procedures are outlined for the rear cover, power board, and various connectors such as HDMI, DisplayPort, and Phone Jack. These procedures involve using specialized tools like soldering irons, de-soldering pumps, and hot air guns to remove and replace components. After any repair, a function test is mandatory to confirm that all functions are working correctly, including HDMI, DP, and audio tests.
Troubleshooting information is provided to address common issues such as a blank or flashing screen, blurred images, or error messages like "Input Signal Out of Range," "OSD Lockout," and "Power Button Lockout." Solutions range from checking power and video cable connections to adjusting OSD settings or replacing incompatible video cards. The guide underscores the importance of professional repairers having the technical competence and insurance coverage required by relevant regulations.
| Resolution | 2560 x 1440 (QHD) |
|---|---|
| Aspect Ratio | 16:9 |
| VESA Mount | 100 x 100 mm |
| Connectivity | HDMI 2.0 |
| Viewing Angle | 178° |
| AMD FreeSync | AMD FreeSync Premium Pro |