Display assembly
IMPORTANT: Make special note of each screw and screw lock size and location during removal
and replacement
Before removing the display assembly, follow these steps:
1. Shut down the computer.
2. Disconnect all external devices connected to the computer.
3. Disconnect the power from the computer by rst unplugging the power cord from the AC outlet and then
unplugging the AC adapter from the computer.
4. Remove the battery (see Battery on page 33), and then remove the following components:
a. Hinge covers (see Hinge covers on page 48).
b. System support brackets (see System support brackets on page 49).
c. Fans (see Fans on page 52).
d. Heat sink (see Heat sink on page 56).
e. System board (see System board on page 61).
Remove the display assembly:
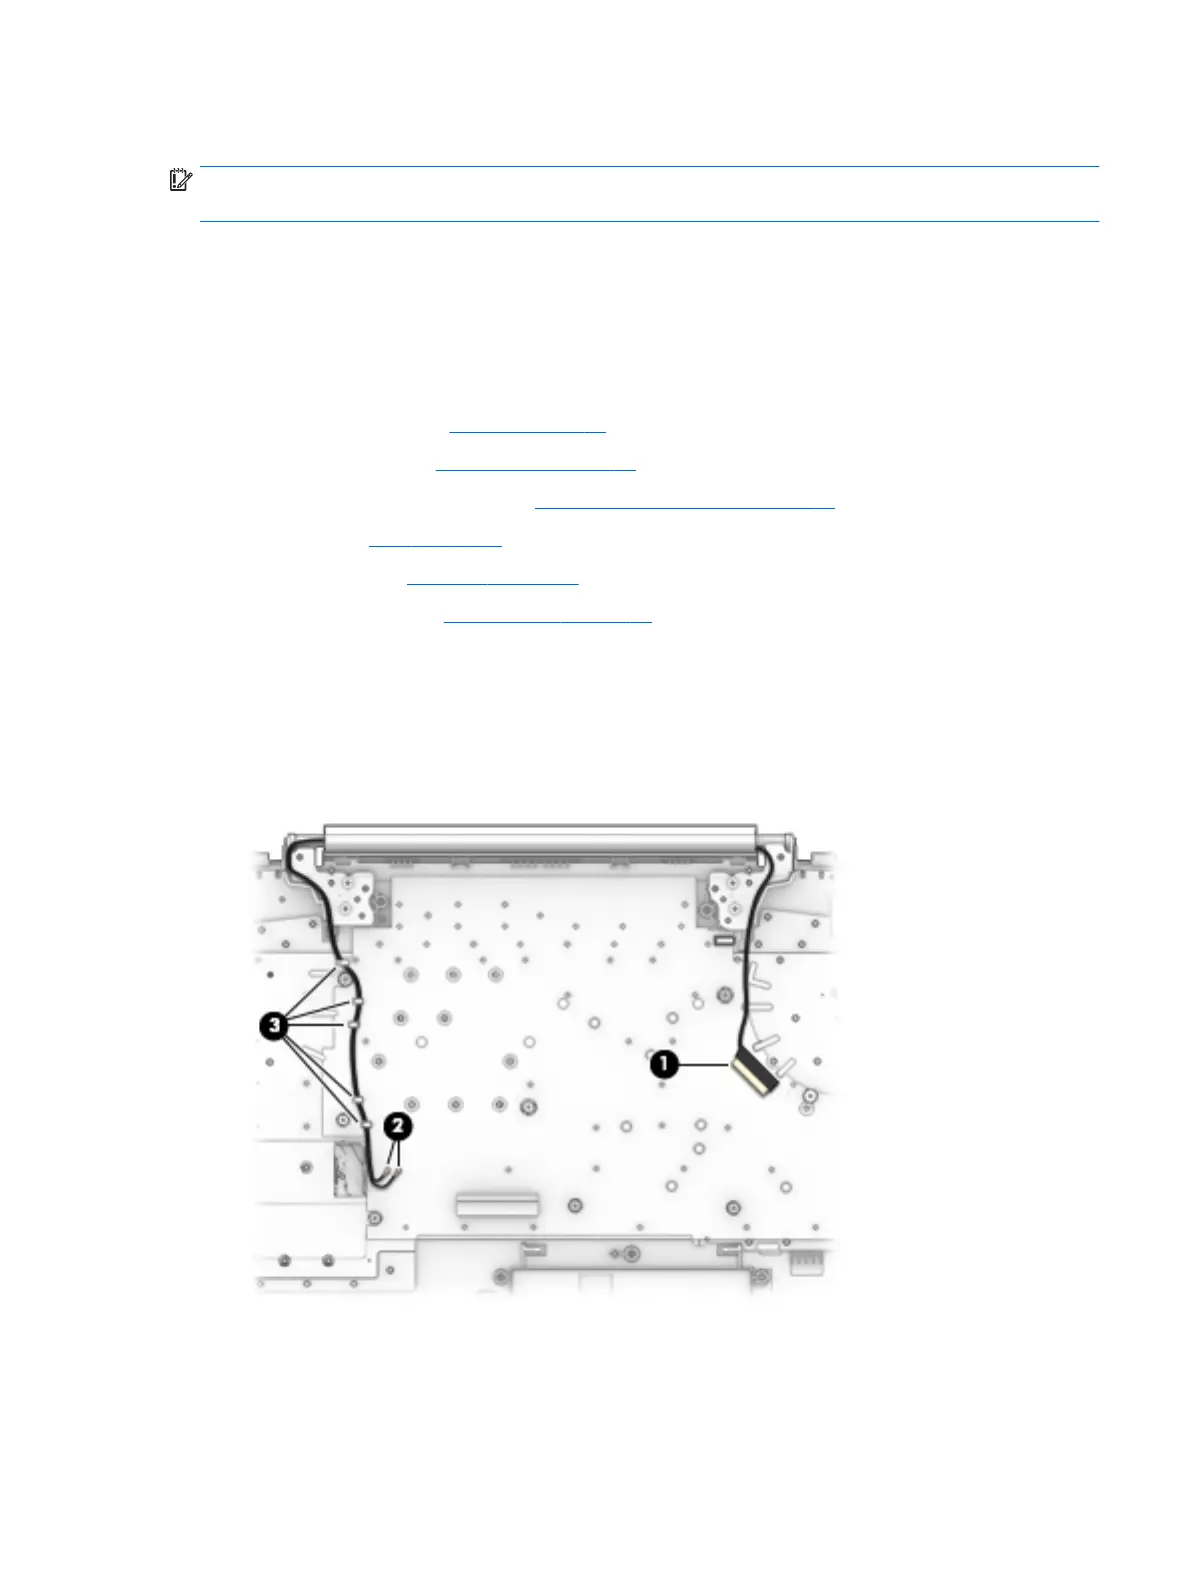
1. Disconnect the display panel cable from the system board (1).
2. Disconnect the WLAN antenna cable from the system board (2).
3. Release the WLAN antenna cable from the clips securing it to the computer (3).
4. Open the computer with the bottom facing up (1).
5. Remove the four Phillips PM2.5×5.7 screws (2) securing the display assembly to the computer.
Component replacement procedures 65

 Loading...