2-5
Installing the Switch
Installation Procedure
Installing the Switch
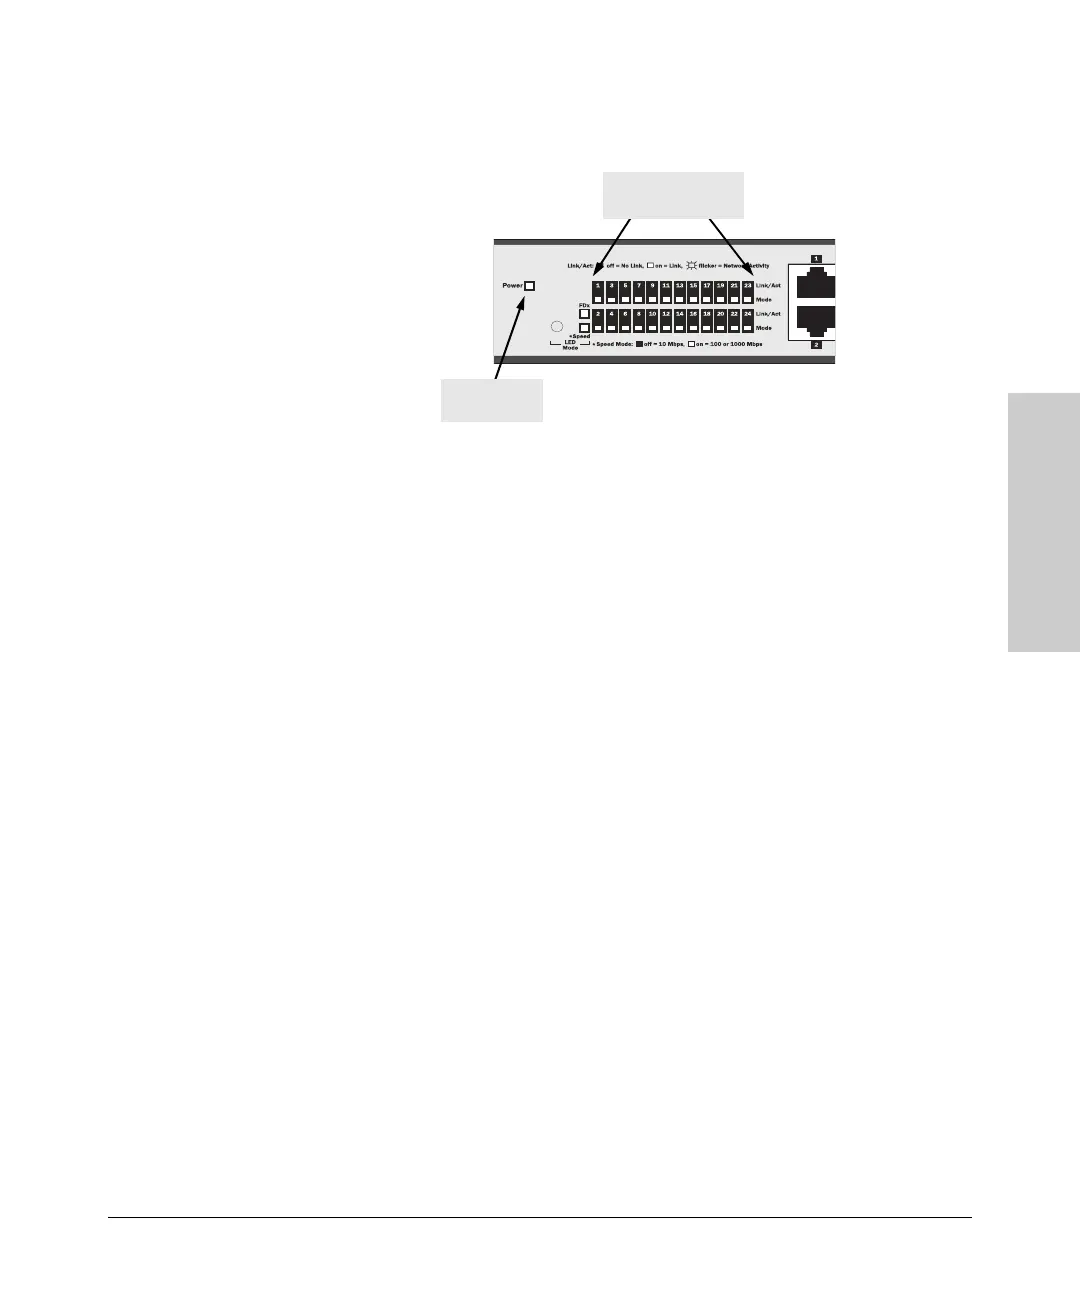
2. Check the LEDs on the switch as described below.
When the switch is powered on, it performs its diagnostic self test. The
self test takes approximately 15 seconds to complete.
Self Test LED Behavior:
During the self test:
•The Power LED will go on, followed by all LEDs turning on for 4
seconds, and finally the Port LEDs will turn on and off in a sequence
from port 1 to 24.
When the self test completes successfully:
•The Power LED remains on.
•The Speed LED remains on indicating the default LED mode.
• The port LEDs on the front of the switch go into their normal opera-
tional mode:
– If the ports are connected to active network devices, the Link
LEDs stay on and the Mode LEDs behave according to the mode
selected.
– If the ports are not connected to active network devices, the Link
and Mode LEDs will stay off.
If the LED display is different than what is described above the self test
has not completed correctly. Refer to “Troubleshooting” for diagnostic
help.
Power LED
Port Link/Act and
Mode LED

 Loading...


