2-3
Installing the Switch
Installation Procedure
1. Prepare the Installation Site
Be sure to follow the guidelines below to ensure proper operation when
installing the switch into a network:
■ Ethernet cable type: Unshielded twisted pair (UTP) or shielded twisted
pair (STP) cables with RJ-45 connectors, maximum length 100 meters
(328 ft); Category 3 or better for 10Base-T, Category 5 or better for
100Base-TX, and Category 5, 5e, or 6 for 1000Base-T.
■ Protect the switch from radio frequency interference emissions.
■ Use electrical surge suppression.
■ Use safe connections with no damaged cables, connectors or shields.
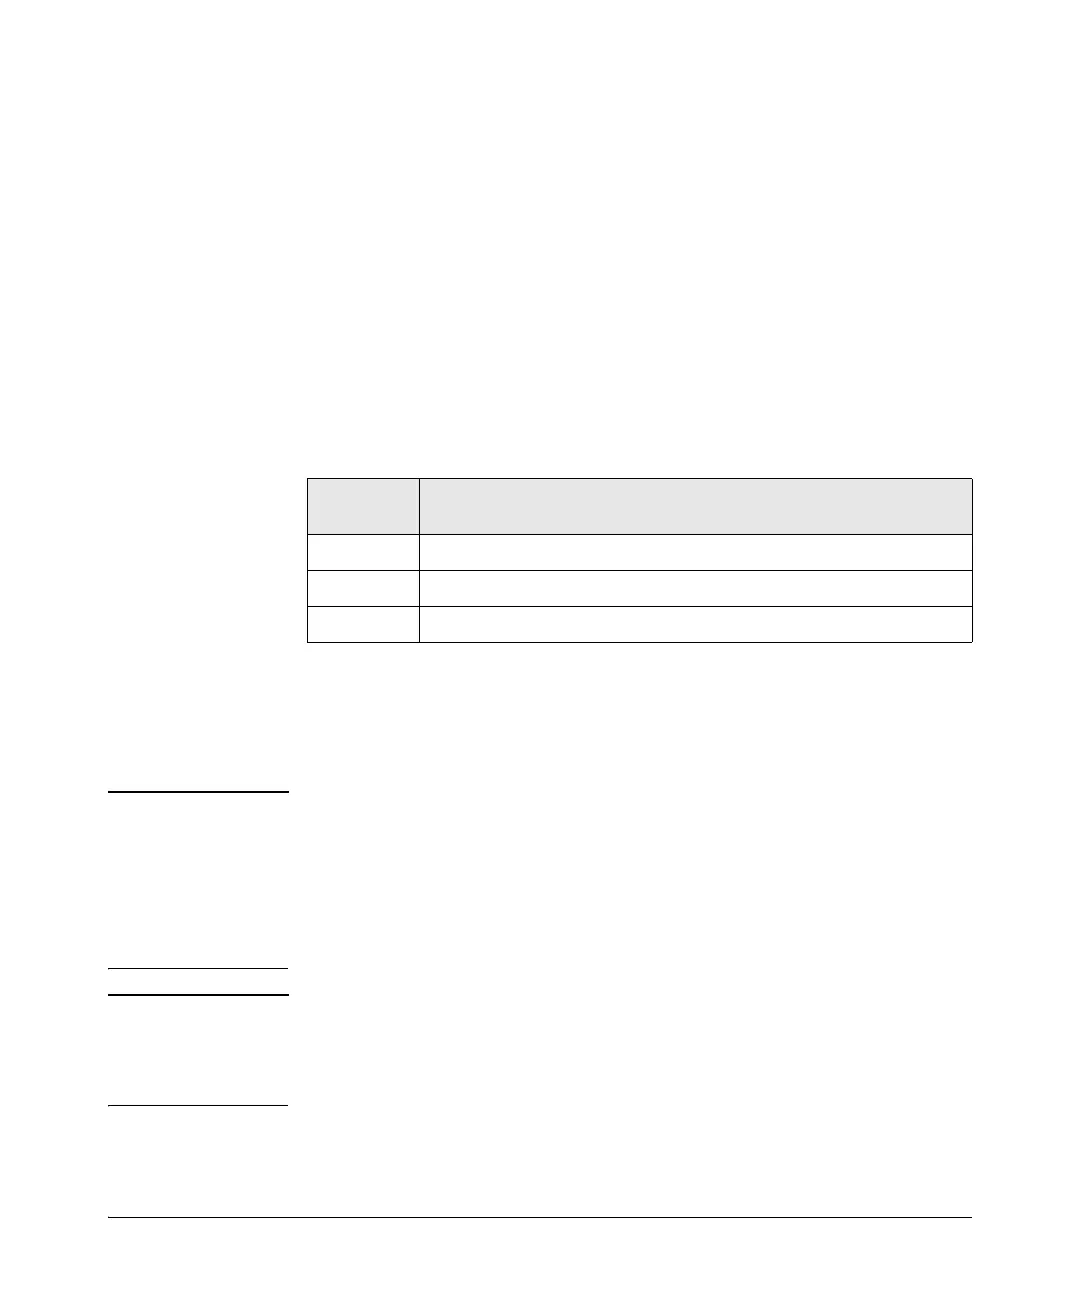
Installation Space Requirements
2. Verify the Switch Passes Self Test
Before mounting the switch, verify it is working properly by plugging it into a
power source and confirming that it passes self test.
Note The switch does not have a power switch. It is powered on by a PoE PD
connection to Port 1, or when the AC power adapter is connected to the switch
and to a power source. For safety, the power outlet should be located near the
switch installation.
The AC power adapter automatically adjusts to any voltage between 100-240
volts and either 50 or 60 Hz. No voltage range settings are required.
Caution Use only the AC power adapter and power cord (if applicable), supplied with
the switch. Use of other adapters or power cords, including those that came
with other ProCurve Networking products, may result in damage to the
equipment.
Switch
Orientation
Clearance Requirements
Front At least 7.6 cm (3 inches) of space for the twisted-pair cabling.
Back At least 2.6 cm (1 inch) of space for the power cord.
Sides At least 7.6 cm (3 inches) for cooling.
 Loading...


