3-2
Configuring the Switch
Recommended Minimal Configuration
Configuring the Switch
Using the Console Setup Screen
The quickest and easiest way to minimally configure the switch for
management and password protection in your network is to use a direct
console connection to the switch, start a console session, and access the
Switch Setup screen.
1. Using the method described in the preceding section, connect a terminal
device to the switch and display the switch console command line
interface (CLI) prompt (the default display).
The CLI prompt appears, for example:
ProCurve#
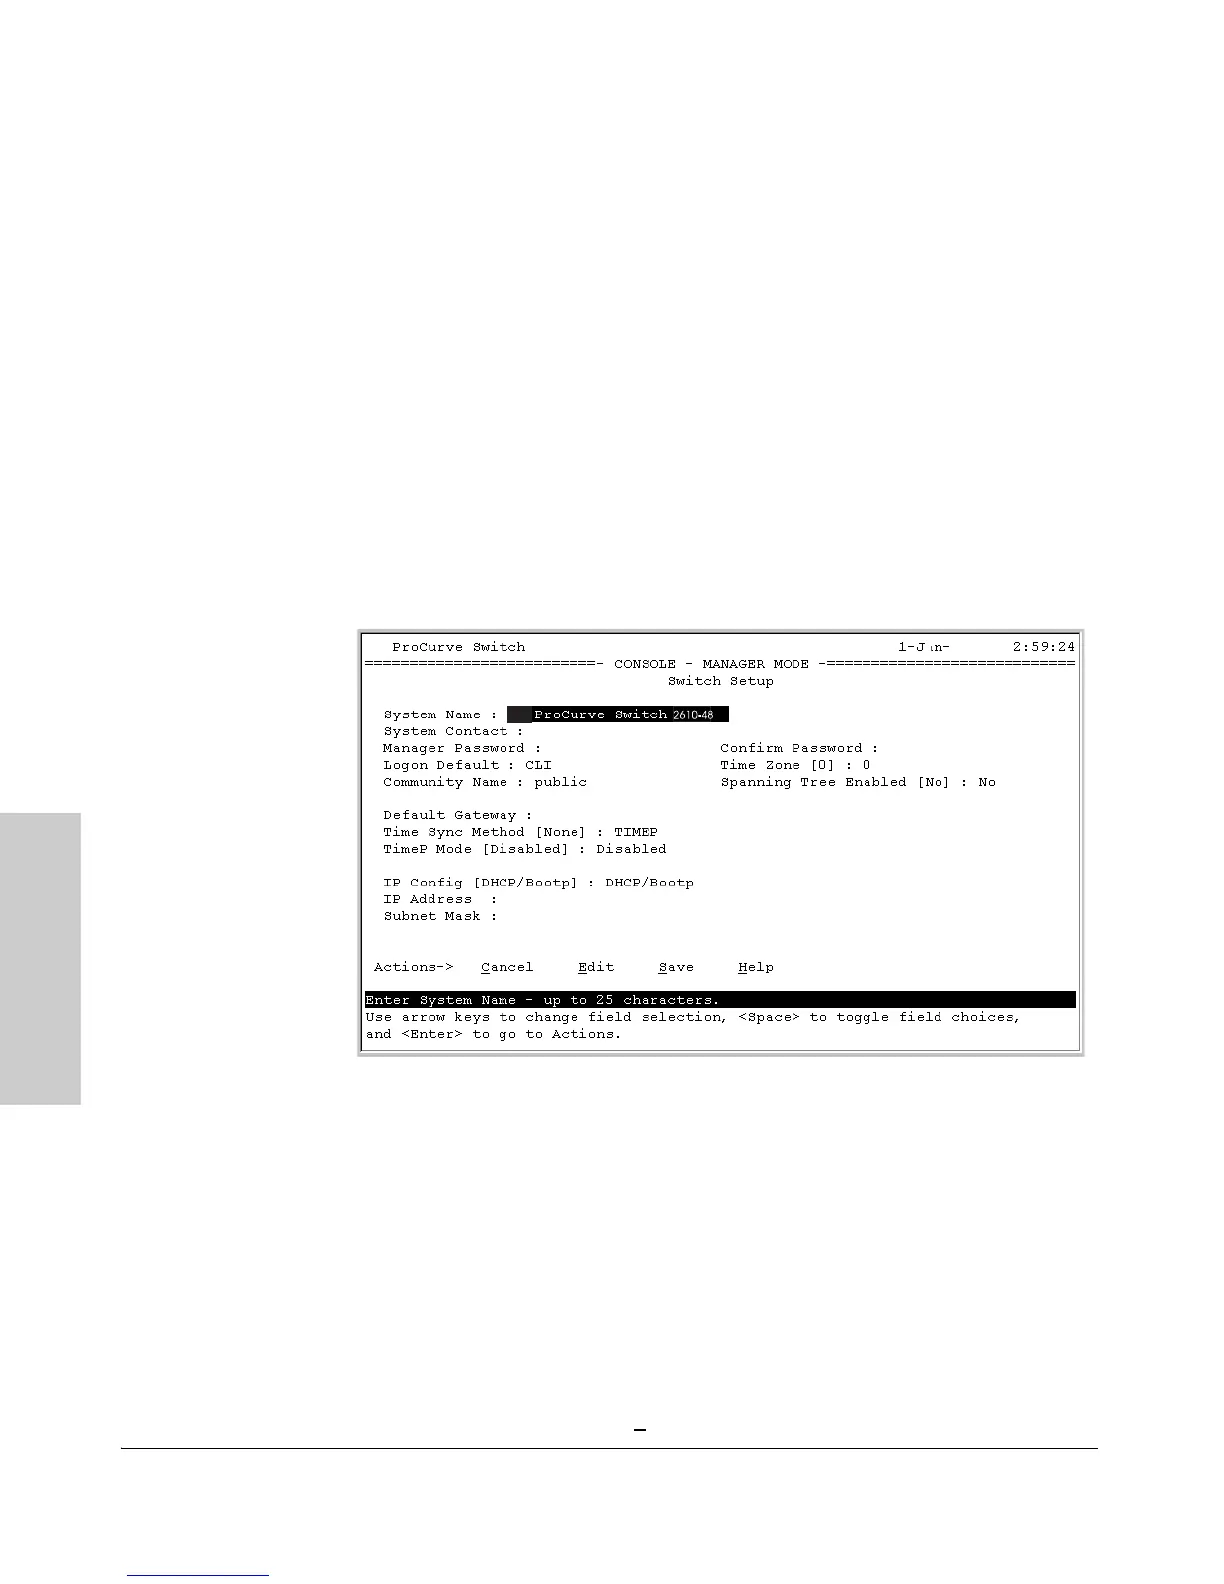
2. At the prompt, enter the setup command to display the Switch Setup
screen. The following illustration shows the Setup screen with the default
settings.
Figure 3-1. Example console setup screen
3. Use the
[Tab] key to select the Manager Password field and enter a manager
password of up to 16 printable ASCII characters.
4.
[Tab] to the IP Config (DHCP/Bootp) field and use the Space bar to select the
Manual option.
5.
[Tab] to the IP Address field and enter the IP address that is compatible with
your network.
6.
[Tab] to the Subnet Mask field and enter the subnet mask used for your
network.
7. Press [
Enter], then [S] (for Save).
2007
2610-48
u
 Loading...