2-19
Installing the Switch
Installation Procedures
Installing the Switch
For mini-GBICs ports, and in general
for all the switch ports, when a network
cable from an active network device is
connected to the port, the port LED for
that port should go on. If the port LED
does not go on when the network cable
is connected to the port, see “Diag-
nosing with the LEDs” on page 5-4 in
chapter 5, “Troubleshooting”.
8. (Optional) Connect a
Console to the Switch
The switch has a full-featured, easy to
use console interface for performing
switch management tasks including the following:
■ monitor switch and port status and observe network activity statistics
■ modify the switch’s configuration to optimize switch performance,
enhance network traffic control, and improve network security
■ read the event log and access diagnostic tools to help in troubleshooting
■ download new software to the switch
■ add passwords to control access to the switch from the console, web
browser interface, and network management stations
The console can be accessed through these methods:
■ Out-of-band: The switch comes with a cable for connecting a PC or VT-
100 terminal, to be used as a console, directly to the switch. You can use
the console port only for out-of-band management. It cannot be used for
a Telnet connection.
■ In-Band: Manage the switch using Telnet from a PC or UNIX workstation
on the network, and a VT-100 terminal emulator. This method requires that
you first configure the switch with an IP address and subnet mask by using
either out-of-band console access or through DHCP/Bootp. For more
information on IP addressing and on starting a Telnet session, see
chapter 3, “Getting Started With Switch Configuration”, and the Manage-
ment and Configuration Guide, which is on the ProCurve Web site at
www.procurve.com/manuals.
The Switch can simultaneously support one out-of-band console session
through the Console Port and one in-band Telnet console session.
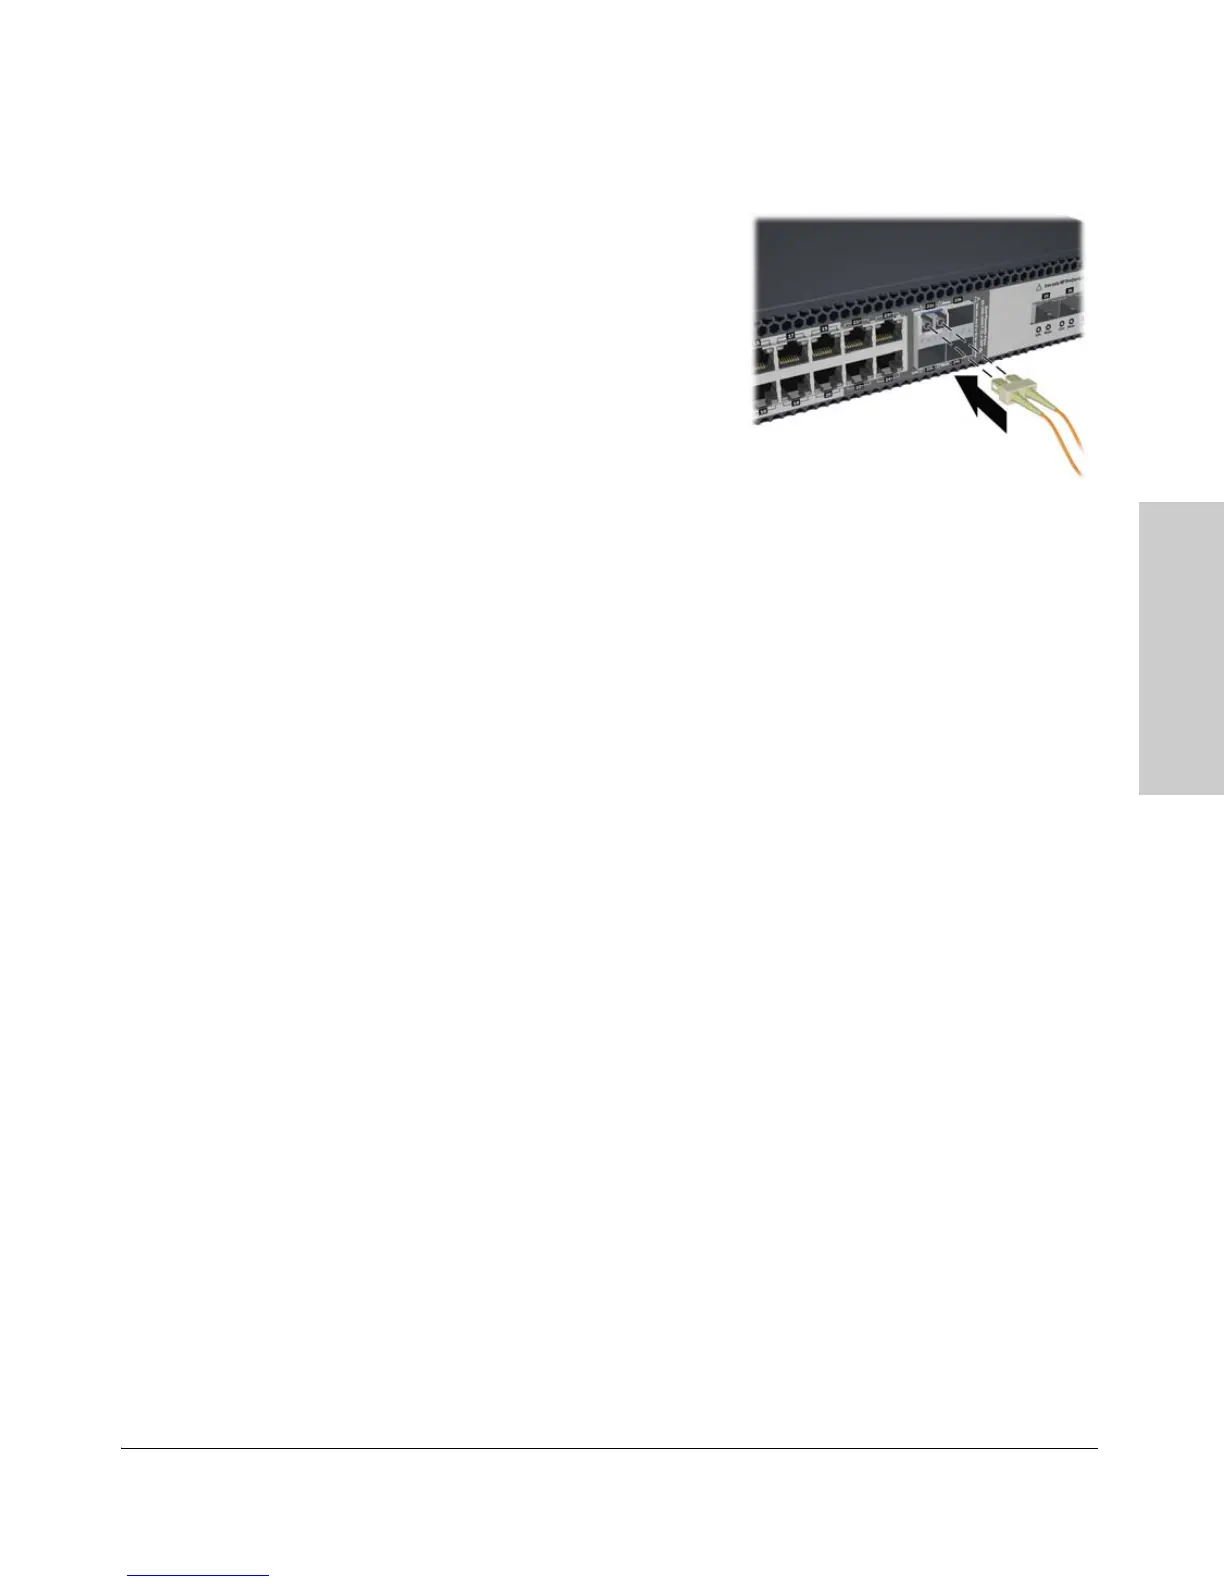
Figure 2-14. Connecting a Fiber cable
connector

 Loading...